

Brewing Nordic Farmhouse Raw Ale, Part 2
For raw ales, as with any beer, the sky is pretty much the limit when it comes to flavoring ingredients, but there are some that are more common traditionally than others.

Raw ale ingredients and yeast
(Note: I will be making minor updates to this blog over time to address any errors or inconsistencies as I learn more and discuss the subject with experts such as Lars Marius Garshol and Mika Laitinen. Minor updates I won’t note, but I will include addendums for areas I feel need extra clarification. Each time I do this, I will update the “version” following this note.) - v 2.1
For raw ales, as with any beer, the sky is pretty much the limit when it comes to flavoring ingredients, but there are some that are more common traditionally than others. Also, the malt and yeast tend to play a large role in the flavor of these ales, so you may want to minimize the use of other ingredients while you get a feel for the interplay of these elements. The main thing that you’ll want to keep in mind is that, since there is no boil, you’ll have to find other ways to incorporate the flavors of herbs, hops and spices. Traditionally, if hops are used at all in farmhouse raw ales, they aren’t necessarily used as an intentional flavoring component; however, the use of hops and reason for using them can vary quite a bit by region.
To hop or not to hop?
The main reason for the use of hops historically seems to have been for their preservative effects and, to a lesser degree, for bittering. I’ve made plenty of raw ales without hops that never went sour and have heard others report the same. If you’re going to use them for their preservative and bittering effects, use low alpha whole hops (aged hops will work too) to ensure they have minimal effect on the flavor. Since you won’t be boiling the wort, there are a couple of alternative methods for introducing hops. Some farmhouse brewers simply make a hop tea by boiling hops in a small amount of water for about an hour, and then adding the hops (preferably in a cloth bag) and water to the wort. You can also simply add the whole hops to the wort in a bag, or run the wort through a bag of hops during lautering.
As Finnish beer writer and sahti expert Mika Laitinen explained to me in an email:
In sahti hops are rare (some brewers don't use any hops and some use so little that the ale is practically unhopped). As far as I know all Norwegian raw ales are hopped, but usually very mildly. Hop tea may not be so typical but running the wort through hops is. In Norway, running the wort through a bed of hops is a traditional method. This tradition probably doesn't extend back to the Viking Age but it may extend back to the late Middle Ages when the triumph of hopped beer began. All Lithuanian raw ales are hopped.
Laitinen added that he prefers the hop tea method: “In Viking Age Brew I advised to sieve the hop tea into wort but nowadays I use this method: boil the hops in water (around one quart for an ounce of hops) for one hour and dump the tea into the mash. This is simpler and works better with hop pellets.”
(Note for v. 2.0 of this blog — As I reference further on in regard to the use of herbs in historical brewing, there has been much written that has begun to be refuted regarding the historical use of herbs in brewing. The same goes for the use of hops, i.e., in that they weren’t used much historically before around the 1500s. This is true in England, but since most sources that discuss this are very Anglo-Centric, this isn’t necessarily the case for the rest of the world. As I begin to learn more from non-English sources and archeological research, I will write more on the subject.)
Brewing with juniper

In Finland and Norway in particular, juniper (Juniperus communis) serves in roles usually reserved for hops. One reason juniper is used often in Northern European farmhouse brewing is its prolificness (and that it’s the only type of juniper that grows in ). Juniper trees grow practically everywhere; hops plants, not so much. Also, juniper possesses antibacterial properties, although perhaps not as much so as hops. Some farmhouse brewers use a juniper infusion to clean their brewing equipment in preparation for brew day, and even use it as mash and strike water. Keep in mind that they are primarily using wood fermentation equipment; it is likely that the resin created by boiling juniper branches coats the surface, minimizing the chance for bacteria to gather in imperfections in the wood. Although Mika Laitinen notes in Viking Age Brew that many sahti brewers in Finland even sterilize their plastic equipment with hot juniper-infused brewing water, he recommends using modern sanitizers on plastic. Personally, I haven’t tried the juniper infusion method, but have found that avoiding chemical sanitizers and simply cleaning my equipment (plastic and otherwise) with very hot water and an oxygen-based cleaner such as One Step or hydrogen peroxide has resulted in many tasty beers.
The use of juniper, particularly for brewers in North America, can be a complicated thing to discuss. In my discussions with brewers across the country, and with brewers from Finland and Norway, or have traveled to one of these countries from the US, I’ve learned that the North American versions of juniper taste significantly different than their Northern European counterparts. When Mika Laitinen visited the US with me for a joint book tour, where we brewed a batch of sahti with Paul Arney of The Ale Apothecary, Laitinen and Arney decided to go with Oregon Fir rather than juniper, as Arney felt the juniper in the deserts of Oregon wasn’t any good for brewing. Arney is known for his philosophy of brewing with only ingredients he can source from the land around his brewery (and also has had first-hand experience with J. communis from a visit to Norway for the Norsk Kornølfestival), so I can safely say that his opinion is well worth considering. Mika noted that the berries he sampled in Oregon tasted nothing like Finnish juniper, which he says is difficult to describe, but is “very refreshing and needle-like but not resiny like pine or spruce.”

Paul Arney and Mika Laitinen cut down a small Oregon Fir tree outside of The Ale Apothecary brewery while Seth Klann of Mecca Grade Estate Malt looks on.
Personally, I have brewed raw and boiled ales with various edible North American varieties of juniper. I have yet to come across J. communis unfortunately. In my area (central-eastern Kentucky), and in much of the eastern US, Eastern Red Cedar (Juniperus virginiana) is very prolific. Native Americans and European settlers used the needles and berries in medicinal teas and to flavor meat. I have made raw ales with it, but the results so far have varied. Some of the early ones were drinkable enough, but the branches imparted a very sharp flavor. For others, the branches imparted only a subtle, pleasant bittering. The amounts used didn’t always seem to cause this sharp difference, so there may have been other factors. I haven’t used many of the berries, except in very small mead experiments, where they are flavorful but have a bit of a paint thinner aroma. Most of the branches I gather don’t tend to have enough berries on them to impart a noticeable effect in my raw ales.

Eastern Red Cedar (J. virginiana) Can be recognized by its tightly compacted, scale-like needles. Some trees will have “berries” (actually tiny pine cones) while others will have none.
Over time I have found that the more recent ales I have used J. virginiana in have been enjoyable and well worth repeating. I think this may be a result of trial and error and fine-tuning my process over time. In your own experiments, I wouldn’t say not to use J. virginiana, but I recommend trying out varying amounts, erring on the side of using less than more until you reach a balance that works for you. I also recommend using only the smaller branches, as larger, older branches may play a role in imparting an overly sharp flavor. Also, I suggest not using branches in the boil except maybe in the last couple of minutes if making a boiled-wort beer. I can almost say for certainty that this can result in sharp, unpleasant flavors. This is an area I’m continually researching and experimenting with, so I’ll update this blog as I learn more. I can say that I’ve brewed raw ales with a couple of smaller branches in the mash (not in the wort) recently that were quite refreshing and flavorful. This is the method I recommend at this point.

Eastern Red Cedar can either be mixed directly into the mash or laid at the bottom of your mash tun as a filter. This picture is an example of using way too much in an early brew, which was likely the cause of an overly sharp, pungent flavor. Use just a couple of small branches for a subtle flavor and increase carefully from there if you desire.
In the final entry in this series, I will provide some recipes for recreating my more successful raw ales. It is difficult to provide amounts, as there are factors such as location, age of the branches, and the season you gather them that may affect the final flavor. For a standard 5-gallon batch, I would say to use branches with the smallest circumference and to use no more than 2-3 branches of around 1-2 feet in length and 6-12 inches in width. You can also just use juniper berries if you have them. I wouldn’t use more than a cup or two per 5-gallon batch, but you’ll have to experiment with this, as some people enjoy the flavor of juniper more than others (just ask any gin drinker…).
When in the mountainous deserts of Durango, Colorado—where I travel every year (pre- and hopefully post-quarantine) for an annual herbalism festival put on by Plant Healer Magazine—I usually try to bring home some Rocky Mountain Juniper / Western Juniper (Juniperus scopulorum) and Prairie Sage (Artemisia ludoviciana) for brewing Colorado raw ales and meads. These are both highly aromatic plants and Prairie Sage (related to Mugwort / Artemisia vulgaris and Wormwood / Artemisia absinthium) can be quite bitter, so I use them sparingly. I enjoy raw ales made with Rocky Mountain Juniper more than those with Eastern Red Cedar, although it’s still not an ideal substitute for European juniper. My recommendation if you live in the US is to experiment with cedar, spruce, and fir and decide what works best for you. This is farmhouse brewing after all, so you should go with whatever is local to your brewery, and whatever works best for you.

Rocky Mountain Juniper / Western Juniper (Juniperus scopulorum) overlooking Durango, Colorado.
** Important ** These are the only species of juniper that I’ve researched and experimented with extensively. There are other species of edible juniper but please do your research, as some can be toxic. Also, take care where you forage (avoid busy roadsides for instance), and only take small amounts from a single tree. You don’t want to harm the tree or yourself. Ornamental junipers (Juniperus sabina and Juniperus oxycedrus) are known to be toxic, as is yew (Taxus baccata), which is not a species of juniper but can be confused with edible conifers.
Other herbs

Prairie Sage (Artemisia ludoviciana) is common in the mountainous deserts of the Southwestern US.
There are a number of different herbs that can be used in brewing. I’m not going to cover them all here (my books and Mika and Lars books all go into detail on several of them). A classic in the genre of herbal brewing is Sacred and Herbal Healing Beers by Stephen Harrod Buhner. I must put in a disclaimer here, though. I have brewed extensively from this book, and have made many tasty herbal brews. I, along with other beer writers, have been guilty of writing about the historical usage of herbs in ales using information from perhaps dubious sources (see my note on this below). I have researched books, historical sources, and archeology papers, and herbs are often referenced in regard to historical brewing. However, some more intrepid researchers have recently begun refuting the claims of the use of herbs in brewing simply because they were able to go back to original sources (many of them not in English) that show little to no evidence of herbs in brewing. Some of the most commonly discussed, particularly in regard to gruit ales, are Bog Myrtle (Myrica gale), Yarrow (Achillea millefolium), Sage (Salvia officinalis), Rosemary (Salvia rosmarinus) and Ground Ivy (Glechoma hederacea).
I feel it is my obligation to take care to not reference these herbs as being used specifically in herbal brewing until I am able to delve more into these sources myself. However, I still hold that, at least in more modern history, herbs are great to brew with and many have done so with success. Hence, I will keep brewing with them and sharing recipes when I can. Just keep in mind that you can also make a tasty raw ale with nothing more than malt, water and yeast. Herbs can be fun to play around with for a bit of extra character, but keep their influence minimal if you really want to get the full effect of a malty raw ale.
(Note for v. 2.0 of this blog — it has come to my attention that this is a contentious subject with beer historians. The use of these herbs for brewing has been mentioned in several books and journal articles, but as Lars Marius Garshol noted in an email, he is dubious about these claims, as he has yet to find direct evidence in historical or archeological sources.)
Brewing with kveik (Norwegian farmhouse yeast) and bread yeast
I primarily use kveik and bread yeast in my raw ales, as these are what have been used traditionally. Bread yeast can potentially cause some funky off flavors, as it tends to have bacteria not present in modern “clean” yeasts. In my mind this is simply part of the deal. Most times it produces pleasant, if not a bit odd, flavors for me. Rarely have I brewed something with bread yeast that I find completely undrinkable. Obtain Finnish bread yeast for sahti if you’re able (I haven’t), or just use good quality store-bought bread yeast. Some folks have had luck using sourdough yeast, including this brewery that has even produced a book on brewing beer with sourdough yeast. I tend to prefer kveik, but bread yeast has produced some plenty drinkable raw ales for me.
I’ll talk a bit about my personal experiences using kveik, but I’ll point you to Lars Marius Garshol’s blog and book (see my review here) if you really want to geek out about it.
Kveik is its own completely separate category of yeast. Every culture behaves differently, and some cultures have additional bacteria. Generally, kveik you order from a homebrew supplier will be “cleaned” of all additional bacteria so only the Saccharomyces cerevisiae (brewing / baking yeast) remains. If you obtain kveik that has come straight from the original farmhouse brewer or has been passed along by another homebrewer, there is a chance it will have additional bacteria present (according to Garshol, the chance is about 50/50). This isn’t necessarily a bad thing. In fact, I prefer to brew with the original farmhouse cultures if I can. The kveik cultures I have used thus far are Voss, Stalljen, Geiranger and Lutra. There are many more, and a detailed rundown of all kveik cultures known so far (and their individual qualities) can be found in this database that Lars Marius Garshol updates as often as he is able.
There are also various forums on the internet where people talk about their experiences with kveik and share cultures. I’m very much an experimental, non-technical brewer and therefore can’t speak to the technicalities of brewing with the various cultures as well as some can. I recommend Milk the Funk’s Kveik Wiki and the Facebook group Brewing with Kveik as a starting point if you really want to delve in. I can tell you that for the most part, my experiences in tasting raw ales made with kveik match those noted by others whose experiences I’ve read of. Voss produces tropical flavors, with hints of pineapple, mango, and orange peel. When Mika Laitinen sent me Stalljen and Geiranger, he noted in an email that Stalljen produces a strong citrus flavor and is ideal for “blonde and refreshing beers.” Geiranger, he said, is ideal for malty beers, as it doesn’t produce fruitiness, but imparts a “nice candy flavor which enhances maltiness.” I followed his notes and the results were very close to what he noted. It’s tough for me to pick a favorite. At first, I preferred Stalljen when I split a batch between the two, but Geiranger has produced several very tasty brews for me.
I’m looking forward to working with some Voss Mika recently mailed to me from Finland that he has been saving and reusing in his home brewery. It was propagated from the original culture (which contained many strains) procured by Lars Marius Garshol in 2014, and therefore isn’t the “pure” culture available in homebrew stores. Mika has also written a comprehensive set of blogs answering many of the questions he has received about kveik over the years. I encourage you to check it out, as it’s much more in-depth than my brief overview. This one in particular goes into the most detail on how to use kveik: Practical Guide to Kveik and Other Farmhouse Yeast: Fermentation.

Some dried kveik from Sigmund Gjernes’ brewery in Voss, Norway.
As for Lutra, Omega Yeast notes on their website:
Isolated from our Hornindal Kveik (OYL-091) culture, Lutra is shockingly clean with unrivaled speed when pitched at 90°F (32°C). The strain is perfect for brewing a refreshing pseudo-lager without the lead time of a lager. Lutra is your worry-free way to navigate the evolving demand for cold ones.
I have been very pleased with my Lutra brews so far. I don’t know how lager-like I would call them, but they have turned out light and refreshing with hints of fruitiness, a pleasant malt flavor and a smooth, silky mouthfeel.
Using kveik in raw ale
Since there are so many different strains of kveik, and I’ve only worked with a few, I’m not able to provide specifics on how to work with each strain. I’d recommend the above-mentioned database as the best source for that. I can, though, provide you a general overview, which I have also done in this article. One of the greatest assets of kveik is that it is generally very forgiving if used within a fairly broad range of parameters.
The main areas where kveik differs from most other yeasts is that it
a) works best when underpitched,
b) prefers high temperatures, and
c) loves high-gravity worts.
It also produces all manner of unexpected flavors, from fruity, citrusy, tropical flavors, to mushroom earthiness, to candy-like flavors. For pitching, Lars Marius Garshol recommends about 1 teaspoon of slurry per 25 liters (6.6 gallons) of well-aerated wort. I mostly use dried kveik, around a teaspoon or two per five gallons (20 liters) sprinkled over fresh, hot wort (to be honest, I usually just take a small fingerful and sprinkle it over the wort without measuring). Kveik (depending on the strain) works best at temperatures ranging from 68° F (20° C) to 104° F (40° C), most preferring the higher ends of the spectrum. I’ll admit that I have no way to control fermentation temperature other than keeping my fermenter next to a heater vent wrapped in a sleeping bag in the winter, or on the back porch on during summer heat. I usually try to pitch at the higher end since I know the temperature will likely drop below what I’d prefer to keep it at.
Most people say that kveik begins fermenting very quickly, although I’ve found that most of mine tends to take off somewhere around 8-12 hours (perhaps sooner since I usually leave it overnight before checking). This is perhaps because of my lack of temperature control. I have learned that I may also possibly be overpitching, or not starting with “healthy” yeast by creating a starter early enough in advance. I will keep working on that. Regardless, though, once it does take off, it tends to ferment very quickly. Within 12 hours my wort has already dropped a couple of gravity points and is starting to taste like a flavorful, malty ale (this is also when I scoop the krausen off to dry and save). Within 24 hours I’m usually scooping some into my haarikka or drinking horn and enjoying a pint or two. In about a week I usually rack into a bottling vessel and just decant from the spigot until I decide I’m ready to bottle in a few days. For some batches, I never bottle, or only put in a couple of bottles for aging. Fresh, raw ale brewed with kveik is some of the best beer I’ve ever had, although the bottles I’ve aged for a few weeks to a few months are flavorful in their own way. Most of my kveik raw ales are from high-gravity worts, ending at anywhere from 6-10 percent ABV. I have had a couple that have finished at a little less than 6 percent, but I haven’t noticed any loss in quality.
(v. 2.1 update — I admit that I may have overestimated the time it takes for my kveik to ferment. It’s more like overnight (maybe 6-8 hours or so), although some seem to take several hours into the next day. Lately, though, my kveik brews have been fermenting much quicker. I’ve finally managed to brew with the Voss kveik Mika Laitinen provided me that I reference above. I pitched about half of the 3-gram packet Mika provided in about a cup of wort starter I gathered earlier in the brew day. and added this to the wort once it dropped to between 90-100 Fahrenheit, and it was showing activity in just a couple hours. Within a couple of days it had dropped several gravity points and was already quite tasty. A success I would say!)

Some kveik that I dried on a piece of wax parchment paper.
Kveik can also be used to ferment mead and cider, but some extra care has to be taken. I haven’t used it in cider; honestly, I make very little cider, so I can’t speak to that. Also, since there are so many strains of kveik, and each has its own little quirks, each strain may behave differently in meads and ciders. That said, I have come across people on social media who have successfully used kveik in mead and cider. Personally, I’ve made a couple of session meads with kveik and was very pleased with the results. I aim to continue experimenting more. Since kveik is used to having loads of nutrients due to its intimate relationship with high-gravity ales, it likely has no need to produce its own nutrients. For this reason, it’s a good idea to add nutrients, particularly if making low-gravity session meads or ciders.
As with ale wort, keep mead and cider must at 90° F (32° C) to 100° F (38° C), from pitching through, if possible, at least the first 24-48 hours of fermentation (longer if you have a way to keep a consistently controlled temperature). Even with the addition of nutrients, my mead experiments thus far have taken several weeks to fully ferment and attenuate. So, much shorter than most high-ABV meads and a bit longer than most session meads. This isn’t to say that yours won’t ferment quicker. I’m still pretty early in my experiments with kveik mead and hope to write about that more in the future.
Although I would love to share my kveik with others, at the moment I am not ready to. As of the writing of this blog, I am on my fourth generation of Stalljen and Geiranger, which I have been drying on parchment paper set on a baking pan on low heat (see here for how to do this) in my oven. I have no idea what kind of bacteria I’m imparting and can’t guarantee that any I share will be the same quality as the original. That, and I still want to experiment with what I have. Hopefully I’ll have some to share in the future but for now, there are plenty of people sharing them online, and several homebrew suppliers sell various pure strains.
(Important addendum — I somehow missed one of the most important steps when working with kveik: the gjærkauk (yeast scream)! It’s pretty simple: when pitching the kveik, scream as loudly as you can to scare away evil spirits and ensure the yeast wakes up and thrives. You can just scream the loudest guttural nonsense you want, or use a Finnish yeast spell like Mika and I did with Paul Arney of The Ale Apothecary at about the 3 minute mark in this video. Skal!)
Sources & Resources
I have read through so many books, journal articles, websites and forums in researching traditional and historical brewing that at this point it seems to have all coagulated in my brain into an organism with a life of its own. I guess you could say I’ve been infected by the raw ale bug. The list below is by no means comprehensive, but it should provide you with a starting point if you want to study this more in-depth or check my sources. Some I have already mentioned in this blog series, but I’ll provide them here for convenience (including shameless promotion of my own books). I should note that most of these aren’t primary sources. There are many more sources, often in other languages than English, that may or may not refute these sources. I will continue to research these sources the best I can, and encourage you to go back to primary sources when possible when researching this subject. It’s a never-ending (and often frustrating) journey, but fun all the same!
Viking Age Brew: The Craft of Brewing Sahti Farmhouse Ale
Historical Brewing Techniques: The Lost Art of Farmhouse Brewing
Brewing and Beer Traditions in Norway: the social anthropological background of the brewing industry
Sacred and Herbal Healing Beers: The Secrets of Ancient Fermentation
The Homebrewer's Almanac: A Seasonal Guide to Making Your Own Beer from Scratch
merryn.dineley.com (ancient malt and ale)
Brewing with Kveik Facebook Group
Eastern Red Cedar Berries, A Touch of Natural Flavor
Skål!

Photo taken (by me) at the Skål Beer Hall in Seattle during my 2019 Viking Brewing tour of the Pacific Northwest with Mika Laitinen (pictured left).

Brewing Nordic Farmhouse Raw Ale: Part 1
The concepts of raw ale and Nordic farmhouse yeasts first worked their way into my head when researching historical brewing for my first book Make Mead Like a Viking. I began to experiment more in-depth when I began to focus more on beer brewing for my second book Brew Beer Like a Yeti. It seemed that as I delved deeper into this fascinating subject, my yearning for knowledge just kept growing. The rabbit hole was long and deep…and very, very old.
Recreating Nordic farmhouse ales in a scrappy Kentucky farmhouse homebrewing environment
This blog has been a long time coming. The concepts of raw ale and Nordic farmhouse yeasts first worked their way into my head when researching historical brewing for my first book Make Mead Like a Viking. I began to experiment more in-depth when I began to focus more on beer brewing for my second book Brew Beer Like a Yeti. It seemed that as I delved deeper into this fascinating subject, my yearning for knowledge just kept growing. The rabbit hole was long and deep…and very, very old. Much of this information been hidden away from most of the world until recently. Two people who helped uncover the entrance to this Brewing Wonderland for me were Mika Laitinen from Finland and Lars Marius Garshol from Norway. In their respective blogs (Brewing Nordic and Larsblog) and books (Viking Age Brew and Historical Brewing Techniques), they explore farmhouse brewing traditions in Finland, Norway and The Baltics that have quietly continued in rustic corners of these countries while the rest of the developed world fully embraced modern brewing with all of its regimented precision, temperature control and extreme cleanliness.
My books, Lars and Mika’s books and blogs, and a few others can give you the context you need if you’re curious to learn more. The intent of this blog, though, is to document my personal explorations into Nordic farmhouse brewing, which began in earnest with my Pacific Northwest Viking Brewing tour with Mika in the summer of 2019, and my discussions with Lars, specifically in this article, this interview, and this book review.
(Note that I originally planned this as part of a three-part “Historical Brewing Techniques” series, but this part turned out rather long, so I’ll be splitting it into three parts; they can do that in the movies so why shouldn’t I?)
First, a bit about me

Me at the Zimmerman Óðrerir Mead Hall (no, this isn’t where I live). Photo by Dave Brown, one of the Viking Nerds and creator of Don’t Fall in the Mead Hall.
If you’re new to my work (or even if you’re not…), it bears mentioning that I have never considered myself a “professional brewer” or a “brewing expert.” What I am is a professional writer who explores the fringes of the brewing world and practices what I learn at home. I then document what I learn in books, articles, blogs and other media. If that makes me a professional, then I guess you can call me a Professional Gatherer of Arcane Brewing Knowledge. While I started out doing by-the-book homebrewing, I quickly grew weary of all the specifics and “necessities” and lost my passion for a while. What got me back into it was when I began to research historical and traditional brewing and came to the realization that brewing isn’t all that different than cooking.
There are certainly steps to be followed and things that, if done “wrong,” could make for something not very tasty or result in a pleasant surprise—but traditionally brewing was simply a part of farmhouse life along with raising crops and animals and keeping the family fed. While I don’t have anything against brewing competitions, I never brew with an intention to compete. I feel that would hold me back from exploring new things, and my life is just too chaotic to fret about whether or not I’m brewing something exactly “to style.” If I brew it and I drink it and I like what I drink, I’ve succeeded. If not, I check my notes and try again.
Although I don’t live on a farm (I did grow up on one though), I live in a very old, very cramped house, and have two young children to raise. I also do a lot of gardening, food preservation and other “modern homesteading” stuff. Hence, I don’t have the time, energy or space to practice highly regimented, excessively sanitized homebrewing. I take notes, I keep my equipment clean, and I follow (or create) recipes, but I don’t let myself get caught up in fretting over whether everything is “just right.” This blog is for those who understand this way of brewing or can at least appreciate that there are plenty of us out there who brew like this.
My goal in this series of blogs is to chronicle my explorations in brewing raw ales and working with the Nordic farmhouse yeast kveik. For more detail on these subjects, I highly recommend Lars’ and Mika’s blogs and books. I am indebted to them for their exhaustive research, but have adapted what I have learned to how I need to brew in my scrappy little home brewery. The good news is that I have had few missteps. Most of my brews have been quite good to exceptional (with a few that ranged from okay to kind of awful). I can’t say for sure in every case what made a brew turn out bad but I have some ideas, and am confident in what caused the good ones to be so damn tasty.
So, what is raw ale, and how do you brew it?
I’m going to be up front with you: you’re going to need to have some brewing knowledge and the ability and equipment to brew with malted grains (i.e., all-grain brewing). While I hope to make this interesting for beginning brewers, you’ll need to explore some introductions to all-grain brewing and prepare some equipment if you want to make these brews. There are plenty of resources on the web, and a fair share of books and magazine articles to help introduce you. Shameless plug: I can say that I provide an introduction to the subject—and instructions for building affordable equipment—in my books Brew Beer Like a Yeti and Make Mead Like a Viking. So, skipping ahead, I’ll assume you at least understand the basics of how beer is brewed so I can keep the word count down here.
Whether you’ve brewed with all-grain or have only done extract or brew-in-a-bag (BIAB) brewing, a vital part of the process is the boil. Not so with raw ales. Without going into too much into the technical details on why we do a boil in modern brewing, I’ll sum it up briefly. The primary reasons we boil are to: break down proteins for clearer beer and increased shelf life, pasteurize the wort to avoid souring, and bring out the aroma and bittering qualities of hops. Historically, boiling beer wort would have been resource-intensive, time-consuming or just plain not possible, as it requires high amounts of steady heat and large metal vessels (although hot rocks placed in wooden vessels or small cauldrons was a technique often employed historically). The mashing and lautering processes bring out all of the fermentables and flavoring characteristics you need to create a beer; albeit, a very different beer than one made by boiling the wort. As for pasteurizing, the wort gets plenty hot enough during the mashing process to take care of this. As Mika Laitinen puts it in his blog entry Sahti and Related Ancient Farmhouse Ales:
“This lack of wort boil has a tremendous effect on the beer, and is one of the major traits of Nordic-Baltic farmhouse ales. A beer from a non-boiled wort has a short shelf life, but when fresh, has an exquisite taste of malt and cereals. Due to retained proteins, it also feels nutritious, smooth, and full bodied. An ale completely devoid of boiling steps is called raw ale.”

Left: a raw ale Mika Laitinen brewed along with Paul Arney of The Ale Apothecary, myself, and Seth Klann of Mecca Grade Malt in Bend, Oregon. Here it is being displayed in a glass at the Skål Beer Hall in Seattle during a presentation Mika and I put on about Viking Age Brewing. Right: two slightly different raw ales I brewed at home with “wild” ingredients from my yard, including yarrow and wild violet (behind the glasses).
The flavor of a raw ale is a very unique thing, but is difficult to describe. This is primarily because it is tantamount to asking someone to describe the taste of beer, or to provide a general description of how meat tastes. As with boiled beers and cooked meat, there are a huge number of factors to consider; not to mention personal tastes. I have brewed multiple raw ales and tasted a few made by others. While there are some similarities in overall flavor and mouthfeel, I realize that I’ve barely hit the tip of the iceberg when it comes to all of the possibilities. Mika’s description above is a good indication of what to expect, though. Raw ales are malty, grainy and full-bodied due to the proteins present, but from there the flavor can vary wildly. The type of malt used will have a significant effect on the flavor, and raw ales made with no additives other than yeast can be quite tasty. Add in flavoring ingredients, the type of yeast used…and factors such as when you drink it, the vessel you’re drinking it from, and the circumstances in which you’re drinking it…hopefully you get the picture.
To me, raw ale is an ephemeral thing. It’s meant to be drank shortly after brewing, and each one I make is based on the individual circumstances of the brew day and my available ingredients. I’ve definitely bottled some raw ales, which hold up well for the most part, but drinking them as close as possible to when I’ve brewed them is what I prefer. Flavor characteristics of the raw ales I’ve tried vary wildly, but include: malty sweetness, herbal notes, tropical, citrus and candy flavors (primarily due to the use of kveik yeast), and a certain something that I can never quite put my finger on. Some have varying degrees of tartness and what I can best describe as a “sharp” flavor, and some have hints of bitterness (due to the use of few to no hops, bitterness in my raw ales is rarely heavily pronounced).
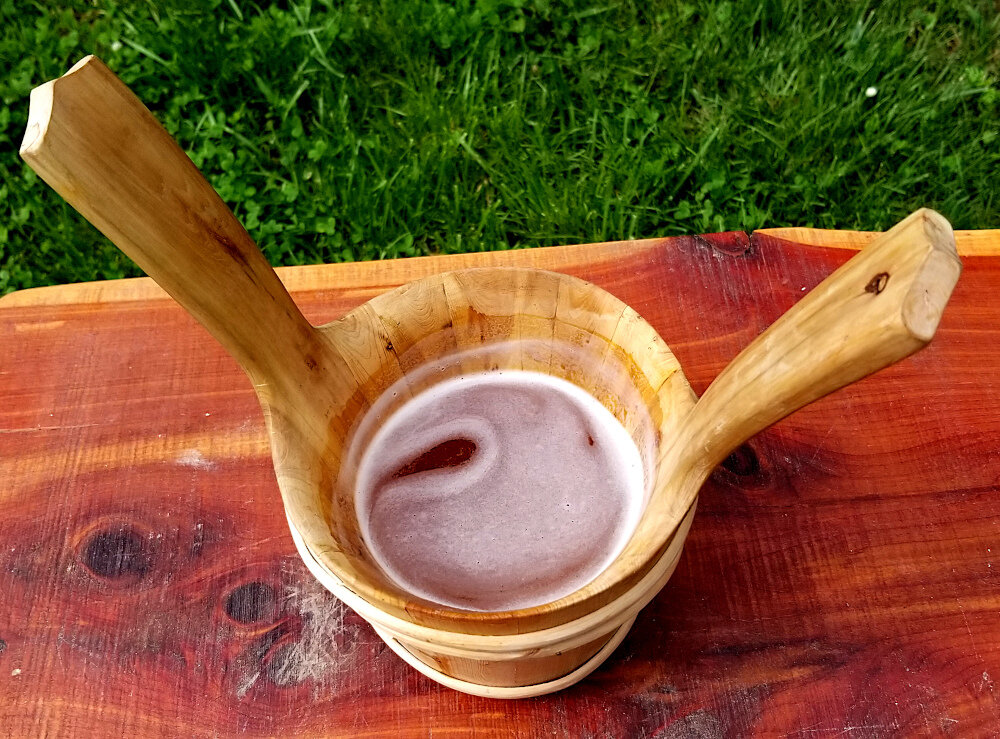
How I prefer to drink my raw ales: freshly brewed and straight from the fermenter in a traditional drinking vessel such as this haarikka (a smaller version of a shared feast-drinking vessel) from Finland. Read more about haarikkas and farmhouse feast ales here.
These flavors are all more or less evident depending on when I drink it. For instance, sweetness works its way into dryness from my first tastes a couple days after brewing to my final tastes before finishing it off or bottling it. Another factor is mouthfeel; they can be smooth, viscous and lightly carbonated initially, and almost flat when at their peak (raw ales aren’t traditionally carbonated unless drank while still fermenting). Being a farmhouse ale, I suppose I should say that there are barnyard flavors present, but for most of the best ales I’ve brewed, one thing I’ve been impressed at is how clean they taste. In short, drinking raw ale is an experience unto itself. I’m not saying every one I’ve had is absolutely delicious (although many are), but as with any fine wine, mead or beer, there’s a lot going on with every sip and every one of them has something to be appreciated.
Grains and malting
In my research into Finnish, Norwegian and Baltic raw ales, I’ve found that there are some standards as to what types of malts are used and the percentages in which they are used in the grain bill. However, what was most clear to me is that there really isn’t a “standard,” per se. In most Northern European farmhouse brewing regions, barley is the primary (and often only) malt, sometimes complemented by a small percentage (usually around 5-10%) of rye. At times, wheat and oats (both malted and unmalted) make up a small portion of the grain bill. Most modern farmhouse brewers don’t use smoked malts, but historically, smoky malts would have been very common, as a low-heat, smoky fire was the most efficient method for drying. While it’s unlikely you can emulate traditional farmhouse malt bills exactly, you can come close by using mostly Pilsner, Vienna and Munich, along with some rye, caramel or smoked specialty malts. That said, this is just a small sampling of malting options, as each region and each particular farmhouse has its own unique recipes and malting and brewing techniques.
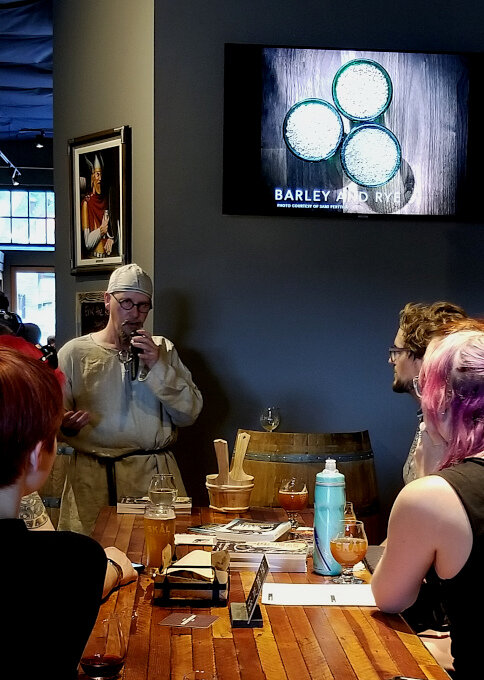
Mika Laitinen discusses typical malts used in Nordic farmhouse ales during a talk and raw ale tasting at the Skål Beer Hall.
In initially reading up on raw ales, the process sounded a bit daunting and time-consuming to me. However, in practice, I find that if I have everything ready to go by, say noon on a Sunday afternoon, most of the day can be spent relaxing or catching up on other projects, as a lot of the time is spent waiting. Otherwise it’s just time spent grinding my grains, gathering water (usually filtered from the tap), bringing the water to the appropriate temperatures, and lautering, recirculating, sparging and cooling the wort. My main focus for the day is brewing, as I want to make sure I do everything properly, but it has honestly become a pretty relaxing, meditative thing at this point.
I should note that, while the brew-in-a-bag (BIAB) method will work when making raw ales, it isn’t ideal. There is no recirculation of the wort and you can’t quite pull off the temperature changes the way you do with mashing in a tun. The resulting wort will be fermentable and very well may make a tasty beer, but the wort will be very turbid. That said, I haven’t actually tried it. If anyone reading this has given it a try, I’d be curious to know how it turned out.
I’ll go into more detail about specifics when I write up my final blog in this series, but for now, I’ll provide a basic rundown of the process. There are a lot of variables depending on exactly which kind of raw ale you’re brewing, but I mostly base my brewing process off of the sahti-brewing process described by Mika Laitinen in this blog.
Raw ale brewing process
I often brew my raw ales using the single-infusion mash method, generally brewing at around 145° F (63° C) to 150° F (70° C). To get the full flavor spectrum of a traditional raw ale such as sahti, though, you’ll want to perform a multi-step infusion mash process. This means that you’ll be increasing the temperature of the mash over stages. This is easier if you have a mash kettle that you can place over direct heat, but I emulate it well enough using my converted cooler mash tun. The following steps are for those of you who are able to heat your mash-tun. I’ll then provide some alternative options for those of us who use converted coolers for mash-tuns. (Addendum to original article: there is actually a large range of raw ale brewing styles, some of which use the multi-step infusion process and others that use single-step infusion. See the end of this blog for a bonus discussion on this.)
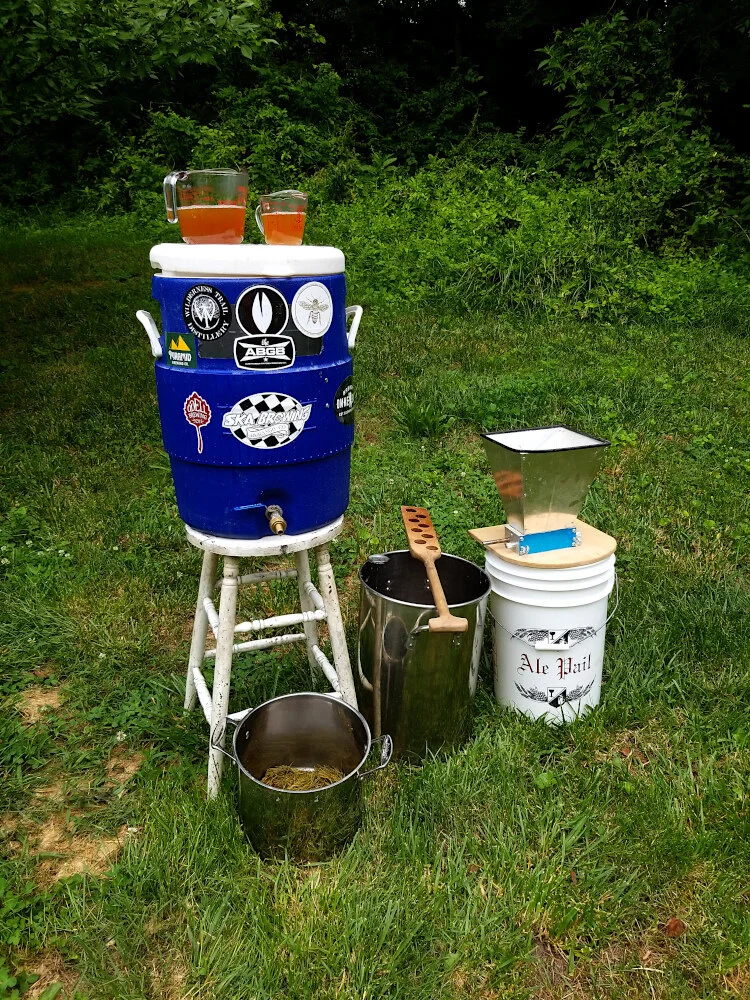
My brewing equipment. On top of my mash-tun is two samples of raw ale wort I used to start two different types of kveik yeast. On the right is my Cereal Killer Grain Mill.
Step 1: Heat your strike water (1 quart / 1 liter of water per one pound / .45 kilograms of grain) to 150° F (70° C) and blend with malted grains in your mash tun. Your goal is 140° F (60° C), but I always heat the water about 10 degrees higher, as you’ll lose some heat as the grains absorb the water.
Step 2: Let the mash rest at 140° F (60° C) for 45 minutes.
Step 3: This is a good time to add juniper, pine or fir branches to the mash. Then raise the temperature to 160° F (70° C) for 45 minutes and finally to 176–185° F (80–85° C) for the last 15 minutes.
Step 4: Lauter and recirculate until the wort runs clear. If you’re using hops and didn’t add them to the mash, you can either add them to the wort now or run the wort through them via a nylon bag tied to your mash-tun spigot. Sparge with 180° F (82° C) to 200° F (93° C) water until you’ve gathered about 5 gallons / 20 liters of wort in a brewing pot. If using an immersion chiller, add it now to sterilize the chiller.

For this raw ale, I lautered through some dried aged hops I keep to use for ales for which I want hops’ antibacterial properties, but little in the way of their flavoring or bittering potential.
Step 5: Cool the wort using a wort chiller or ice bath. Aerate the wort (by stirring and/or pouring vigorously into your fermenter) and pitch yeast at its appropriate temperature. (I’ll cover more on yeast in a future blog).
There are a couple of alternatives for folks who can’t heat their mash-tuns. Historically, hot rocks were sometimes added to bring up the temperature. You can still do that, but that’s a whole other bag of rocks that I won’t be covering here. I do cover it in one of my books though.
Option 1: Use as little initial water as you can and start with a very thick mash. Every 15-20 minutes, pour small amounts of hot water (180° F / 82° C to 200° F / 93° C) water over the mash using your preferred sparging technique to slowly raise the temperature. Do this four or five times until you reach a mash-out temperature of 176–185° F (80–85° C), then sparge until you’ve collected about 5 gallons / 20 liters of wort. This isn’t the most precise method, but it does work.
Option 2: Start with the full amount of strike water, and draw about 1 gallon / 4 liters of wort out at a time. Then heat the wort using the temperature guidelines for heated mash-tuns above and add it back to the mash. Proceed with lautering, sparging, cooling and yeast-pitching.
This is just the overall process to get you thinking. For the next blogs in this series, I’ll go into more detail on ingredients, yeast and, yes, recipes! I’m very open to any feedback from other raw ale brewers. I’d love to hear different experiences and techniques, and am open to constructive criticism. Just keep in mind that I don’t have a technical mindset when it comes to brewing. I try to keep everything basic and to the point to demystify the brewing process. I’m happy to engage in nerdy brewing discussions, but if you’re going to be a turd about it, you will be flushed.
Skål for now.
-Yeti
Bonus!
In discussing this blog and farmhouse brewing in general in an email conversation with Mika Laitinen and Lars Marius Garshol, some interesting ideas were brought up. Ever the analyst, Lars even looked into the data came up with some graphs on the spot (or perhaps he already had them from a project he was already working on). I couldn’t help but share what was discussed, so with their permission I am including slightly amended (mostly to clarify who is saying what) version of our discussion (with me being the proverbial fly on the wall) below.
Lars: The multi-step infusion mash process is traditional for sahti, and parts of eastern Norway, but in many places (western Norway, Lithuania, parts of Estonia, parts of Denmark, etc.) people did just a single-infusion mash. That is, they mashed at one temperature and that was that.
Mika: In my experience, step mashing is more useful for high gravity raw ales. It helps to extract malt sugars better when the mash is fairly thick. Single infusion works well for medium gravity raw ales (say below 7 % ABV) where more water can be used for mashing and sparging. Perhaps the variation in the traditions reflect this.
Lars: Hmmm. Yes, could be.
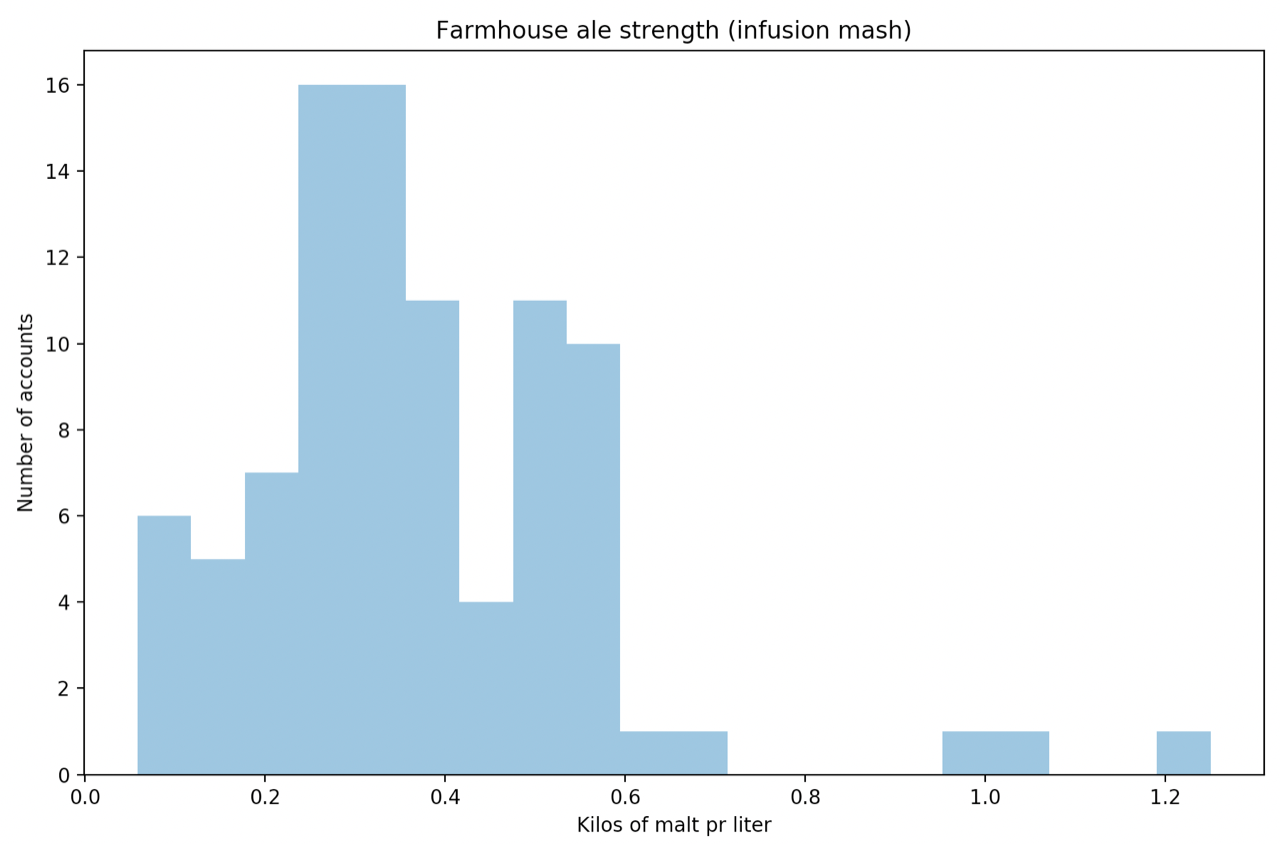
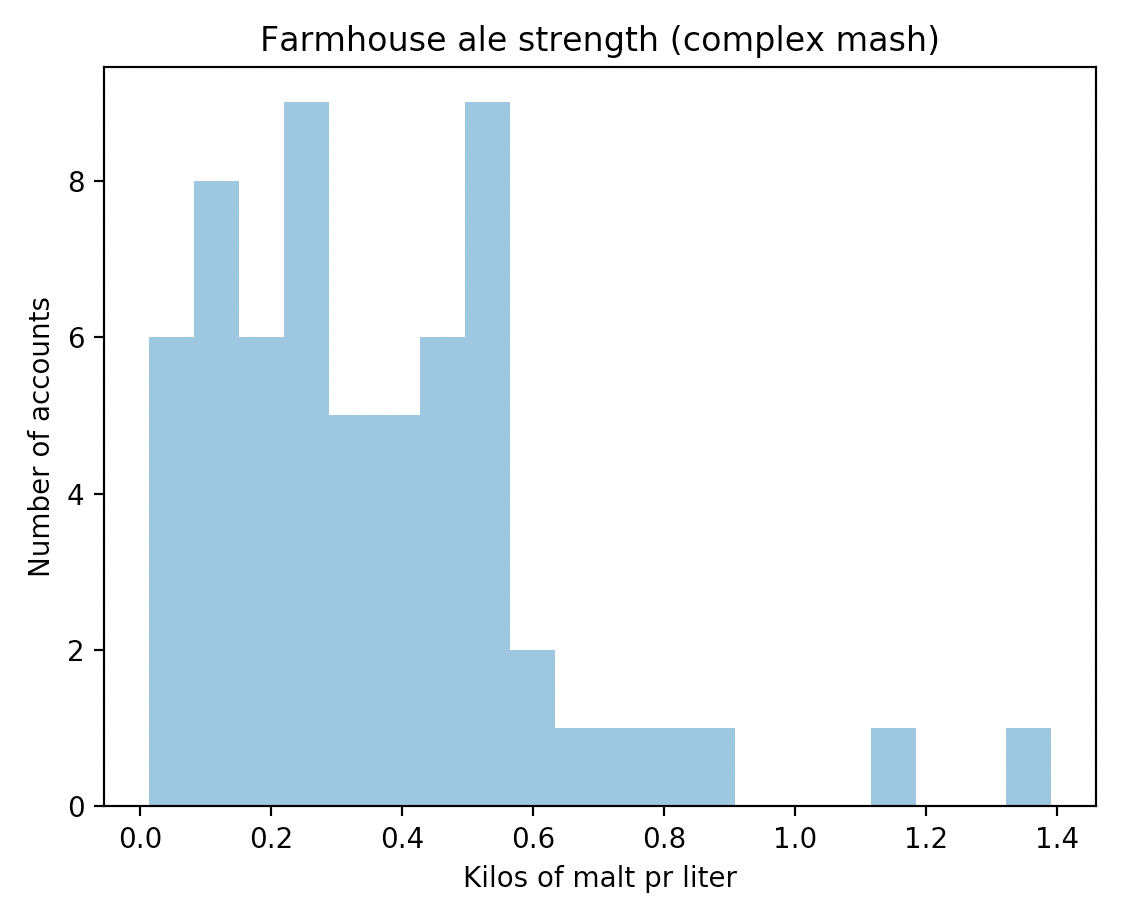
Graphs courtesy Lars Marius Garshol.
Lars: Hmmm. There’s no clear difference that I can see here. On the map there is a clear geographic patterning to the infusion/complex mash distribution, so I suspect this is simply about different customs spreading to different regions.
Mika: Nevertheless, for a raw ale beginner it might be easier to be prepared to raise the mash temperature towards the end of mashing. With smaller batches the temperature can drop a lot more than with typical farmhouse ale batch sizes and anyway two steps give more flexibility to the process.
Lars: True. I find the temperature does tend to drop toward the end when I brew kornøl, which can give a drier and more attenuated beer than you really want for that style.
Me: (Nods humbly and steps away).

Zen and the Smell of Cow Manure in the Morning (Revisited)
During one of my early-morning road bike rides through the rolling hills of Berea, Kentucky, I found myself contemplating random thoughts, as I usually do to distract myself from the burning of my leg muscles, the cramping of my wrists and the unpleasant feelings in my posterior. Riding past a cow pasture, a common occurrence, I realized that I actually enjoyed breathing in the smell of cow manure in the cool morning air while whizzing past herds of lumbering cattle.
…or: How I Learned to Stop Worrying and Love the Bicycle
It’s Thanksgiving morning 2020 and I’m sitting at my computer as the smells of baking food waft through the air. I just returned from a morning bike ride, something I try to do often these days, particularly days when I plan to indulge in a fair bit of food. As I rode through my quiet town of Berea, Kentucky, along creeks and past cow pastures, and out to the Indian Fort Mountain trailhead along the new walking and bike trail traversing the town, I got to thinking. Biking has a tendency to do this.
When I first started sending random thoughts out to the Internet by blogging on the now-defunct Earthineer.com (where my alter ego RedHeadedYeti was born), I wanted to write about the random things I was passionate about. While this included things like bikes, sustainability, and…the antique pipe set I inherited from Papa Zimmerman…Earthineer founder Dan Adams wisely pushed me to write more about brewing and fermentation. Still, I was mostly just writing for the fun of it, and I look back fondly on those early blogs.
This one in particular comes to mind often. For a time, I focused much more on brewing (and drinking) than I did on biking. I enjoyed hauling my kids around town in their trailer, but held off for several years on solo bike rides where I really pushed myself. and gave myself time to think Having access to so much homebrew and picking up booze to keep myself from breaking into the homebrew was taking its toll. I had also been traveling a lot to promote my mead and beer books. While there was plenty of fun involved, there was also a lot of boring downtime which I often spent enjoying local boozy beverages. I don’t regret the fun, and don’t much regret the booze intake (at least the first couple of drinks…), but having even mild hangovers most mornings just isn’t fun.
I knew I needed to make a change. I just needed the push. Thanks for helping out with that, 2020. In addition to all of the other…stuff…that has happened in 2020, I rang in the new year with a hospital stay from a recurrent blood clot. Due to medication I’m now on in order to, well, keep living, I have to severely limit my intake of alcoholic beverages. No problem. Now, I enjoy maybe a couple drinks a day and the mornings I can motivate myself, I get up early and head out for a bike ride. I’ve lost weight, feel better overall, and find that I actually enjoy savoring tasty beverages more now that I don’t convince myself that I need at least five more.
2020 has been an awful year to say the least, but it’s also been a reflective one for me. I’ve spent a lot of time dwelling on what’s important in life, and hoping all the insanity in the world will wake people up to the many changes we need to make in order to survive as a species and just, you know, be decent human beings (note: I believe it has done that, but it also hasn’t…).
I hope you enjoy looking back on this pondering from the Before Times. I would have had no way of knowing when the events I outlined in this blog were taking place that the very thought of traveling the world and enjoying good food and drink with other people would suddenly become a near-impossible feat to accomplish. And, in case you’re wondering, while this may not be a straight-up blog about beer, mead, or brewing, much beer was enjoyed during my bike travels. One thing I don’t mention in the blog is how much I enjoyed the concept of rolling into even the smallest of towns, particularly in Germany and Austria, and finding they had their own local brewery that pretty much only provided that town with beer. This was during the early days of the craft beer boom, and I was young and inexperienced with the world, so that was something that really stood out to me and set me on the path to what was at the time a vague notion that maybe someday I would become a beer writer.
Take care out there, folks, and enjoy the good things with those you’re able to safely enjoy them with.
- Yeti
During one of my early-morning road bike rides through the rolling hills of Berea, Kentucky, I found myself contemplating random thoughts, as I usually do to distract myself from the burning of my leg muscles, the cramping of my wrists and the unpleasant feelings in my posterior. Riding past a cow pasture, a common occurrence, I realized that I actually enjoyed breathing in the smell of cow manure in the cool morning air while whizzing past herds of lumbering cattle. The nostalgia of my youth on a rural Kentucky farm it elicited and the fact that it wasn’t car exhaust far outweighed its…manure-ness. It got me thinking back on the multiplicity of milieus, weather conditions, sights and smells I’ve experienced on a bike. Sure, I’ve seen a lot by car, train and bus, but the slowed-down intimacy of a bike ride allows for a far more fulfilling experience. Not to mention the myriad of additional benefits, such as exercise, gas savings, and the satisfaction of reducing my impact on the environment.
My love affair with the bicycle started as a child when I was given a Huffy by my grandparents. I still remember the thrill as my “Poppy” gave me a gentle push down an embankment and set those wheels rolling. From then on, I was on my bike as often as I could—setting up ramps in the yard with my brothers, flying down gravel country roads, and one time, slamming my shoulder full force into a post next to a barn after somehow forgetting how to use my brakes. As I turned from a fun-loving yeti-ling into a surly teenager, I put my bike away for a while in exchange for cruising Main Street looking for (and not finding) trouble in my fancy Ford Tempo.

“Poppy” Kaser trying to convince my older brother Aaron not to be afraid of his bike.
While attending Berea College, I mostly walked or hitched rides. It wasn’t until my senior year, when I bought a cheap used bike and started cruising around town, that I started to remember how much I enjoyed the wind in my hair as I flew down a hill. Fast-forward to my graduation; freshly married, I headed off to Seattle to prepare for a ride that would entail more than 900 miles across Europe in a month—a wedding gift from my parents-in-law. As I had never ridden more than a couple miles, we headed to the REI flagship store in downtown Seattle, where we picked me up a Novara touring bike and began riding 20 miles a day or more on the Burke-Gilman trail (a pedestrian/bike trail spanning more than 70 miles that cuts through the breadth of Seattle), keeping a moderate pace on the mostly flat terrain. “This isn’t so bad,” I thought. “I should be able to handle riding 30-40 miles a day.” My first day riding on flat terrain straight into the sea-driven winds of Holland almost made me think otherwise, but by the end of the trip I was having a blast riding up and down the pristine mountains of Switzerland.

Fully loaded and ready to go.
Upon initially arriving in Amsterdam, I found that most of my luggage, along with my bike’s front-wheel quick-release skewer, was on a plane destined for Japan. After unpacking and reassembling our bikes (using a zip tie to keep my front wheel on), we took them to be stored at a bike shop while we waited for the rest of the group to arrive in a week—comprised of my father-in-law and a group of crazy Minnesotans none of us had yet met. I was amazed at the amount of bicycles scattered about the streets of Amsterdam. Many were rusted out hulks that looked like they hadn’t been ridden in years. I saw these rust buckets being ridden about town regularly, though—often by a woman with a baby in the front basket, a toddler straddling the back and bags of groceries strapped precariously throughout. Bicycles and pedestrians definitely had the right of way, as was often evidenced by a car screeching to a halt as a bicycle meandered into its path.

An interesting use of bikes at a street show in Amsterdam.
Fortunately my bags arrived shortly before our planned departure. Next, it was off to ride amongst the tulip fields and dikes of Holland, the steep vineyard slopes of Germany’s Rhein/Mosel region, the cornfields and gaudy city squares of France, the blink-of-an-eye that was Luxembourg, and finally, up to the mountainous region of Switzerland’s Lauterbrunnen municipality. The adventures we had on the way are too numerous to chronicle here. Our many encounters included helpful French farmers offering to give us directions by gesticulating and talking loudly despite the fact that we didn’t understand a thing they were saying, a helpful Luxembourgian waitress who sent us on a “shortcut” (complete with a closing “voila!”) into the mountains rather than along the flat river trail near the café—resulting in our day’s ride extending from the planned 40 to nearly 70 miles—and a cadre of French prostitutes who pranced around my bike as we rode wearily into Metz, France at 11pm after giving up on the Luxembourgian shortcut and finding our own way. Additional adventures included watching the streets of Haarlem explode following Holland’s defeat of Argentina in the 1998 World Cup semi-finals, biking amongst Roman ruins in Germany, and visiting Heidi’s hometown in the mountains of Switzerland.

From the world cup celebration in Haarlem.
Upon returning to Seattle, I was ready to start bicycling on a regular basis. While working in downtown Seattle, I often biked, bussed, or combined the two, depending on how far away I was from downtown at the time. There’s nothing like flying past cars stuck in traffic during rush hour. There were disadvantages, though. I often caught a whiff of exhaust, and one of my routes went past a Hostess factory. The smell of Twinkies frying in the morning is not a pleasant thing (I prefer manure). I also rode various portions of the Burke-Gilman trail on a regular basis, a pedestrian/bike trail spanning more than 70 miles that cuts through the breadth of Seattle. The Redhook brewery was accessed easily from the trail; I learned once that riding 20 miles to the brewery for a few too many is a lot more fun than riding 20 miles back.
After living in Seattle for a couple years, my wife and I decided to throw everything in storage, quit our jobs (conveniently, I was laid off just in time) and take our 1970 VW bus through the national parks of the Southwest US for a summer. I brought my touring bike along, but quickly discovered that most of the trails I wanted to ride required something more suited to mountainous terrain. While working at Snow Mountain Ranch (the YMCA of the Rockies) near Winter Park and Fraser, Colorado for a month, I decided to trade our tax refund in for a Specialized mountain bike (note that I said “I” and not “we”). To this day, I don’t regret this purchase. I was ideally situated for heading out my door and riding the multitude of trails that surrounded me. Granted, it took most of the month to become accustomed to keeping my breath at 8,000+ feet, but by the time I made it back to Seattle, the hills I had struggled with in the past felt more like a slight incline. I should note that, while much of that time was spent solo biking, most of the other YMCA staff were wandering vagrants like myself working a temporary job to fund further travels. I spent time hanging out and visiting the local pub with folks from Britain, Zambia, South Africa, New Zealand… the list goes on. I can say that it was a humbling experience the day I decided to join a mountain bike ride with a couple of experienced bikers accustomed to riding the mountains of the Czech Republic and Columbia…

The Yeti in his natural environment.
Upon returning from our trip, we decided to get our stuff out of storage and head further north to Bellingham, where I got in even more mountain biking, including participation in the Ski to Sea, an 8-part relay race that starts on skis at Mt. Baker and ends in a kayak in Bellingham Bay. A team from a local elementary school, Lost Faculties, was gracious enough to let me join when they needed an extra participant, for which I am eternally grateful. My job was to mountain bike an 8-mile stretch following receipt of the baton from the team that canoed the Nooksack River, and then run my bike half a mile across a rocky beach to pass the baton to the kayaker. The whole town practically shut down for the event, which had participants ranging from pros who finished up a couple hours after the launch of the race, to casual teams who (mostly) finished up by the close of the event at 5 pm.

Hanging out at Bellingham Bay at the end of the race.
What does all this have to do with Earthineer? My defense is that I strongly believe in this site’s focus on environmental sustainability, DIY and community. Bicycles have provided me with avenues for pursuing all of these. To minimize your environmental footprint, I recommend finding places as close as possible to your house to ride for pleasure or exercise, or simply using your bike in place of your car to run errands around town. For DIY, learn how to do some basic bicycle maintenance to avoid bike-shop fees. Stickboy (my partner in beer and bikes Steven Cole) has provided some useful blogs on basic bike maintenance, and the two of us are hoping to cook up some more. Bicycle maintenance can be addictive, though; and, based on personal experience, can lead to a basement full of bicycles and components. To help build your community, join a local bicycle-advocacy group, participate in your town’s efforts to create and maintain bicycle paths, join a local group of cyclists, or just ride around town with friends and family. The important thing is to get out and ride. One thing I love about cycling is that it can be a solo or group activity. I personally prefer to mostly ride solo for the yetilosophical experience, but lately have begun pulling my daughter Sadie (and later, my second daughter Maisie) along in her trailer and enjoying her looks of glee upon my setting her rolling gently down a hill on her own bike. I look forward to taking them on many bicycle rides.

This is Bertha the bike. She has traveled with me to many countries and states. We have ridden thousands of miles (well, at least a thousand or two) together. While I have cheated on her with other bikes, she is my one true love, my reliable standby. Her frame is solid, impenetrable steel. I have modified many of her components but at her core, she is Bertha.
Historical Brewing Techniques: Part 2

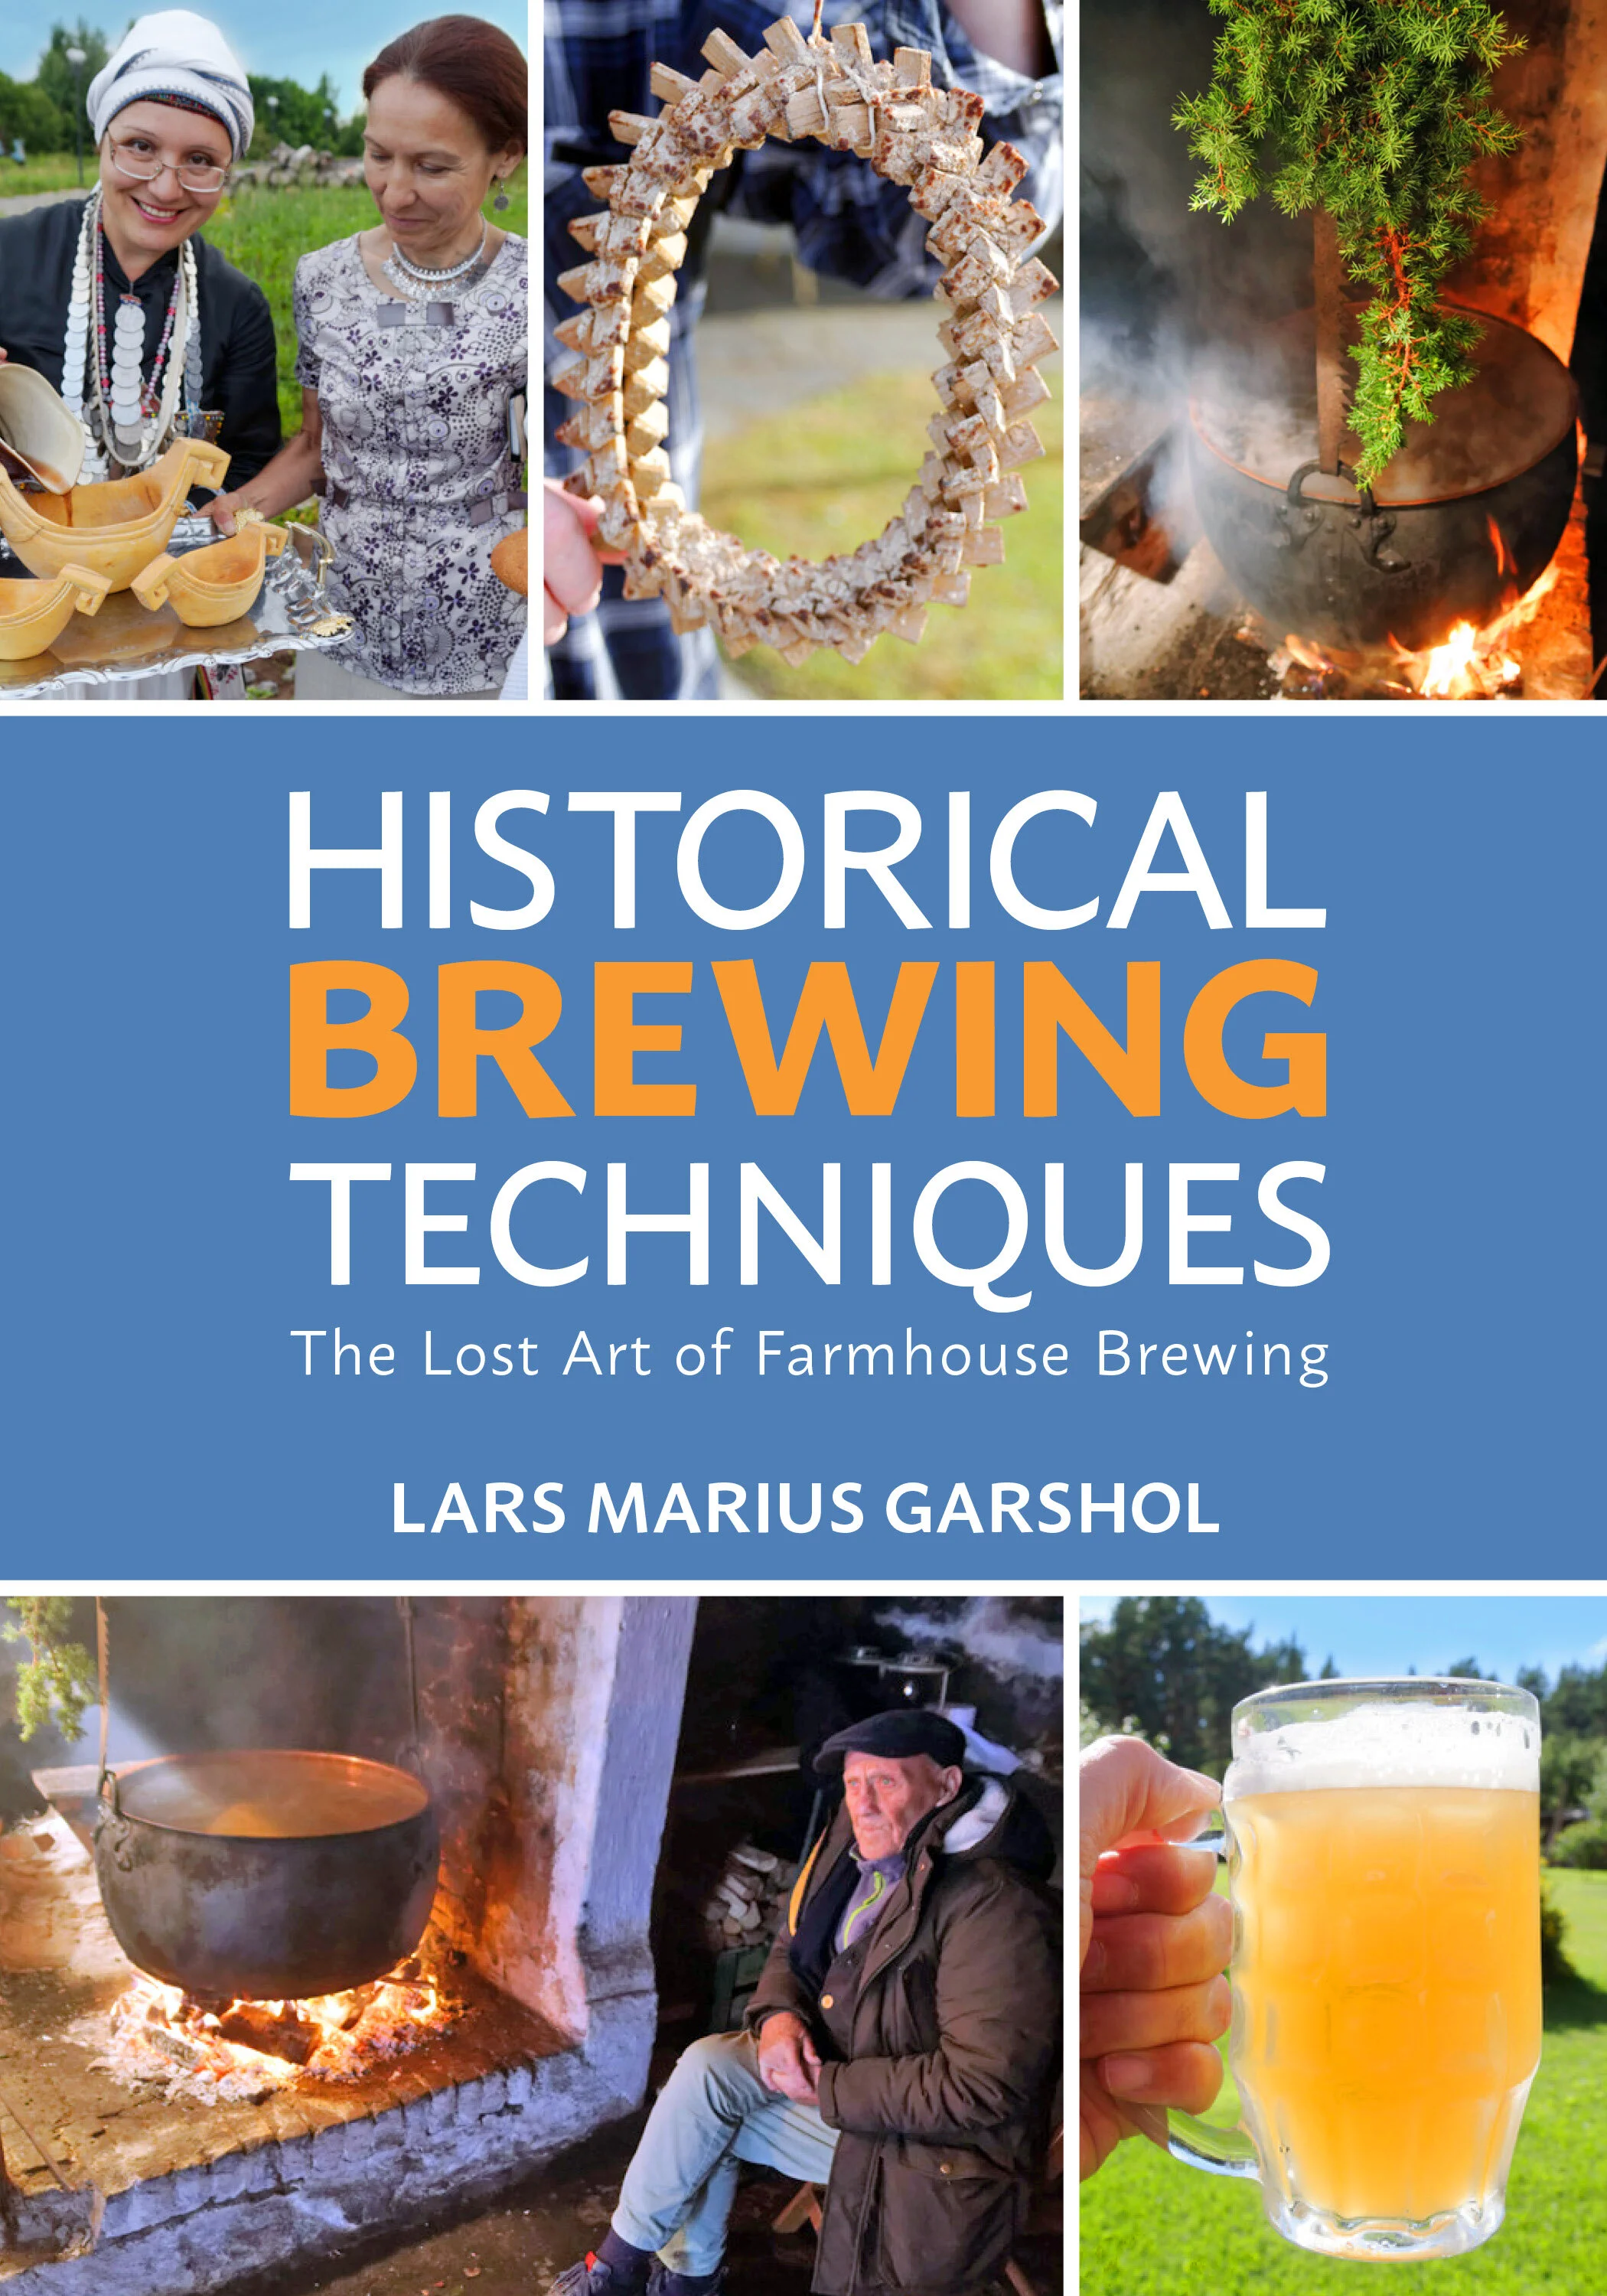
In the first part of this series, I conducted an interview with Lars Marius Garshol, author of Historical Brewing Techniques: The Lost Art of Farmhouse Brewing and the blog Larsblog. Read on for my review of Historical Brewing Techniques and some thoughts it brought up regarding this completely “new” ancient style of brewing.
While Historical Brewing Techniques covers a lot of the same territory as Larsblog, this is by no means a bad thing. Not only is Garshol’s research now in convenient bound form (it’s a sturdy 400-page tome with nice glossy pages for the inevitable beer spillage), but the information from his blog is greatly expanded on. I recommend enjoying it like I did, on the back porch with a beer or three. For my first read-through I made some notes on pages I wanted to come back to when I was ready to start applying the wealth of knowledge contained within, but mostly I just enjoyed the narrative. Even those with little interest in the subject matter can appreciate the book for its engaging combination of travelogue, history, folklore, and fascinating data-driven research. Garshol has uncovered a vibrant brewing and drinking culture that has quietly continued in far corners of Europe (and some not so far corners) while modern, commercial brewing grew to monolithic proportions in much of the world.
Much of what goes on in the craft brewing and homebrewing worlds, even with so-called “farmhouse” styles, relies on tools, techniques and temperatures that are considered irrefutably crucial in creating good beer. (There are definitely some exceptions, though.) Garshol makes it abundantly clear that much of this dogma is antithetical to how people brewed in the days when nearly every household brewed their own beer from start to finish. As a matter of fact, he goes so far as to say that modern commercial brewing and rustic farmhouse brewing should really be thought of as completely separate categories, as they have “evolved separately, drifting apart over many centuries [279].”
Beers brewed by the methods outlined in this book employ vastly different processes and ingredients than commercial beers, and can thus can differ greatly in flavor. If you’re a brewer who is a stickler for the “absolutely necessary” specifics that have been hammered in throughout the modern brewing literature, you’ll need to take a deep breath before delving in. Following is just a sample of the brewing heresies that Garshol discovered farmhouse brewers regularly commit:
A different outlook on cleanliness. Farmhouse breweries can be a far cry from modern, super clean and sanitary commercial (and home) breweries. With many literally being on farms and often using wood as a heating source, the brewing area can often be dank, dusty, and sooty. Except for those who have started incorporating modern brewing into their practices, sanitation with modern chemicals just doesn’t happen. This doesn’t mean that they’re not very aware of possible beer spoilage. Cleaning equipment is an important part of the brew day as with any other brewer; they just employ very different methods. For some brewers, one of the first steps in a brew day is to make up a juniper infusion by boiling juniper branches in water. This infusion is often used as the strike water for drawing out sugars from the mash, but it is also used to clean equipment. While they are very careful about cleaning, farmhouse brewers historically didn’t actually know for sure what kept beer from going bad, so they developed rituals and superstitions that they were sure to follow extremely carefully with every batch. If nearly every beer they made turned out good following these steps, and it worked for their father, mother, grandfather or grandmother (and their ancestors), then it must work.
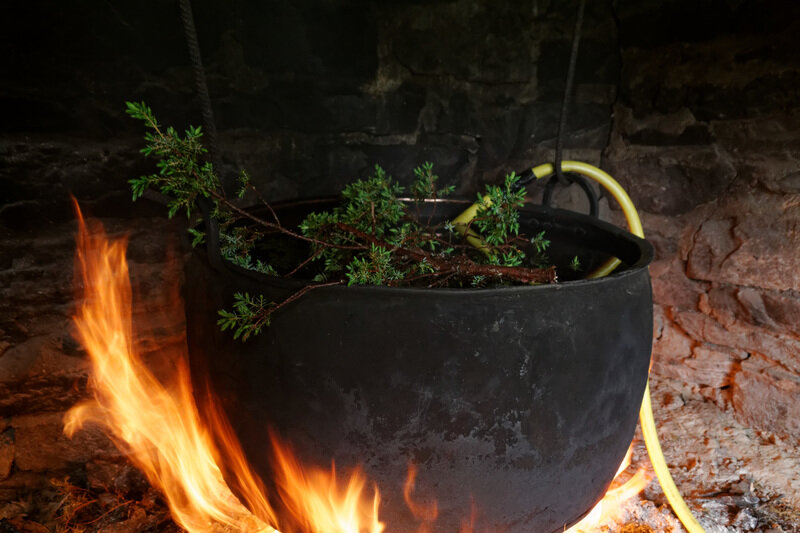
Preparing a juniper infusion. Photo courtesy of Lars Marius Garshol, from Brewing raw ale in Hornindal.
The wort often isn’t boiled. One of the most fascinating aspects of farmhouse brewing, and one of the core elements that enables such unique flavors, is the concept of raw ale. As a brewer who adhered closely to modern brewing “necessities” when I first read of raw ales, I had a hard time believing that you didn’t need to boil wort when brewing beer. But if you think of the reasons we boil wort when brewing, and look at it historically, this makes perfect sense. For one, we get all of those bitter and aromatic flavors from hops in modern beers such as IPAs through a process called isomerization. Without the proper equipment, and a consistent source of high heat, boiling wort for 60 minutes or more just wasn’t possible historically. While many farmhouse brewers do use hops, they’re not used the same way as in modern beers. They understand their antibacterial properties, but most don’t use them for flavoring. If hops are used, they’re made into a hop tea that is added to the wort while lautering, or even to-taste when drinking. Juniper and various other herbs are known to have antibacterial properties, and were often used instead of, or along with, hops. As Garshol notes, though, there is a broad spectrum as to how these ingredients are used and whether there is no boil, a short boil, or a long boil (of the wort, that is; boiling the mash is also a technique some brewers use).

A mug of raw ale. Photo courtesy of Lars Marius Garshol, from Raw Ale.
A general lack of temperature monitoring and precise measurements. For many of the brewers Garshol interviewed, he was surprised to find that thermometers were rarely used and that they just eyeballed ingredient measurements. In modern brewing, if we want to achieve a particular flavor, alcohol level, and other factors that make for a specific style, it is important to be precise. Most farmhouse brewers aren’t brewing a “style,” they’re just brewing the same type of beer that they were taught to brew by the previous generation. Although there may be nuanced differences between batches, they pretty much make the same beer every time. Because of this, they can judge the proper temperature and ingredient amounts just by look, feel and taste. Some of the brewers Garshol interviewed were perplexed as to why anyone would want to take precise measurements, while others were almost mocking of the modern brewing world’s obsession with precision.

Terje Raftevold brewing by instinct and tradition in Hornindal, Norway. Photo courtesy of Lars Marius Garshol from Brewing raw ale in Hornindal.
The yeast; oh, the yeast… An entire book could be written on the yeast used in farmhouse brewing and how it is utterly different from how pretty much any other modern yeast works. Garshol dedicates a good portion of his book to discussing farmhouse yeast, although he admits that there is much more to explore. His discussion on yeast focuses heavily on the current darling of the brewing world, kveik, but he discusses other yeasts as well. Kveik itself, which simply means “yeast” in some Norwegian dialects, has many variants. Other words used for yeast include gjest(er), gjaer and berm. And then there are the words used in Sweden, Denmark, the Baltics, and other countries. Since each region—even individual farmhouses—had their own unique yeast, there are a plethora of nuances in yeast behavior. Garshol feels he has only touched the tip of the iceberg, but he still covers an impressive amount of ground. If we just consider kveik, some of the ways in which its behavior differs from modern yeast include pitching temperature (often 90 degrees F / 32 C or higher); fast fermentation (full attenuation in as little as 48 hours); viability (many strains have been saved and re-used with little-to-no bacterial infection in non-sanitary conditions for generations—people generations, not just yeast generations); and unique flavors (many contribute citrusy, tropical flavors). The saved yeast isn’t subjected to anything resembling laboratory analysis, and is stored by methods such as refrigerating slurry in glass jars, setting it out to dry and then saving the dried chips in plastic baggies, or even dropping a yeast log, yeast ring or cloth into actively fermenting beer, which is then simply left in a rafter or some other “unsanitary” place to dry until the next use.

Terje Raftevold harvesting kveik after 40 hours. Photo courtesy of Lars Marius Garshol from How to use kveik.
I could go on and on about the many other fascinating aspects of this book, but you’ll just need to read it yourself. In addition to some solid technical how-to and recipes, we’ve got history, folklore, superstitions, yeast-waking screams, oven beers, and some rather interesting malting practices. If you don’t believe me when I say just how unique this book is, how many other brewing books are out there that list as part of a recipe to scream loudly or say the name of every angry dog in the neighborhood? I warrant you there aren’t many…
Historical Brewing Techniques: Part 1
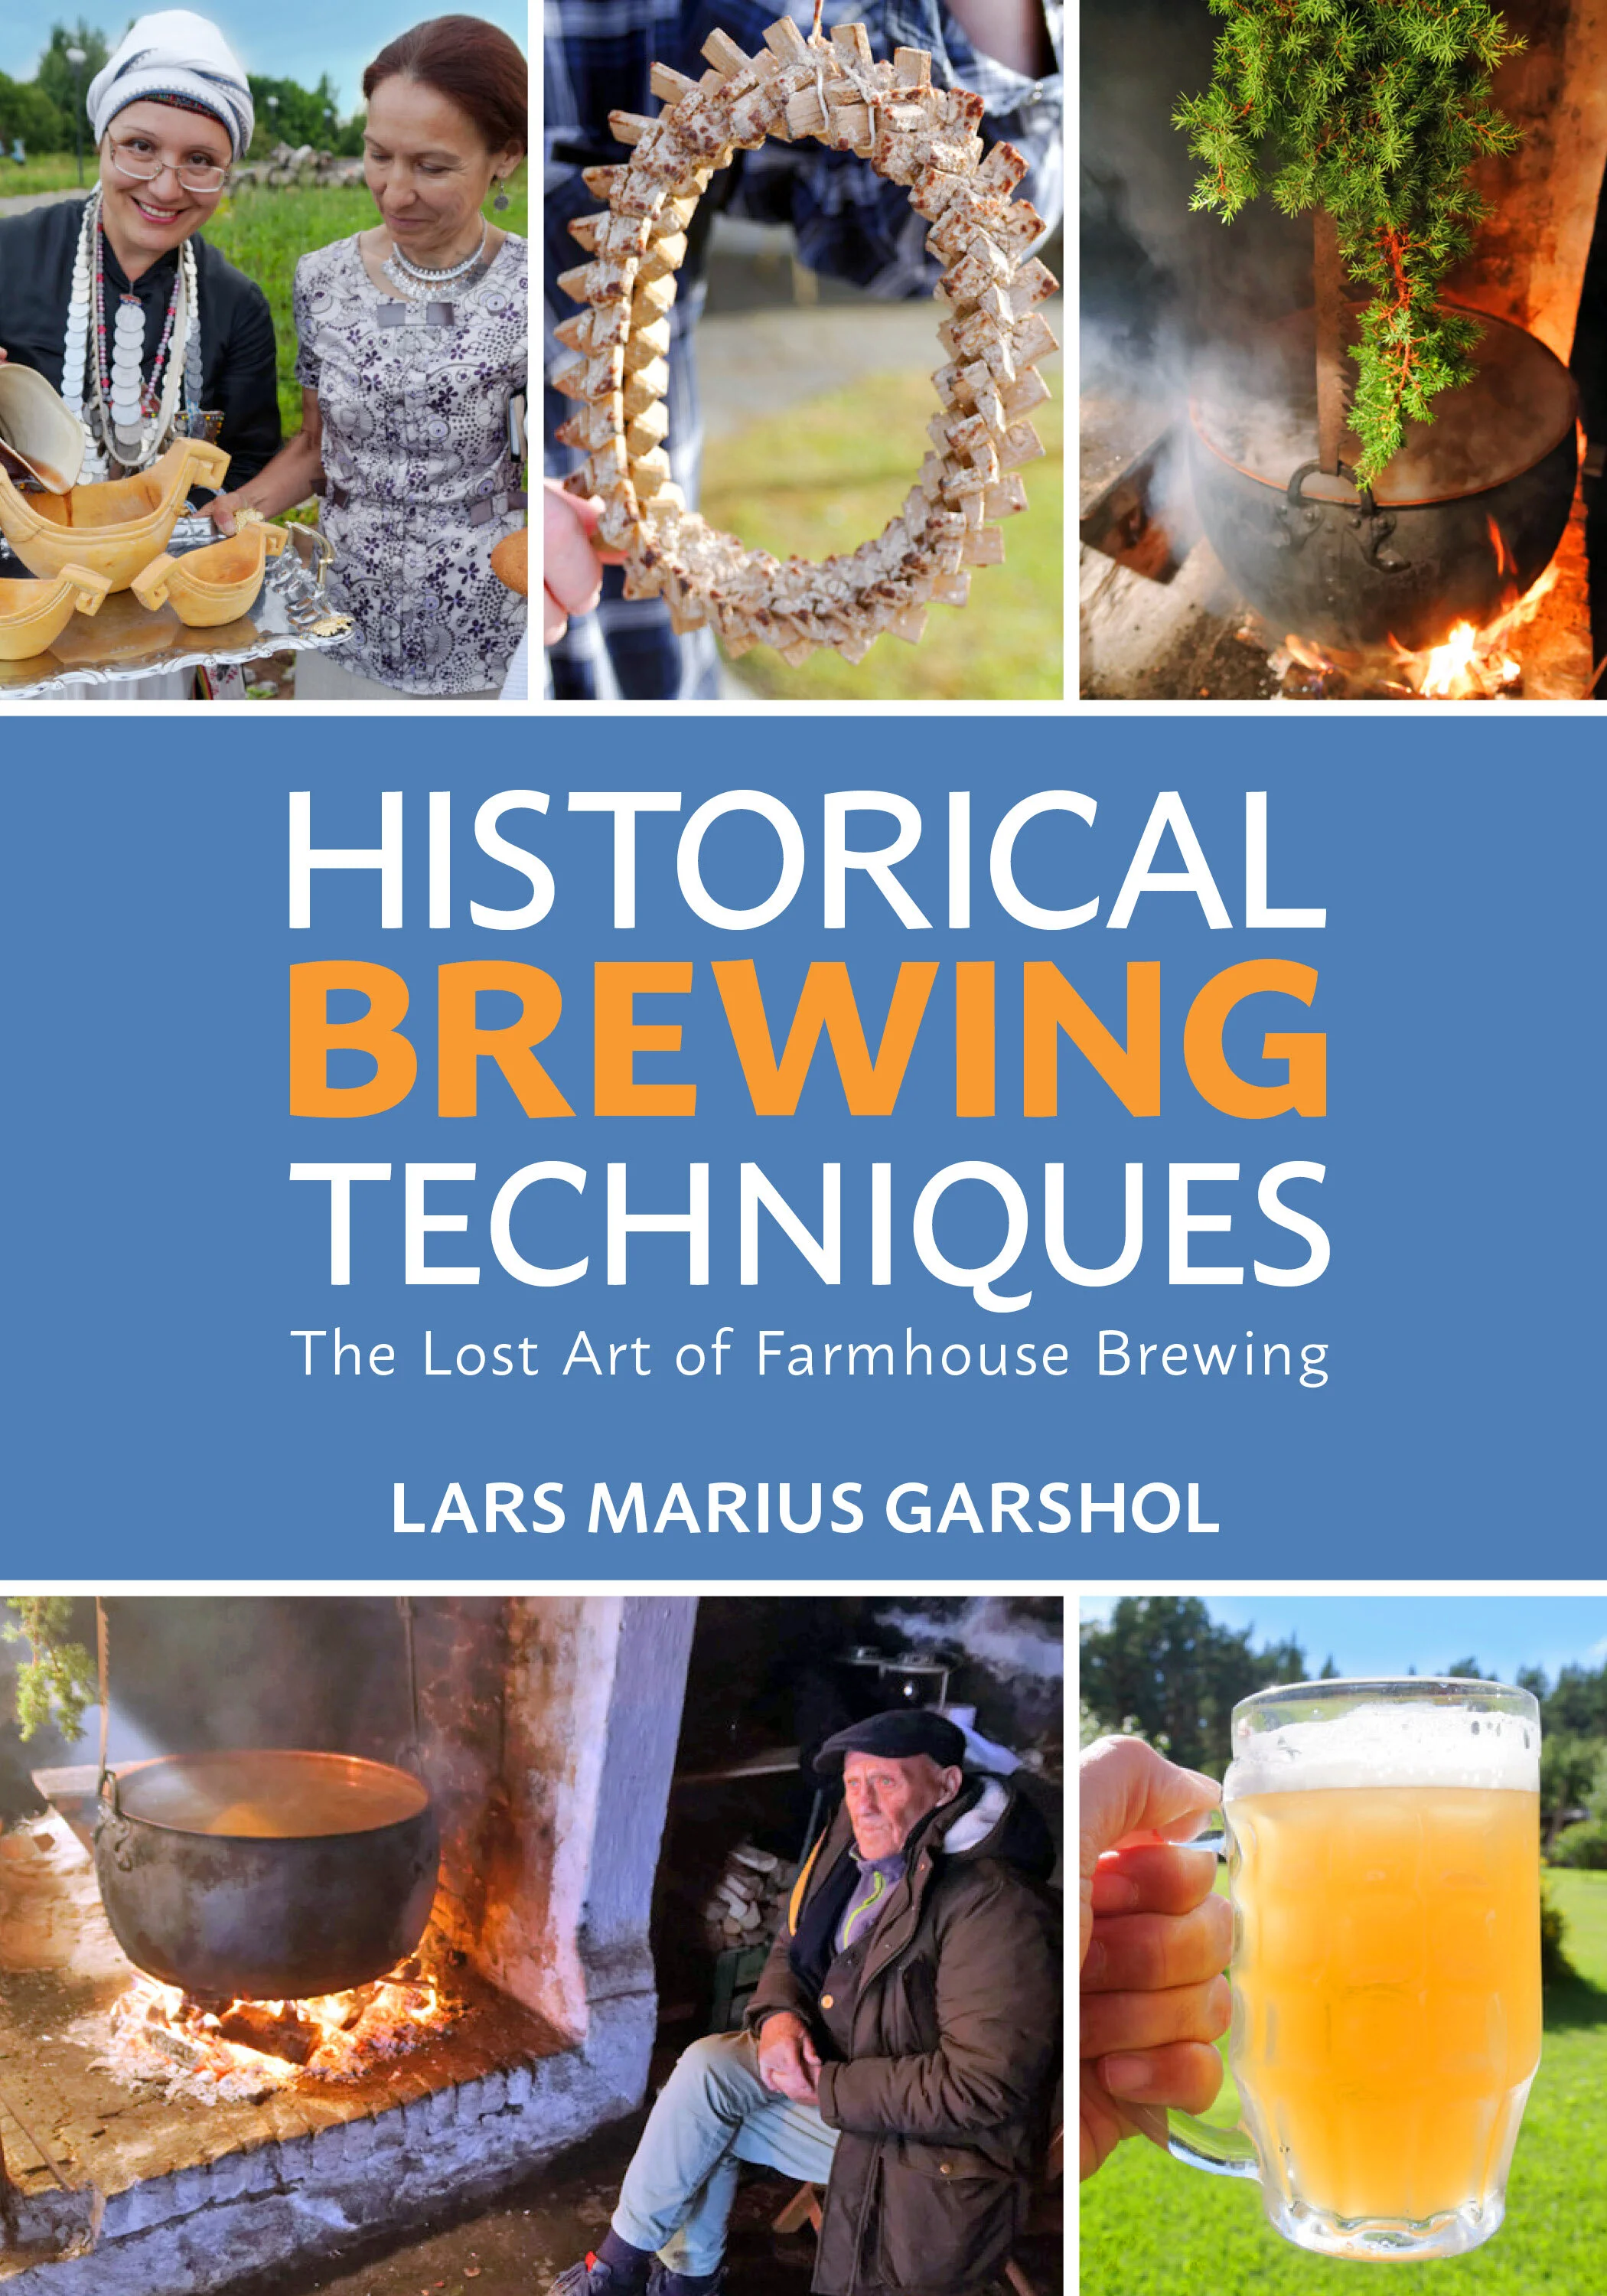
In this 3-part series, I will be exploring this book and the avenues it opens up for changing the face of modern brewing by stepping back in time. First, I will be presenting my interview with Garshol on his new book, followed by my review of the book; then I will cover my explorations in brewing with the techniques, ingredients and yeasts I was introduced to by Garshol and Laitinen.
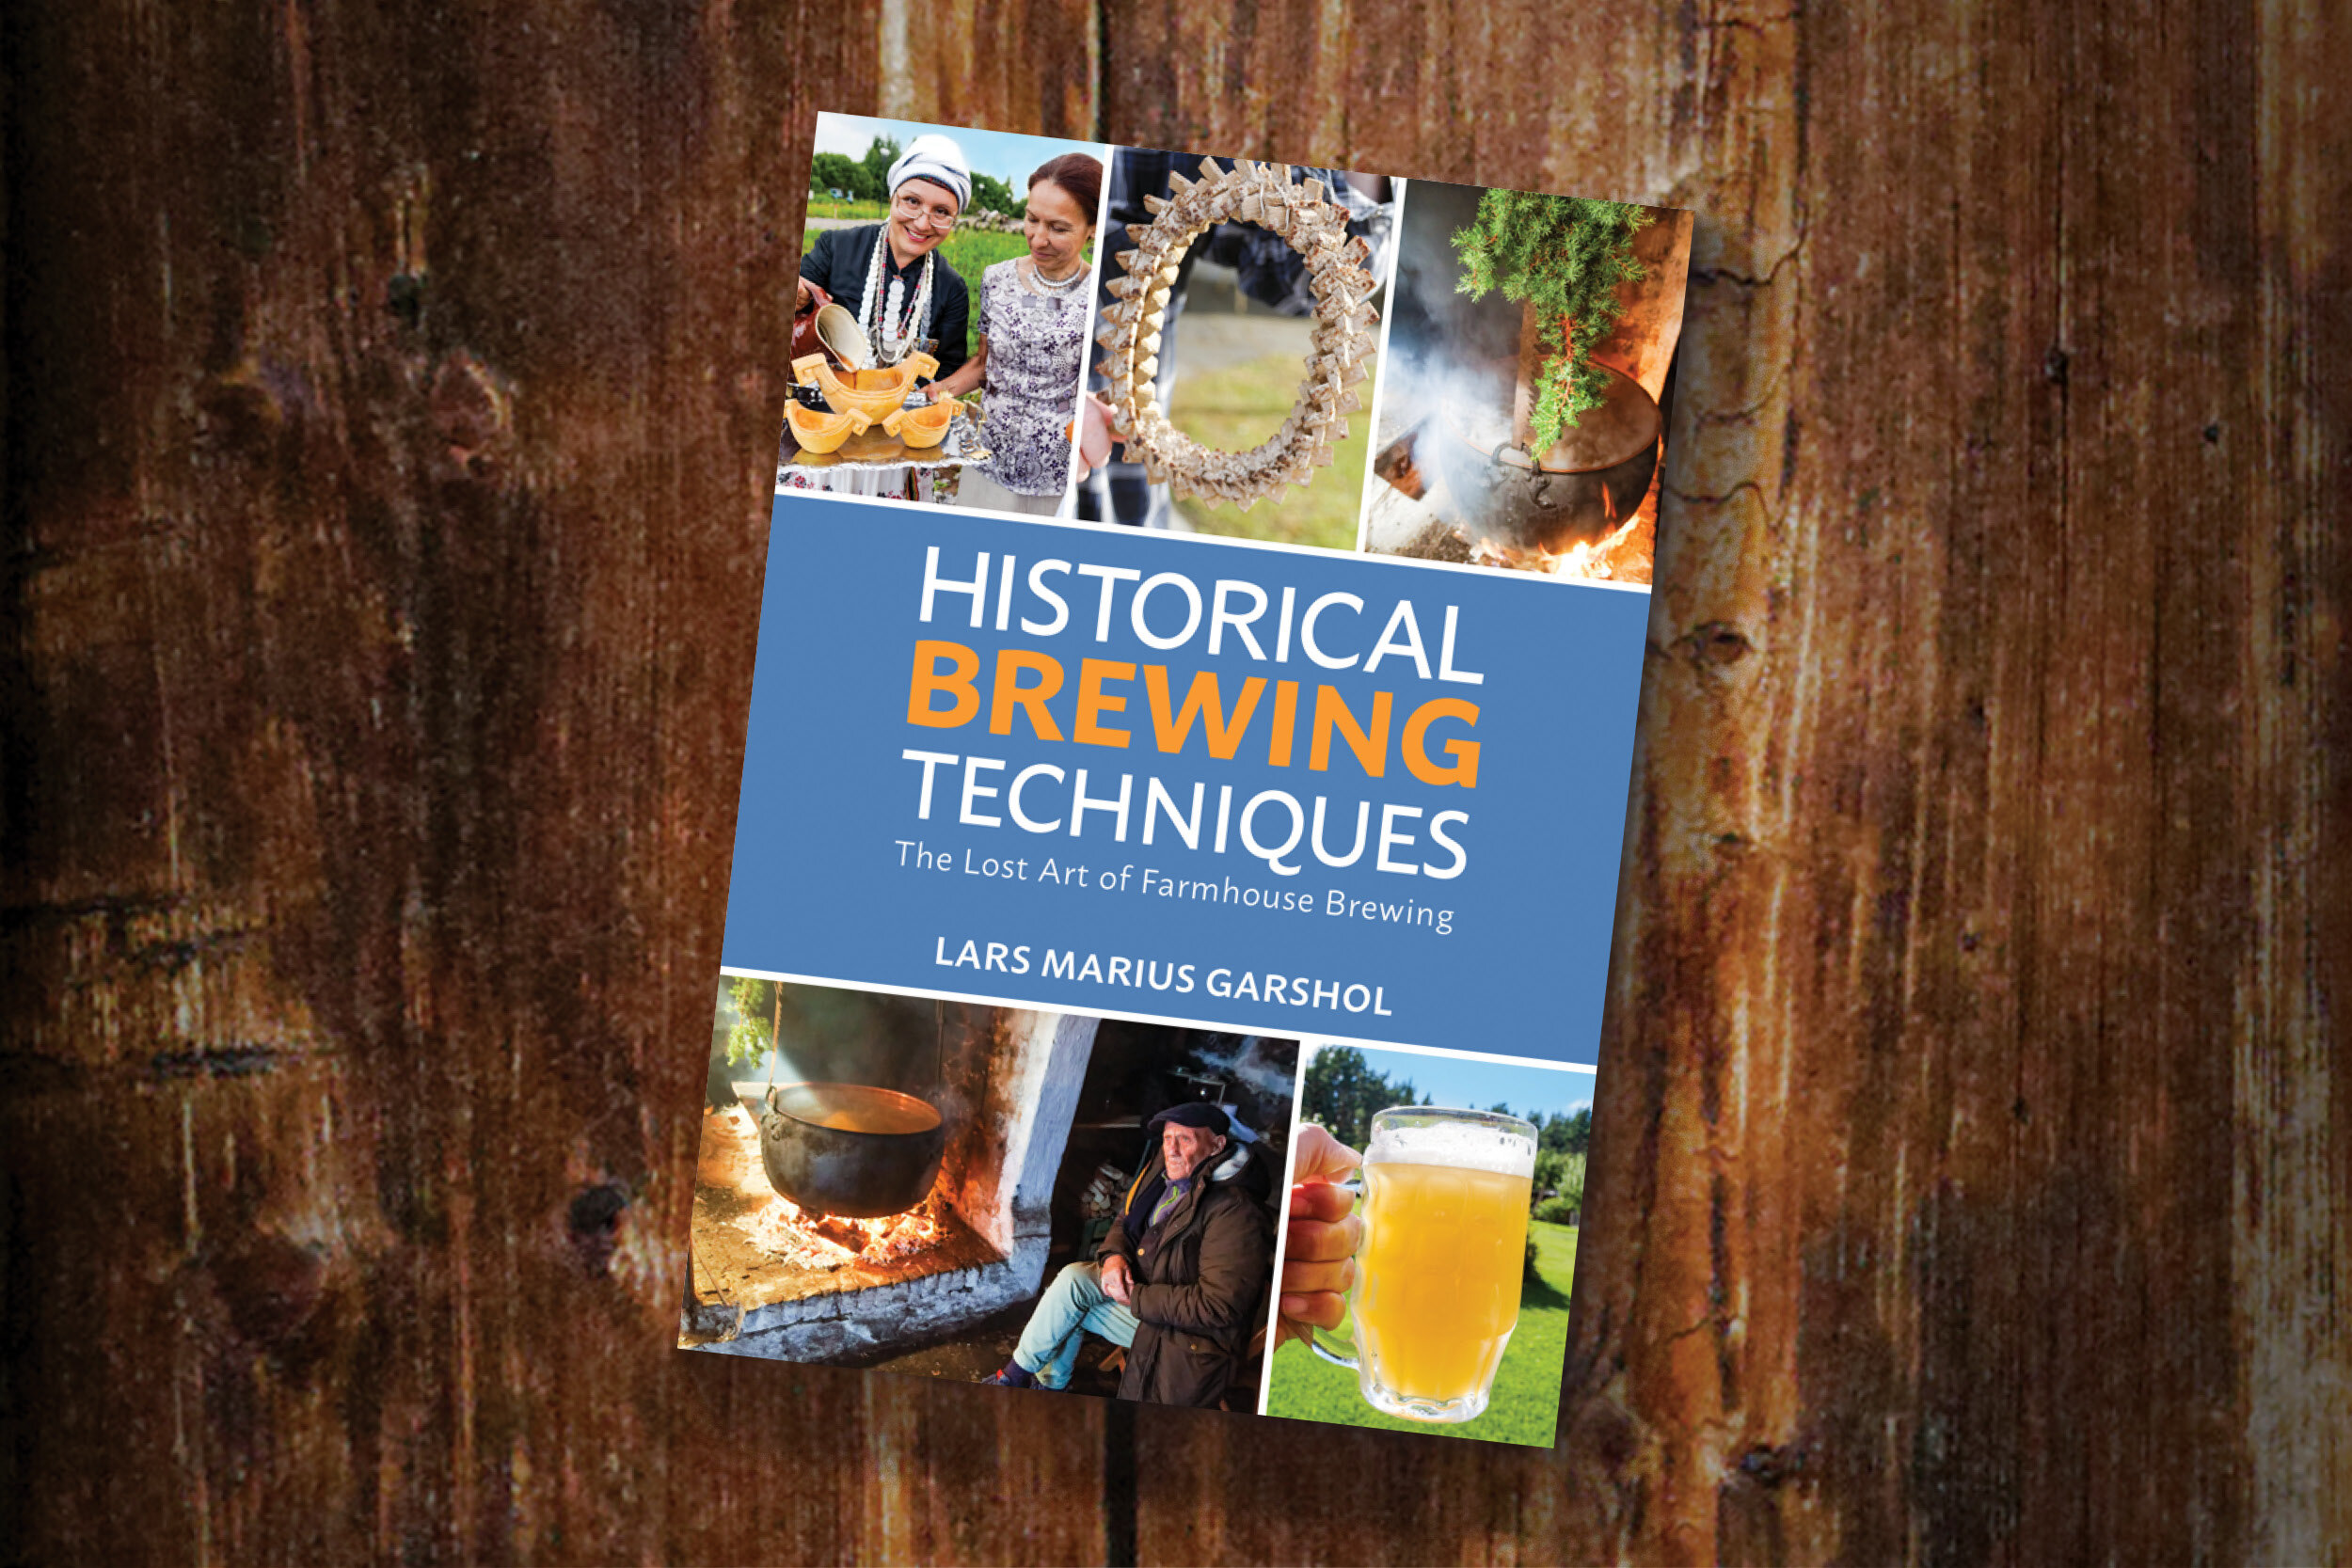
Photo courtesy of Lars Marius Garshol & Brewers Publications
When I first started researching what became Make Mead Like a Viking what seems an eternity ago, the modern resurgence in historical brewing was just getting rolling. There were some great books out there that set a foundation for my research, but there seemed to be a large gap in good, solid, in-depth empirical research on the subject.
Little did I know that while I was poring through old books, journals and Internet archives—doing my best to separate fact from conjecture—that around the same time a beer enthusiast in Norway was making similar explorations. The difference between us, though, was that…well, I was in Kentucky and he was in Norway. He also had the fortune to luck upon some truly astounding discoveries, finding living, breathing representations of brewing techniques and traditions I was only coming across hints of in dusty old tomes.
I’m talking about Lars Marius Garshol, who documents his ongoing research in his blog, Larsblog. In moving beyond mead and researching historical beer brewing for my second book Brew Beer Like a Yeti, Larsblog, along with his Finnish colleague Mika Laitinen’s blog Brewingnordic.com, was an invaluable resource. The meticulously detailed research along with the practical experiential tips and photos helped fill in a lot of gaps and set my research in the right direction. Garshol’s new book Historical Brewing Techniques: the Lost Art of Farmhouse Brewing goes even deeper into the world of historical (and modern) European farmhouse brewing.
In this 3-part series, I will be exploring this book and the avenues it opens up for changing the face of modern brewing by stepping back in time. First, I will be presenting my interview with Garshol on his new book, followed by my review of the book; then I will cover my personal explorations in brewing with the techniques, ingredients and yeasts I was introduced to by Garshol and Laitinen. For more on Garshol, please check out my article in Fermentation magazine on the Norwegian farmhouse yeast kveik.
Part 1: The Interview
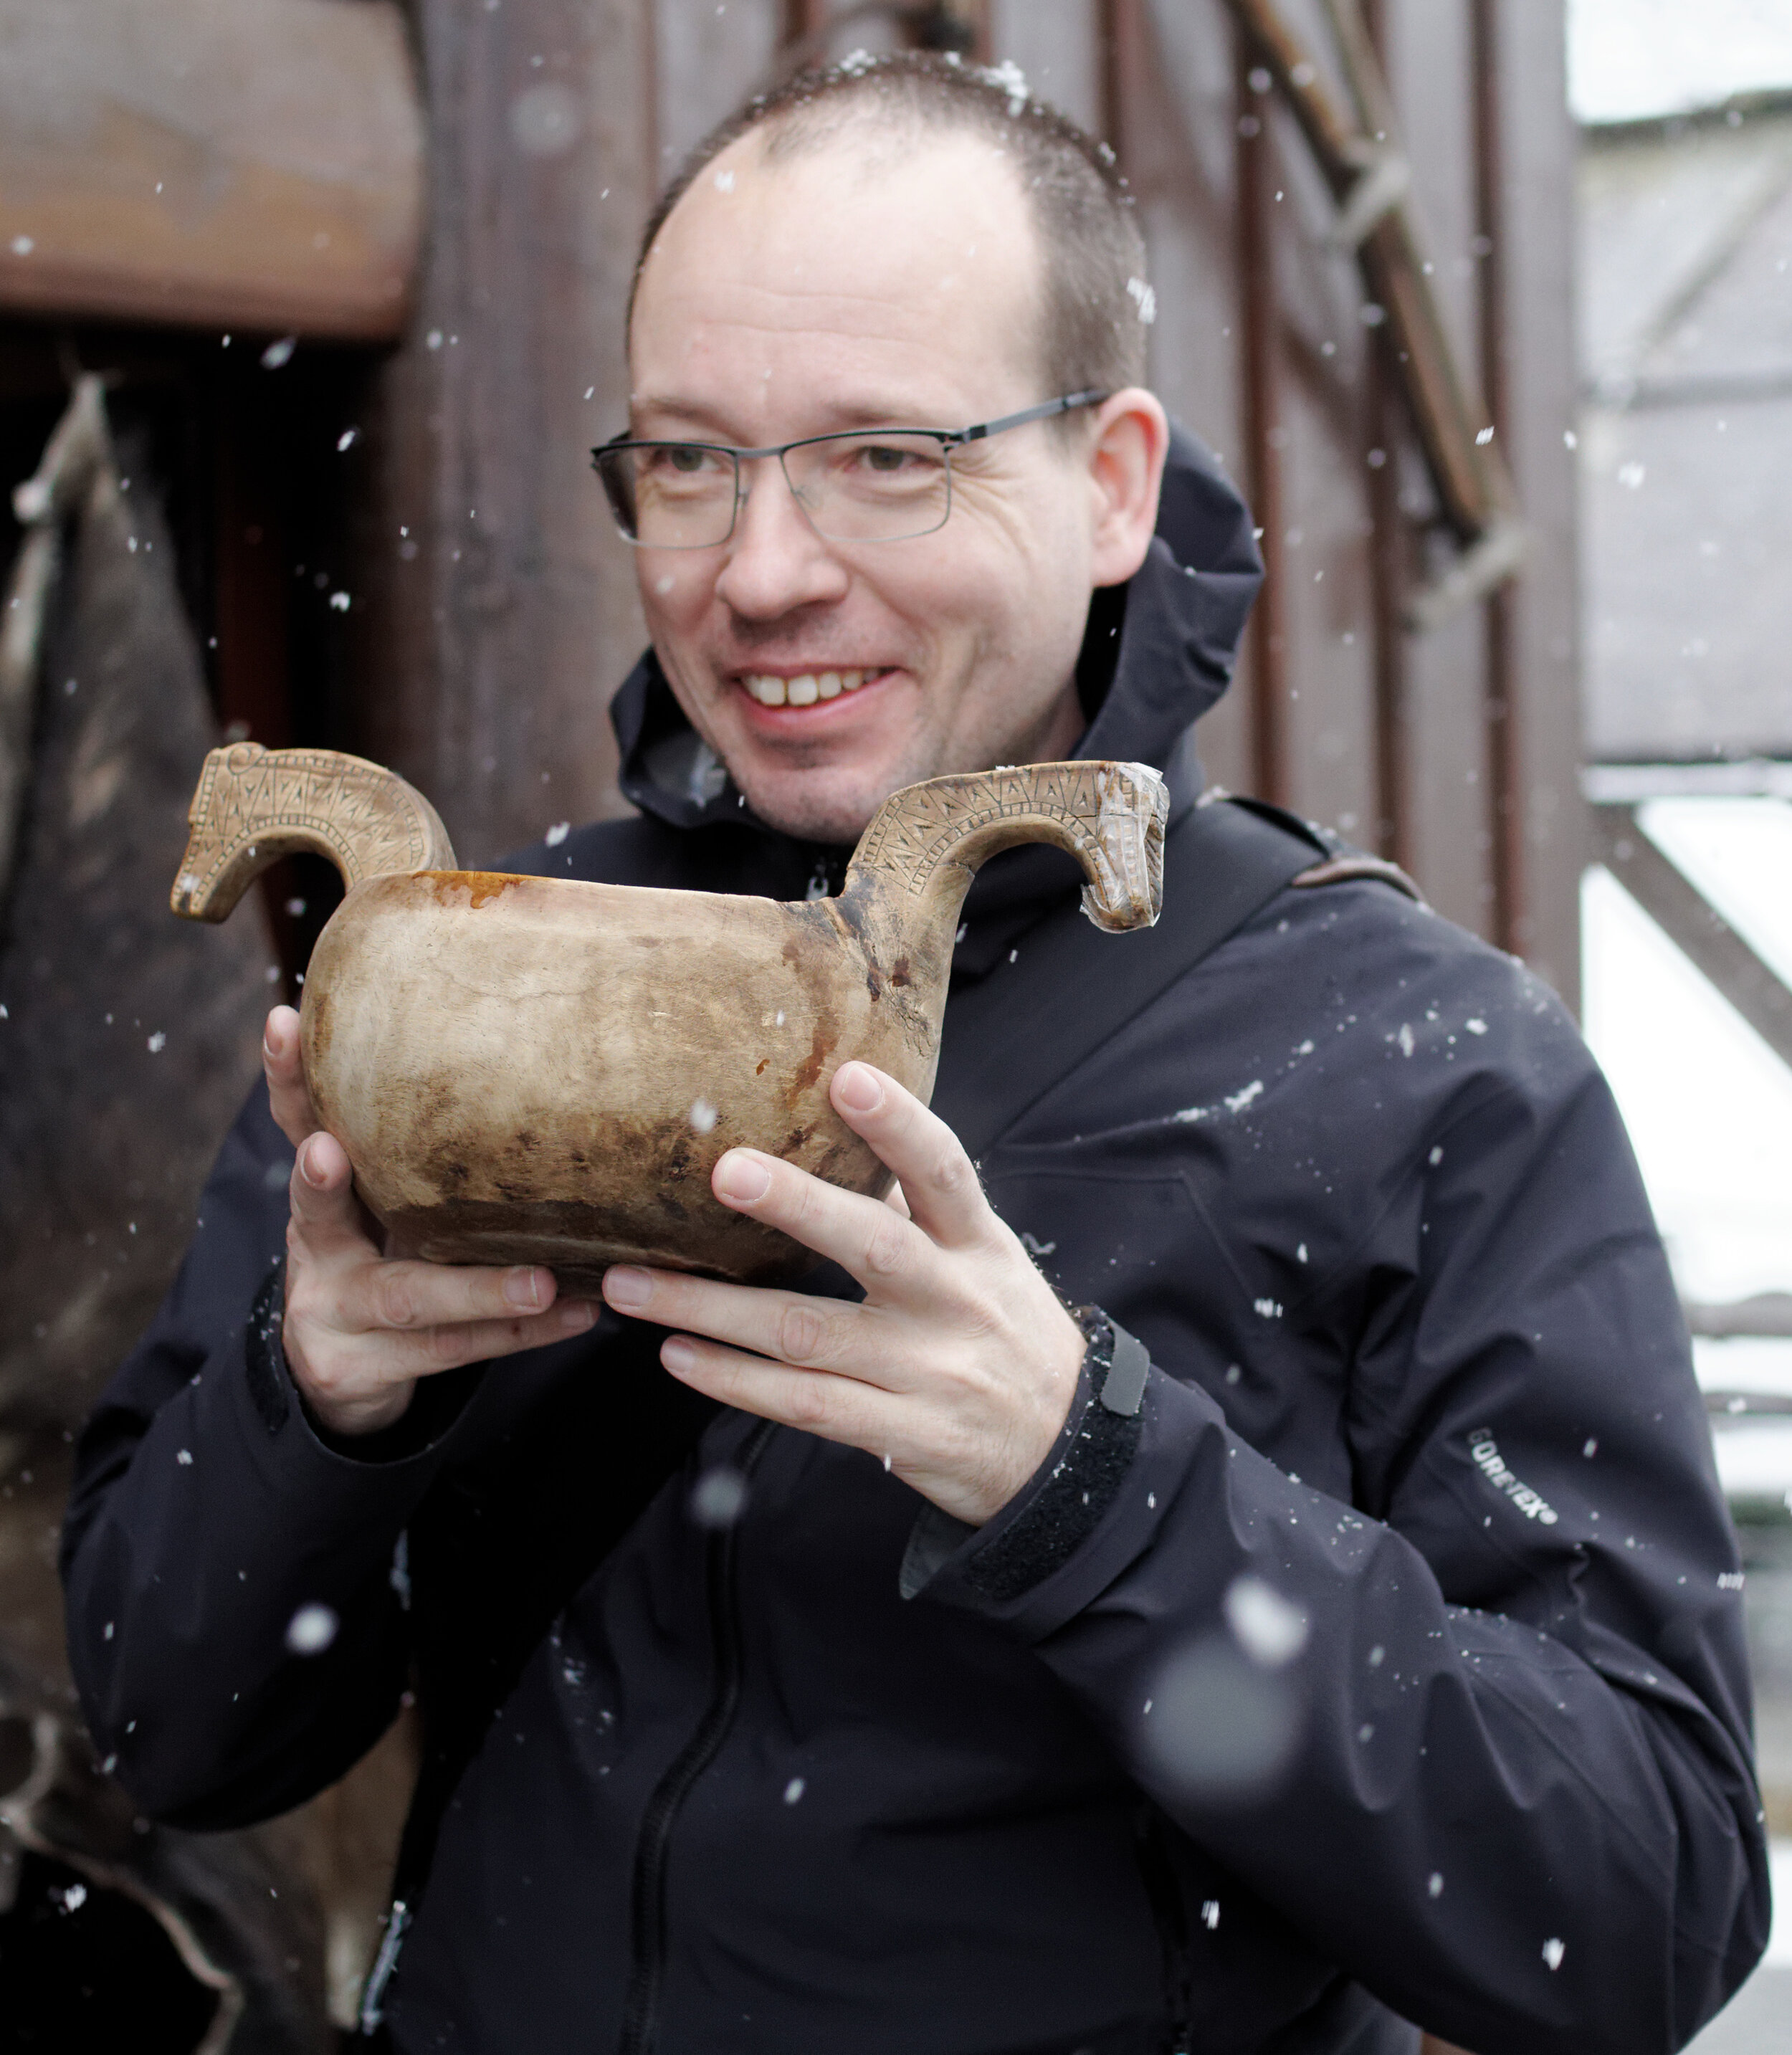
Photo courtesy of Lars Marius Garshol & Brewers Publications
The research you have done for this book is phenomenal. You approach the subject differently than most beer writers have – verifying everything with data and visiting / contacting brewers to get first-hand knowledge of the traditional techniques they employ. If you aren’t able to verify something you have read or heard an anecdote about you make it clear that more research is needed. What drove you to employ this method of research? Was it particularly challenging to confirm everything you wanted to confirm?
I think in part this is just how I am. I always want to have enough data before being certain of something, and always try to distinguish clearly between what I think and what I know. I don’t always succeed, but when doing research on something I’m of course extra careful about it.
The particular way I’ve gone about researching farmhouse ale was basically forced on me by the amount of data. After the 2014 research trip I got hold of the responses to Norwegian Ethnographic Research’s 1950s questionnaire on farmhouse brewing. That was 181 separate answers, all told over 1200 pages. When I started reading those answers the first thing I noticed was that nobody seemed to agree on anything. Some said men were the brewers, others women. Some said the wort was boiled, others not. Some harvested the yeast from the top, others from the bottom. And so on and so forth for pretty much every single detail.
So I decided to start making a database to see if I could capture and make sense of the complexity that way. Partly that was inspired by the maps in Odd Nordland’s book [Brewing and Beer Traditions in Norway], with differently-shaped markers for different practices in different places. It was really the issue of sweet gale (Myrica gale) that got me started seriously, though. There were lots of claims that sweet gale was widely used in farmhouse brewing, but it was not what I saw in interviews and in the questionnaire responses. What I did see was juniper, which seemed to receive much less attention.
So I started wondering: how can I show this in a convincing way? I quickly decided to capture, for every single account, every single herb they said or believed had ever been used in brewing in their area. Then I started making a table of the results, which developed into what’s now table 7.1 in the book, showing herb usage by country. That table gradually became a very convincing distillation of evidence, and so based on that success I basically expanded the method to cover as many aspects of farmhouse brewing as I could. I’m actually still expanding it, and still adding more data. So the data that’s published in the book is just a small fraction of the data, but much of it I’ve only started gathering relatively recently, so it’s still fairly incomplete. I’m hoping to eventually publish a much more complete and detailed overview.
You discuss flavoring ingredients (herbs, hops, juniper, etc.) that are often brought up in writings on historical brewing. Other than juniper branches and sometimes hops, these ingredients mostly seem to take a back seat, with the grains, brewing technique, and yeast really being the primary focus when it comes to flavor. Am I interpreting this correctly? Do you have any tips for people wanting to brew with any of these ingredients while keeping as close to tradition as possible?
I think that’s accurate, yes. The malts particularly tend to take center stage, but to some extent also process, and to some degree also yeast. Originally the malts, of course, were produced from the grain, the by far most important fruit of the farmer’s labour, and something that was literally venerated as holy and carrying the “power of the earth”. And the malt was generally made by the farmer, so it, too, showed his/her skill as a maltster. So there were many reasons why there was so much emphasis on the malt.
Today, I think the first thing you should do is to accept that you’re probably not going to be able to reproduce the flavour exactly. Especially if you haven’t tasted the original beer, which, let’s face it, very few people have. Because you have a different type of brewing equipment, and your ingredients will probably be different, too. So I think it’s good to have some humility about that. But also not to be too fazed about it. Make the best replica you can, be honest about how it might not be exactly the same as the original, then serve it with pride.
You should of course try to get the same ingredients, but there will likely be differences you can’t overcome. American malts taste different than European ones, same with the juniper, and your kveik is probably a single strain rather than the full culture and so on. But try to get as close as you can, then just accept the remaining differences. You’re making a version from another place, anyway.
I would focus on getting the process as close to the original as possible, and particularly on the carbonation. Carbonation is a huge part of the farmhouse ale character, and something that really sets it apart from modern beer. In general the carbonation should be rather like British cask ale: nearly, but not quite, flat. Of course, selling this is going to be hard, but even so you should keep the carbonation as low as is commercially feasible.
But in the end it’s probably never going to be exactly the same. Belgian-style beer brewed in Norway never tastes like Belgian-style beer from Belgium. And maybe that’s good, because the Belgians brew it the Belgian way, so perhaps we don’t need to copy that. For farmhouse ale it’s different: you generally can’t buy farmhouse ale, so the version you make may be the only one people in your area ever taste. That’s why I think it’s important to be honest that it’s not going to be the same. But I think people should brew the beer, anyway. Just be clear about the differences. An inexact copy is better than none.
One thing you are not hesitant to do is to address myths about brewing that have been perpetuated throughout much of the brewing literature. In many cases you reference something that has pretty much become brewing history dogma and noted that you could find no empirical evidence to support these myths. Can you briefly describe one myth that you could find no evidence to support and another that turned out to be pretty much accurate?
One thing that’s struck me when doing research is how much of what has been said and believed about the history of beer that turns out to have no foundation at all, beyond pure speculation. And how much seems to be quite simply made up. The myth that stone beer is German, and that it is made by using the stones to boil the wort is a classic example of a myth that completely falls apart the moment you start looking closely at it. The myth seems to stem from Michael Jackson’s visit to Rauchenfels in Germany, shown in his TV program. Rauchenfels revived stone brewing in 1982, based on how it was done in Austria. Rauchenfels did indeed use the stones to boil the wort.
So it turns out there’s actually zero documentation of stone brewing in Germany, although I’m sure it has existed. And if you look at the documentation from Austria that Rauchenfels based their process on, it actually says the stones were used in the mash. In all of the documentation of actual farmhouse brewing that I’ve found, from Norway, Sweden, Denmark, Finland, Estonia, Lithuania, and Russia you see the same thing: the stones are used in the mash. This, of course, is as should be expected, since the original motivation for using stones was that people couldn’t afford metal kettles.
If you have no kettle, you have two problems: heating the mash, and boiling the wort. And since farmhouse brewers *still* generally don’t boil the wort, it should come as no surprise that they didn’t boil the wort with them. What’s weird is how widespread this myth still is, and how hard it is to get rid of it, even though it completely lacks a foundation, and also basically makes no sense.
As for a myth that turns out to be true: the idea that people had beer as their every-day drink in the Middle Ages has been hotly contested. But now it turns out that some places people actually drank it every day into the 20th century. The ethnographic documentation of it is just overwhelming so there’s basically nothing to debate. So that myth turns out to actually be entirely correct.
In addition to the techniques and ingredients unique to these brews, there is clearly a rich tradition deeply embedded in all aspects of the process, from gathering and preparing ingredients to drinking the final product. You do a wonderful job of painting a picture of what it’s like to brew according to these traditions. In some cases, the approach to these unique ales is akin to mysticism, superstition, even religion. What are your thoughts on how modern brewers can respect these traditions in their own brewing without veering towards cultural appropriation or simply tossing aside the aspects that don’t work for them? Perhaps another way of putting this is, how should modern brewers approach keeping these brewing traditions alive without directly recreating every single aspect of how the brews are traditionally made?
I think it’s perfectly fine for modern brewers to just brew the beers without worrying about the superstition and other attitudes that used to be part of brewing these beers. After all, that’s what most of today’s farmhouse brewers in these regions do, too. Historically, beer was much more than just beer, but that’s almost entirely over now. The farmhouse ales are intensely personal, more so I think than with ordinary homebrew, but not in any religious or superstitious way. I’ve seen brewers play around with things like the yeast scream, and I think that’s perfectly fine. I don’t see a problem with that.

2019 Viking Brewing Tour: A Photo Recap
Follow Mika Laitinen of Brewing Nordic and I as we traverse the Pacific Northwest and drink much beer!
I recently completed an epic 3-week Viking Brewing tour of the Pacific Northwest with Finnish beer writer Mika Laitinen, author of Viking Age Brew: The Craft of Brewing Sahti Farmhouse Ale. Mika also writes about Nordic homebrewing at his website brewingnordic.com. A full travelogue of our experiences would be lengthy, so I’ve chosen to do a photo recap instead with some brief text explaining some of the pictures (okay, so it still ended up being a bit lengthy). We delivered many brewing presentations, tasted many beers, met with several folks in the brewing industry and had an amazing experience overall. Much of what I learned and the contacts I made will surely work its way into my future work. If you haven’t checked out Mika’s book or website yet, I encourage you to do so. He has a very thorough, informative writing style. If you’re a brewer, there is lots of information and some recipes on brewing beer Nordic-style. Whether you’re a brewer or not, the historical and cultural discussions are fascinating in their own right. So without further ado, let’s head to Seattle, Portland and wherever else the winds may take us! Be sure to check out Mika’s website for a recap of his version of the trip, which will likely have more details about the breweries we visited.
Seattle’s Fremont District

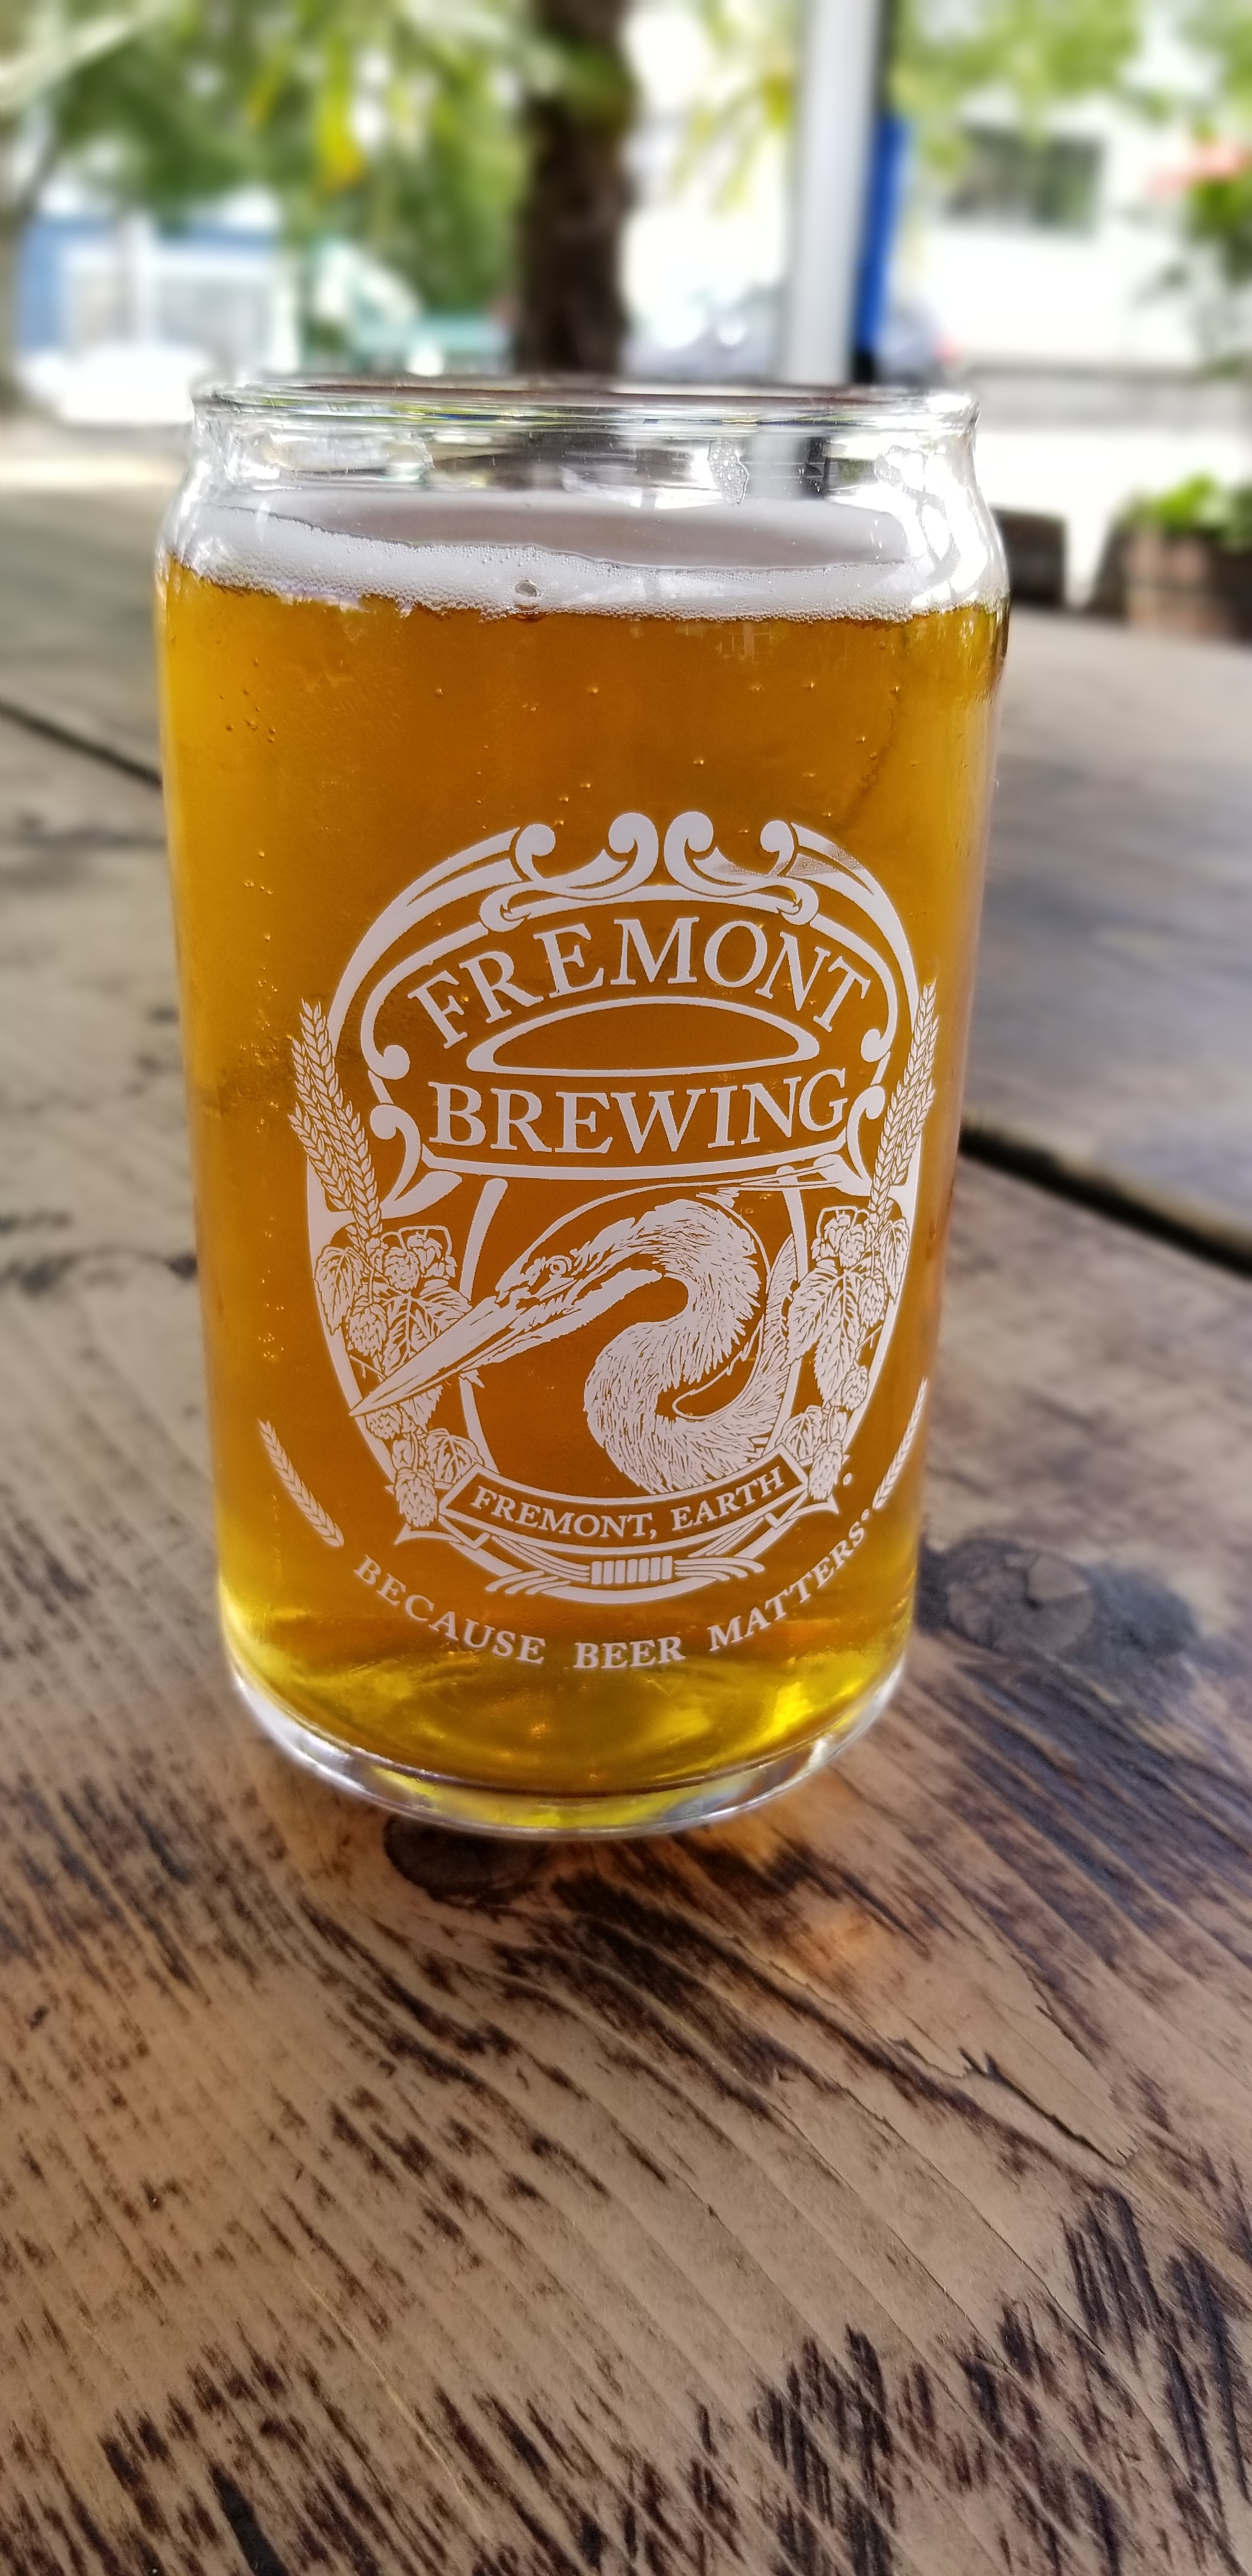
When we first arrived in Seattle, I had to introduce my new Finnish friend to the Fremont troll under the bridge. Check out its story here. Then of course we had to grab a beer at the excellent Fremont Brewing Company.
National Nordic Museum
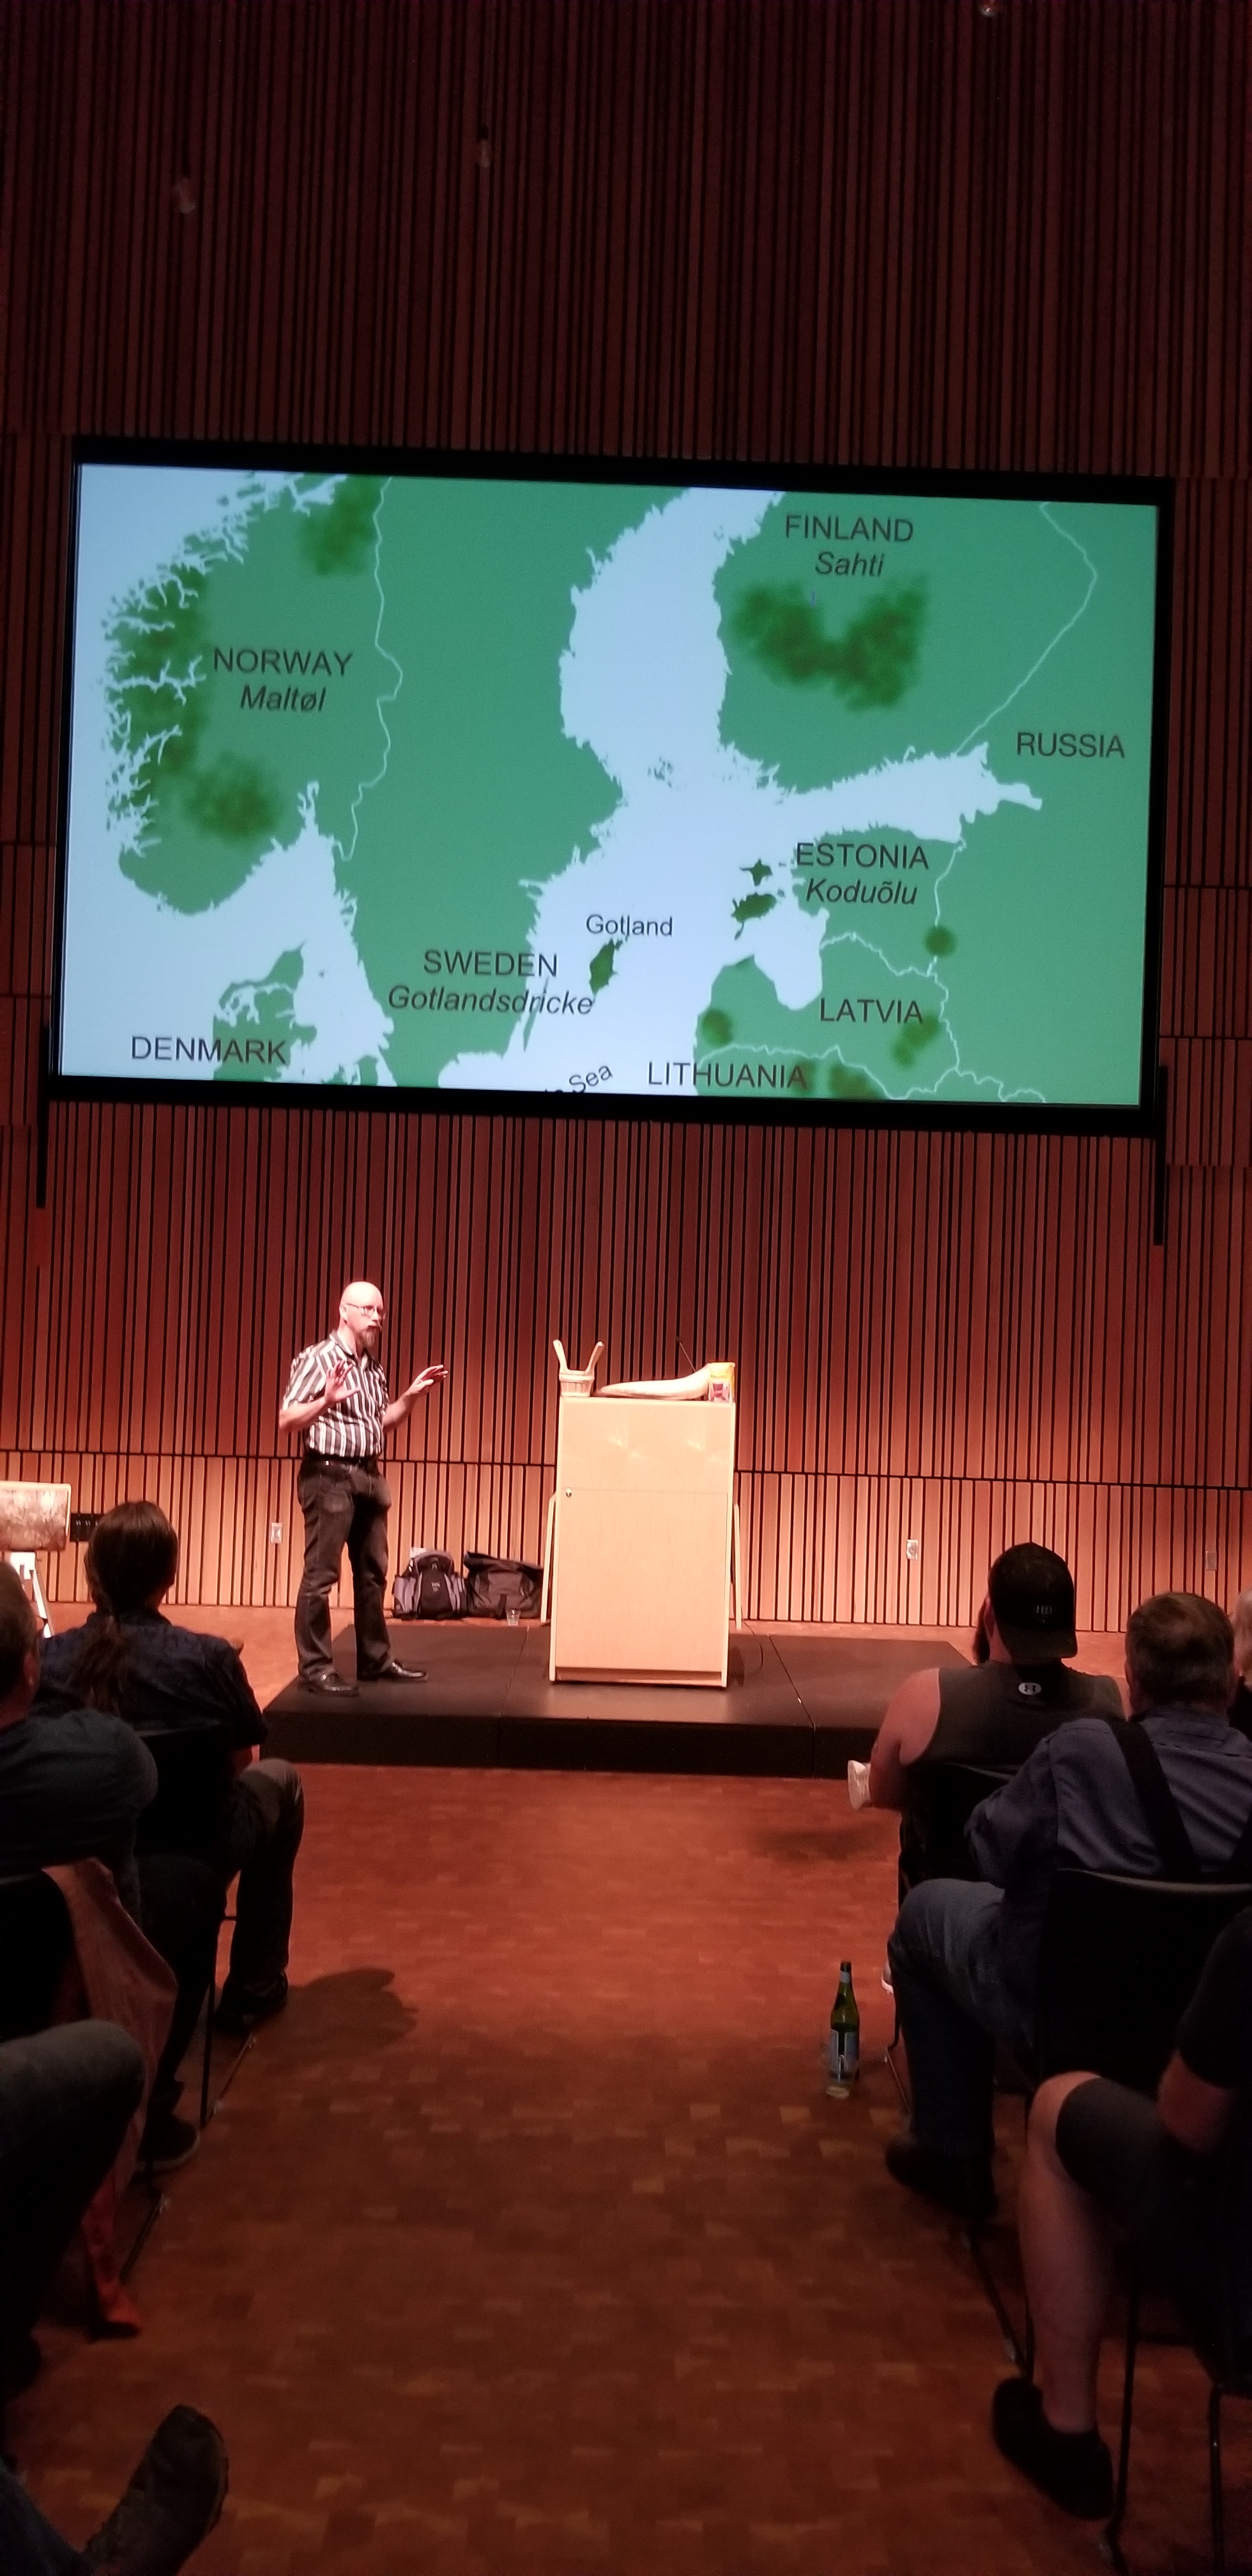

Photo courtesy of Mika Laitinen

Our first event was held at the National Nordic Museum in the Ballard district of Seattle. Mika and I discussed Nordic and historical brewing. We also sampled some Nordic ale brewed by a local homebrewer. Some of us dared to drink from a communal Finnish drinking cup called a haarikka. Made from juniper, it has a lovely smell reminiscent of cedar and completely changes the nature of the beer drank from it. They're usually a bit bigger and are meant to be passed around at feasts for everyone to drink from. Thanks to Mika for sending one home with me!
Mecca Grade Estate Malt


Next we headed to Bend, Oregon to brew up a batch of Finnish sahti-inspired ale using local Oregonian ingredients in collaboration with Ale Apothecary. The malt for the brew came from Mecca Grade Estate Malt in nearby Madras. The team at Mecca Grade graciously showed us around their incredibly innovative malting operation. They are seriously dedicated to making a quality product using only grains that are grown within a 2-mile radius of their malt house. If you live in the Pacific Northwest, check out what your favorite craft brewery or artisinal distillery uses for malt. There’s a good chance it came from Mecca Grade.
Brewing at Ale Apothecary

Photo courtesy of Mika Laitinen
This is me clipping off the Oregonian fir needles that went into the brew.

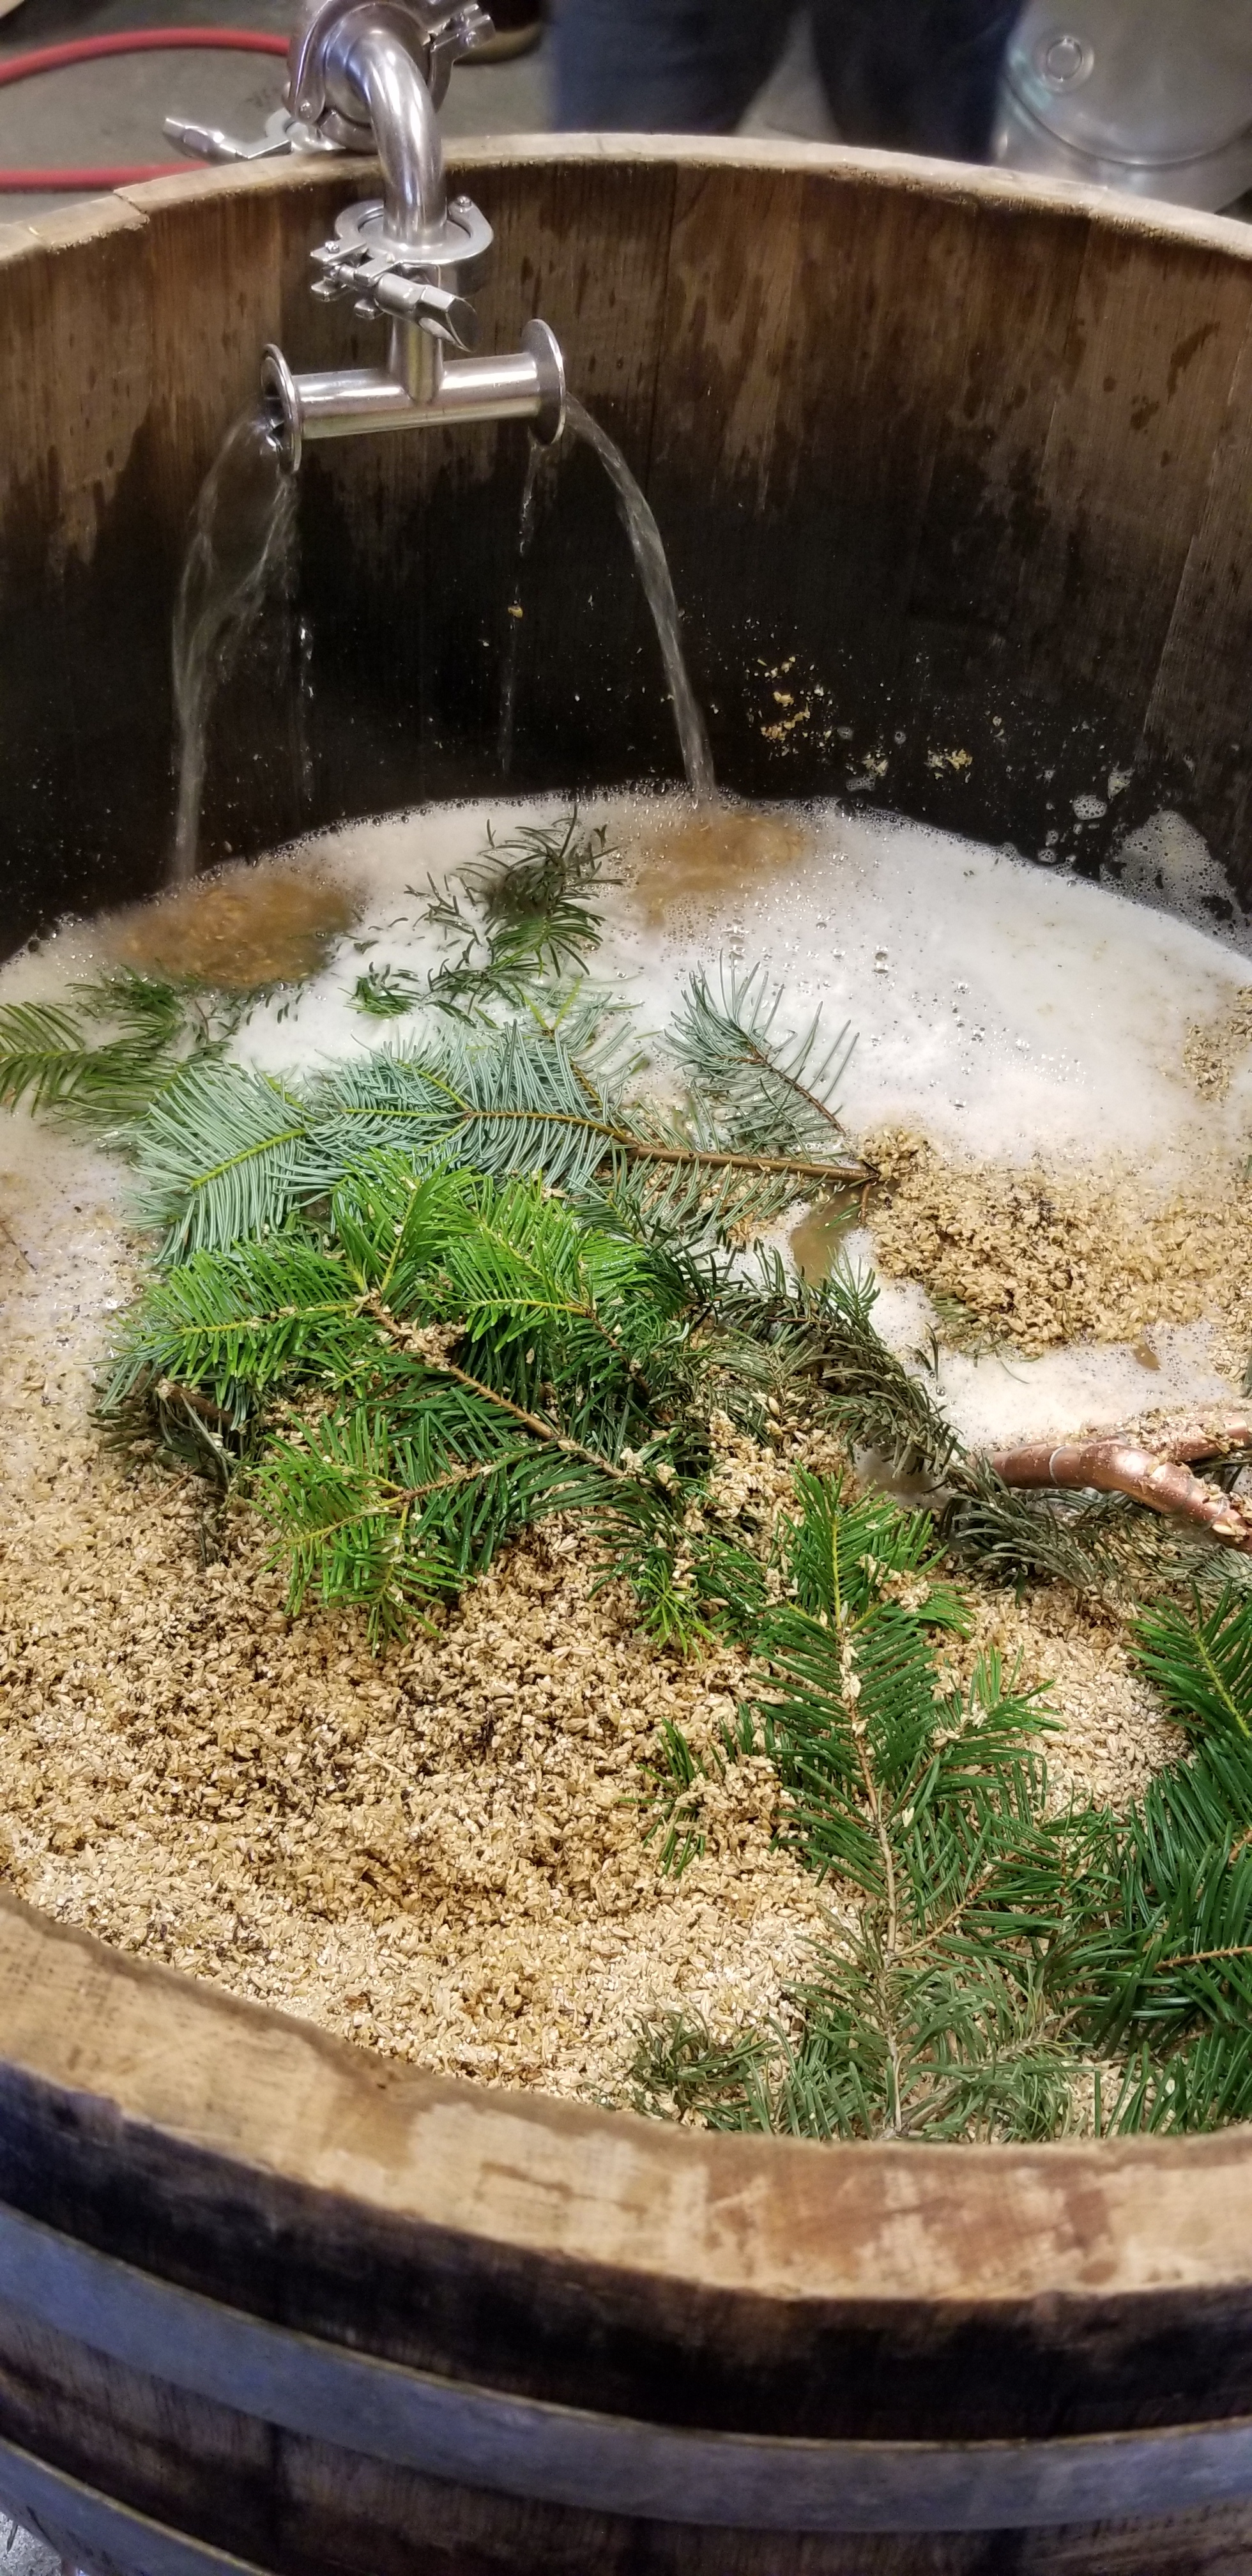
Mecca Grade Estate’s Seth Klann poses with some Kentucky Bluegrass hay grown on his family farm that went into the brew. (Hay and straw were traditionally used to line mash tons as a grain filter.)
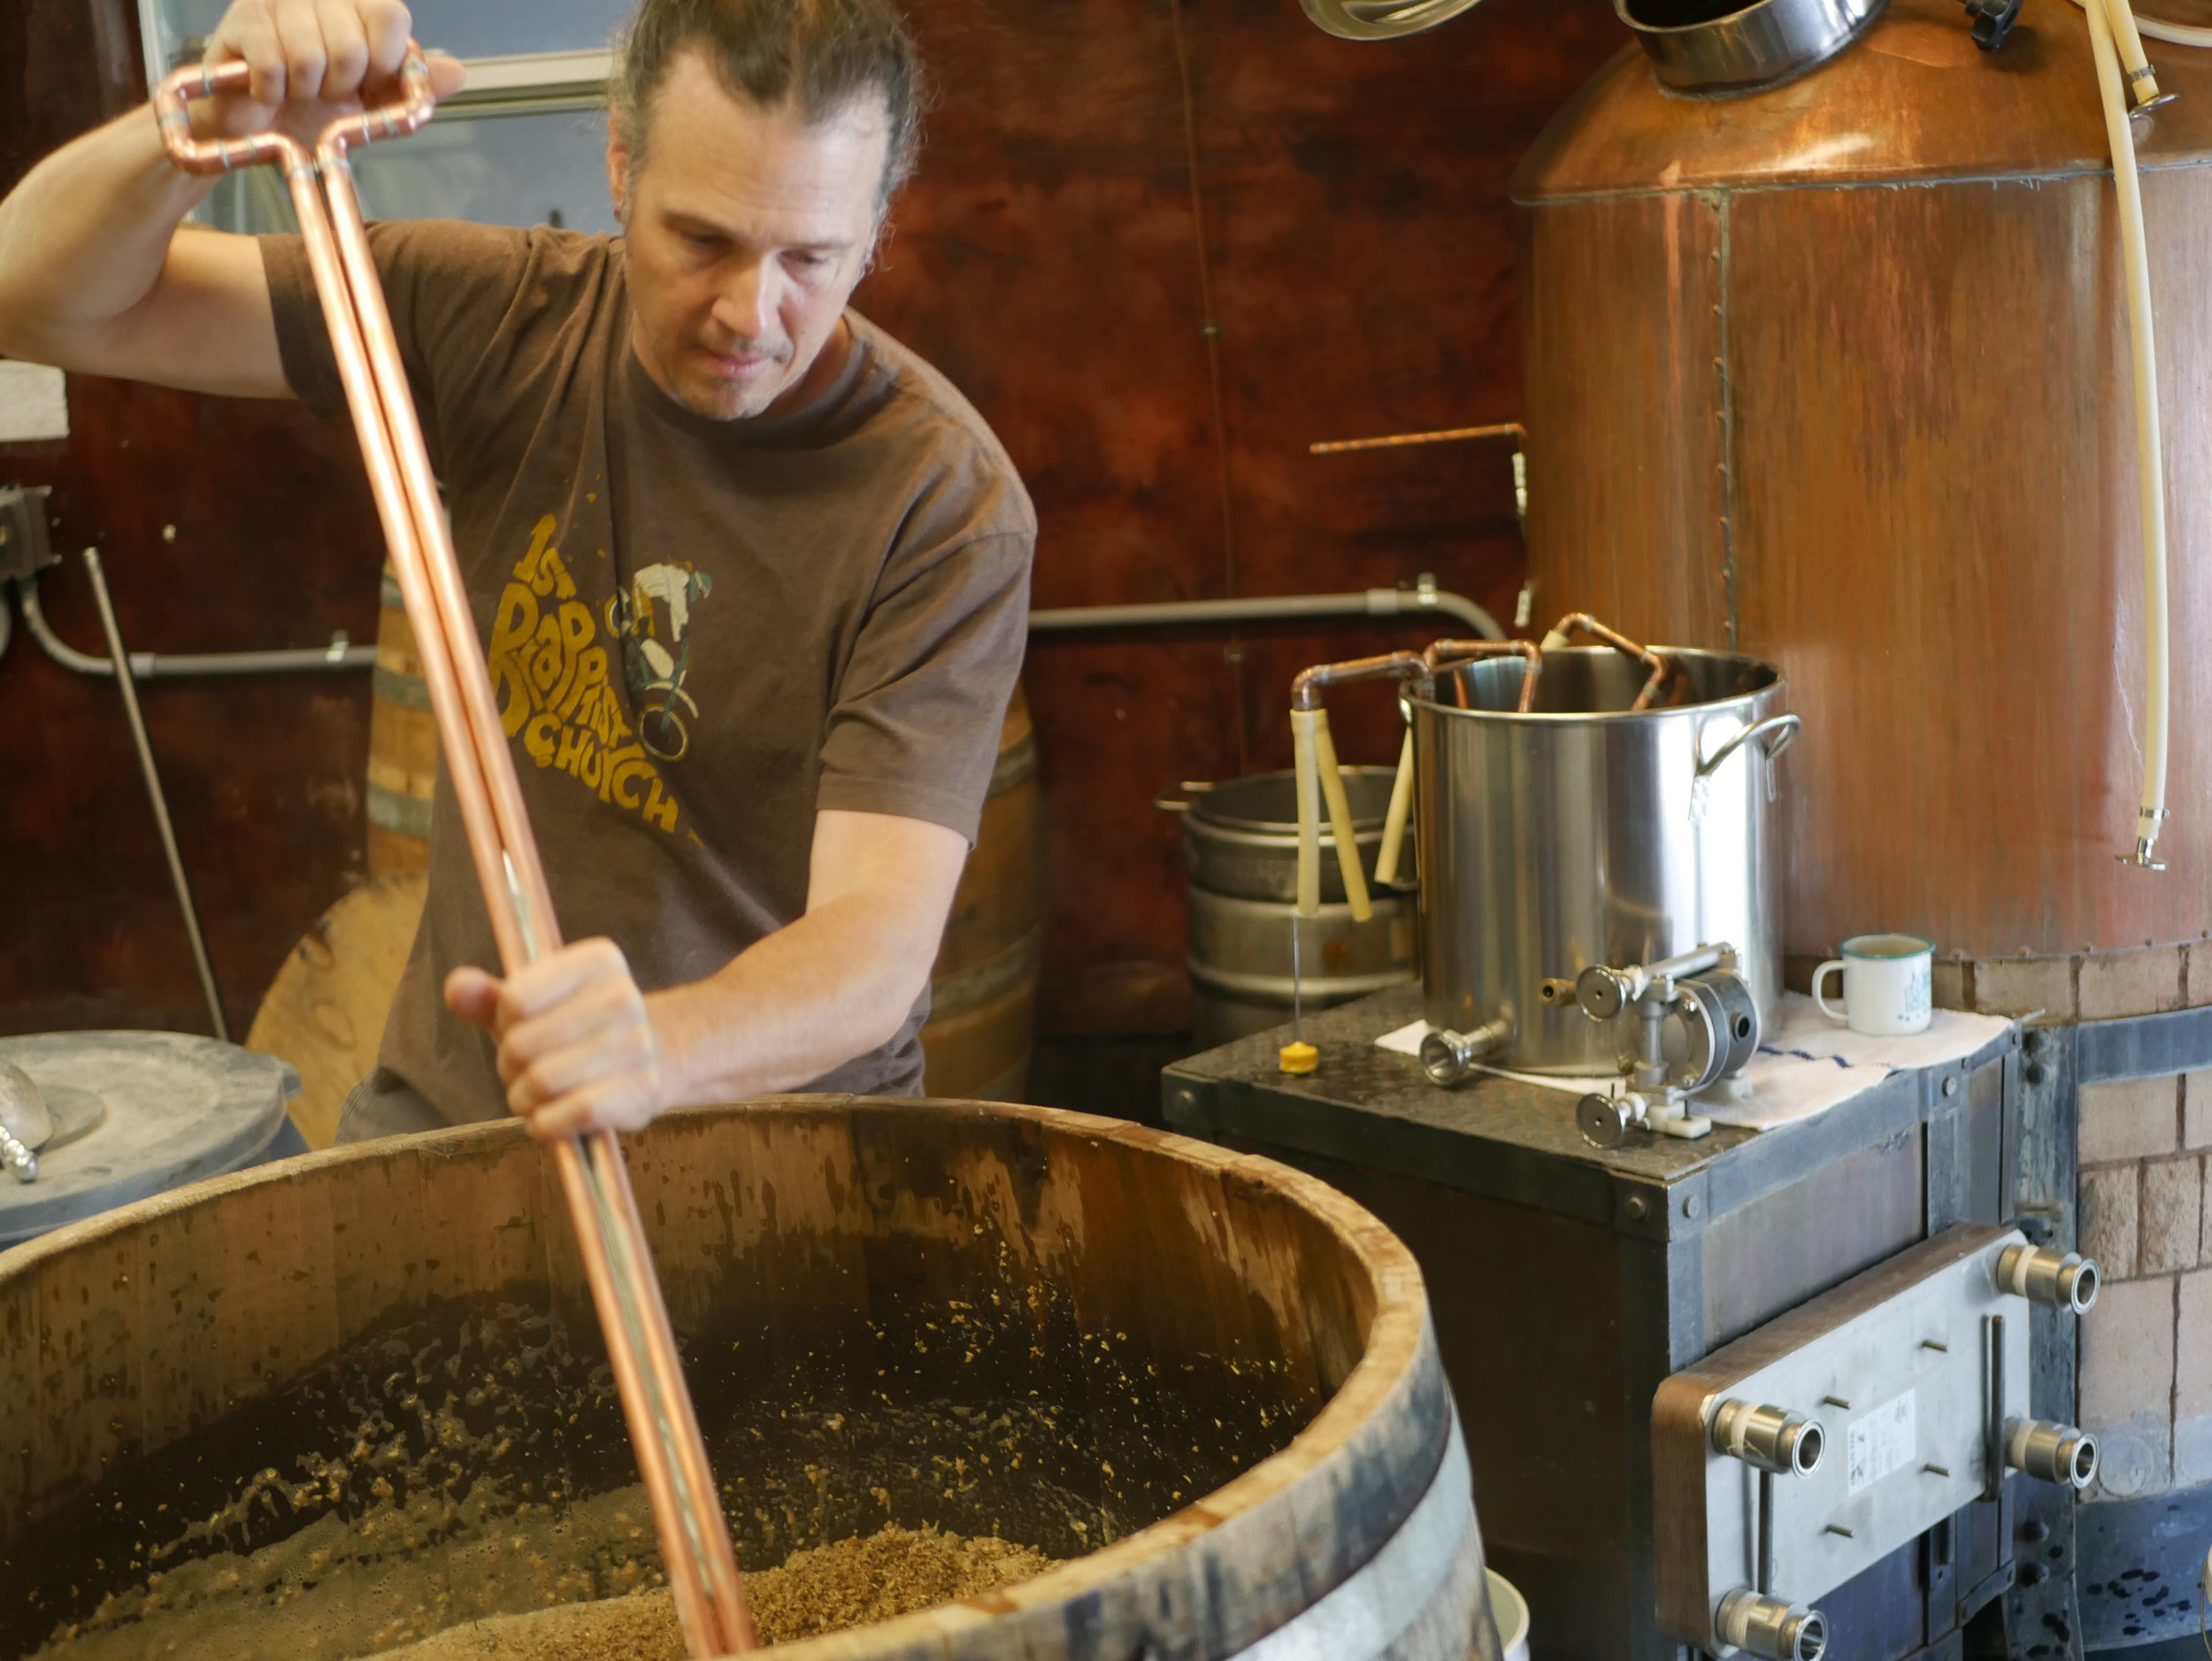
Photo courtesy of Mika Laitinen
Paul Arny: the man, the myth and the legend behind Ale Apothecary’s unique wild farmhouse ales.

Photo courtesy of Taproom Manager Kirsten Schopen
Before leaving Bend we of course had to visit Ale Apothecary’s tasting room. I can say that it was a unique experience. Several of the brews tasted like walking through a forest, with subtle-to-strong flavors of pine, fir and oak. As someone who doesn’t really have the palate for sour or tart brews, I found some to be a bit challenging, but it was an enjoyable tasting experience overall. I can certainly tell that a lot of love, innovation and creativity went into every brew. Mika certainly enjoyed himself…
Portland Distillery, Creamery & Brewery Visits


After leaving Bend we headed to Portland for a week of beer tasting, workshops and general shenanigans. Mika and I also visited various fermentation-related establishments to conduct interviews for magazine articles we’re working on. One of our first stops was Stone Barn Brandyworks in Portland’s Distillery Row. These folks are making some really unique European-style brandies and whiskies using seasonal and local fruits and grains. You probably won’t find their products outside of Oregon, Washington and Japan (yes, those are their most popular markets) but I highly recommend stopping by their booth at a Portland Farmers Market to give them a try!

Just so you don’t think it’s all about booze with me, I am interested in other fermentation products! I was lucky enough to get a personalized tour of the creamery where Portland Creamery’s handcrafted chevre goat cheese is produced. Check out the brand new quarterly magazine Fermentation and you should be seeing my article on them eventually!

It was a true pleasure to get a personalized tour of Portland’s Hair of the Dog Brewing Company from head brewer and founder Alan Sprints himself. These folks create some really unique brews and are one of the first American breweries to experiment with barrel-aged, high ABV, bottle-conditioned beers. Great beers and Alan couldn’t have been more congenial and patient with us beer geeks… ergh, writers. Mika had done his research and took us to several more breweries. Keep an eye on his website for a detailed rundown!
Oregon Brewers Festival

Photo courtesy of Mika Laitinen

Photo courtesy of Mika Laitinen

Photo courtesy of Mika Laitinen
We got to sample many fine beers and even meet the world-famous Unipiper at the Oregon Brewers Festival! All of the beers were brewed special for the festival and must have been heavily vetted, because even the weird sounding ones (Hipster Viking IPA anyone?!) were tolerable to quite good.
Belmont Station Tasting


We were a tad nervous (okay, and a bit excited) for the premier of our Finnish-Oregonian-Kentuckian Sahti at Belmont Station in Portland (often touted as one of the best beer bars in America), but were met with much enthusiasm. Understandable, because it was damn tasty! Grainy, thick, boozy, but highly drinkable. Notes of citrus and a bit of a grassy / hay (in a good way) note on the finish from the Kentucky Bluegrass. A solid 4 out of 5 on Untappd - not bad!
Rogue Brewery Retirement Party

Photo courtesy of Mika Laitinen
As an unexpected bonus, we got to attend the retirement party of John Maier, head brewer and founder of Rogue Ales! I picked up a bottle of barley wine that was brewed in 1999, the year I started homebrewing and had him sign it. What an honor that was. I tried to rub beards with him just a bit to catch some of that legendary beard beer yeast. He told me that yeast was a bear to work with. Really difficult to get it to attenuate properly. Here’s to trying my own attempt at a beard beer!
The Oregon Coast



On the way back to Seattle, we decided to head to the Oregon coast so Mika could get his first glimpse of the Pacific Ocean. Cannon Beach was as beautiful and touristy as ever. We stopped at a couple of breweries in Astoria, including Buoy Beer Company, which had some fine traditional American ales.
The Book Larder


Once we got back to Seattle I did an author talk for Brew Beer Like a Yeti at one of my favorite book stores, Book Larder. This was my second time speaking there (the first time was for the release of Make Mead Like a Viking. If you like food, drinks and books, how could you go wrong here?
The Skal Beer Hall


Our final event was at the amazing Skal Beer Hall in the Ballard region of Seattle, an area that has deep Scandinavian heritage. The food, drink and atmosphere are everything one could hope for in a modern-day mead hall. It was an ideal venue for Mika and I to close out our tour. After the event, much imbibing and camaraderie ensued, as folks we had met earlier in our trip returned to show their support, and to have some good old-fashioned fun. We even managed to get in a bit of gameplay with the Viking Nerds game Don’t Fall in the Mead Hall. I’ll close this out with a photo taken with Mika’s camera that demonstrates the spirit of the evening. Thanks to the good folks from Matchless Brewing and Mirage Brewing for getting wacky and geeking out about beer with us. Skal to all!

(I have no idea what we were doing here. An Instagram user stated that we look like the Spice Girls of the Viking Age…)

2019 Viking Yeti Beer Tour
I’m excited to be headed to the UK! I’ve got several events planned in the short time I’ll be there. First, I’ll be heading to Manchester in northern England for a brew day and book signing at Beer Nouveau. England’s smallest commercial brewery, Beer Nouveau is my kind of brewery. They eschew modern conventions and look to recreate traditional “heritage” beer styles.
Yes, I’m lousy at regular blog posts and newsletters. I could chalk it up to being super busy but that’s only a partial excuse. Try as I might to focus on digital output I simply spend more of my time writing for print publications…and working on my old, rundown house…and raising my children…and escaping it all from time to time for a hike or bike ride. I’ve also been traveling a lot, and have some big travel plans for this spring and summer. What follows is a summary of my travel and event itinerary for spring and summer 2019. For any of these events, if you’re not in the area but know someone who may be interested, please feel free to forward this to them.
Berea Book Fest & Mead Workshop
This coming Saturday (April 13) I’ll be at the Berea Book Fest in Berea, Kentucky. I’ll be signing and selling my books, and will be participating in a "Be Your Own Publicist" panel with Jenean McBrearty, Jereme Zimmerman and Ana Maria Selvaggio.

London & Manchester, England
I’m excited to be headed to the UK! I’ve got several events planned in the short time I’ll be there. First, I’ll be heading to Manchester in northern England for a brew day and book signing at Beer Nouveau. Beer Nouveau is my kind of brewery. They eschew modern conventions and look to recreate traditional “heritage” beer styles. We’ll be brewing a batch of beer and I’ll be discussing and signing my books on Sunday, April 21, which it turns out is Easter but oh well! Joining us will be Manchester Homebrew. I’m looking forward to tasting Beer Nouveau’s brews and checking out Manchester’s pub scene. Steve Dunkley, the embodiment of Beer Nouveau (founder, owner, brewer, server, etc., etc.) has been great to work with in creating a collaborative a brew that we will be serving at the main event and primary reason for my trip to England, Pebblefest, in London’s Flat Iron Square on Saturday, April 27. I’ll be talking beer brewing, and have been busy collaborating with Beer Nouveau and Toast Ale on a collaborative brew, a traditional English bitter based on an 18th century recipe, that will be served at the fest.

Beer Nouveau’s brewery and tap room.

Toast Ale: made with…toast!

Check me out if you’re in London!
I’m honored to be working with Toast Ale, partly because they’re great people, but also because they’re a highly sustainability-focused organization. Each of their beers is brewed with unsold loaves of bread from bakeries and unused crusts from sandwich makers. The only other ingredients are grains, hops, yeast and water. The bread replaces 1/3 of the grain bill, which is important, because nearly 24 million slices of bread are wasted every day in the UK alone. The excess bread doesn’t just have to go into beer though. To learn more about what can be done to stop food waste, check out the Real Bread Campaign. They’ve also expanded into the US, so if you’re in the New York area, you might want to check out Toast Ale USA.
The week between my Beer Noveau and Pebblefest events I’ll be cavorting about London, having a bit of fun while visiting and speaking at some breweries and pubs. This includes a talk on Wednesday, April 21st on honey beer at Hiver, who use raw honey from London urban beekeepers in all of their beers. During the day Thursday, I’ll be visiting the BBQ restaurant and brewery Pitt Cue to brew up a batch of smoked ale that they will showcase on their menu for a month or so after I head home. I’m excited to be doing this, particularly as I’m a fan of both BBQ and smoked ales. My friend Sara Bir (the sausagetarian), author of The Fruit Forager’s Companion and Tasting Ohio, will also be working with the chef on some companion dishes featuring foraged ingredients. On Thursday evening, April 22nd, I’ll be doing a tap takeover showcasing the Pebblefest beer at The Dodo Micro Pub, which I’m told is a quintessentially British quirky little pub. Just my kind of place. Saturday is the Pebblefest, which I’m really excited about. Advertised as “London's most stylish eco-festival,“ with debates, talks and workshops on subjects such as sustainable food and drink, ethical fashion, plastic-free living and zero-waste skincare. Sunday, I’ll be visiting with the North London Beekeepers for a mead workshop. Then it’s a bit of time for getting a last look at London and heading back to Kentucky.
Herbalism and Brewing in Colorado
The next leg of my spring / summer tour will be in the mountains of Durango, Colorado. I’ll be returning to the Good Medicine Confluence, which I taught at the first time in May 2018. This year’s event is held May 15-19 at Ft. Lewis College, which sits on a plateau with a breathtaking view of the town of Durango and the surrounding San Juan Mountains. Last year, this event re-invigorated me for the year to come, not just because of the intensive classes I both attended and taught, but for the like-minded crowd, old and new friends, and just the muscle burn and lung workout from walking around a town sitting at an elevation of more than 6,000 feet above sea level. I’ll be teaching about mead, small-scale, wild and herbal beer brewing, and making natural sodas while there. Check out the schedule here. As of writing this blog, I still have ONE TICKET for sale for the full event at a $100 discount of $300. You can place a secure order through my website, or contact me to discuss other options, such as PayPal.
Nordic Brewing in the Pacific Northwest
After Colorado, I’ll be home for a couple of months getting my Berea, Kentucky garden started and working on some homesteading and house-repair projects. Then, in early July I’ll head to Bowling Green, Kentucky for the Heartland Apicultural Society conference at Western Kentucky University from July 8-10, where I’ll be talking mead making for beekeepers. Then, I’ll be teaching a weekend of mead and vegetable fermentation workshops for the Berea Festival of Learnshops July 13 and 14. Sign up soon to take a hands-on workshop where you’ll be making and bringing home your own fermented goodies!

After that I’m stoked to return to my former home of nearly eight years, the US Pacific Northwest. Plans are finalized for several events and more are in the works. For much of the trip I’ll be joining my friend and fellow author from Finland, Mika Laitinen, who runs a website that is one of my favorite resources for Nordic beer brewing. He has also written a book, Viking Age Brew. We’ll be starting our tour with a joint presentation at the Nordic Museum in Seattle, Washington. Then we’ll be traveling to Bend, Oregon to brew a batch of traditional Finnish sahti with the Ale Apothecary using a Finnish lauter tun called a kuurna. Click here for a description of what that’s all about. Sahti is traditionally drank very young, while still fermenting. The yeast we’ll be using, a Norwegian farmhouse yeast called kveik, ferments fast, making the beer drinkable within a week. We plan on serving it at an event at a bar in Portland but haven’t finalized plans on that yet. While we’re in Portland we hope to attend the Oregon Brewers Festival. We don’t have any official plans for presenting there yet but plans are afoot.


Then, it’s back to Seattle, where we’ll be doing another joint presentation at the brand new Skål Beer Hall in Seattle and I’ll be talking about my book Brew Beer Like a Yeti at the Book Larder in Fremont, a quirky Seattle neighborhood I used to live near that also happens to be the center of the universe and even has a troll lurking under a bridge. Finally, after a bit of time playing along the Oregon coast I’ll close out my trip with an event I’ve been doing for a few years now, the Mother Earth News Fair in Albany, Oregon from August 3-4. Then it’s back to Kentucky to tend to the weeds that will inevitably have taken over my garden.

Stay tuned for my fall schedule. Some big events are in the works but I’m not ready to let the cat out of the bag yet. Until then, Skål!
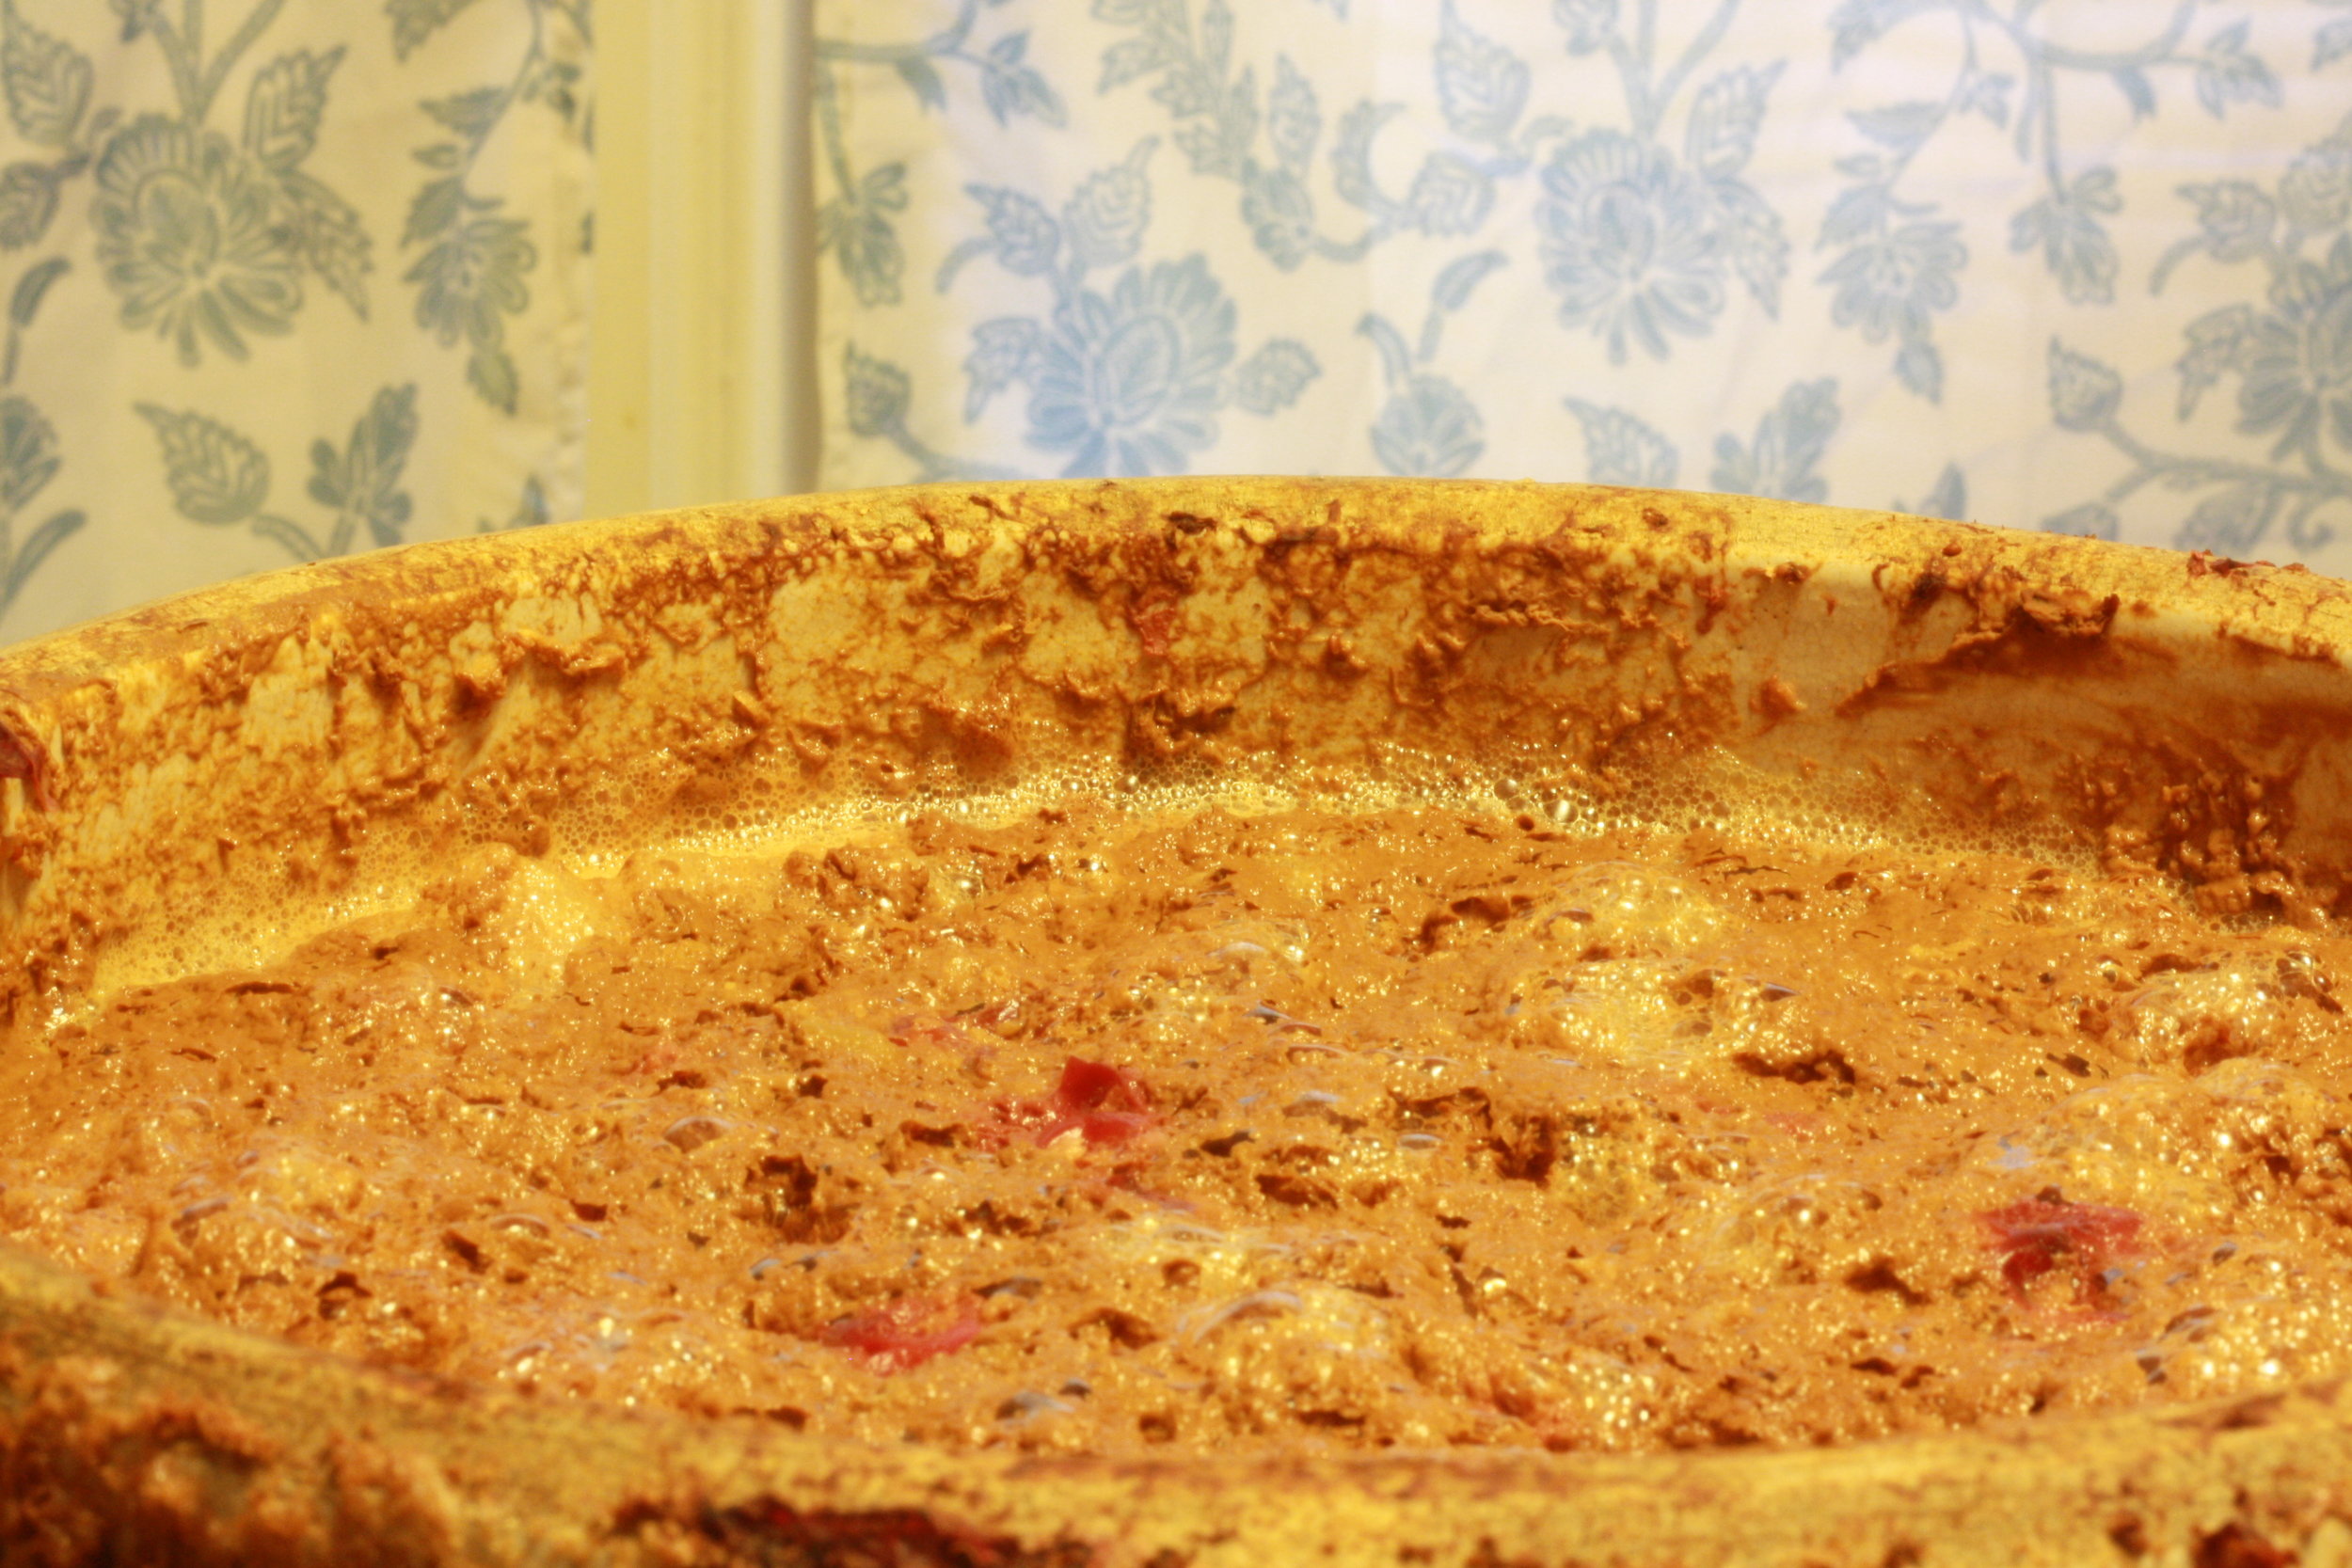
Wild Yeast is Your Friend
A troubleshooting guide to fermenting mead with wild yeast.
A troubleshooting guide to fermenting mead with wild yeast
Often I will start a wild-fermented mead or wine outside near my garden and fruit trees, as this is where the wild yeast is most abundant.
Note: This has been updated with some minor clarifications as of July 9, 2020.
I’ve been writing and speaking about mead and fermentation for several years now, and now that my book Make Mead Like a Viking has been out for a year (it was published in November 2015), I’ve received a fair share of questions pertaining to the finer details of mead making and in particular, how to troubleshoot and be sure one is doing everything “right.” As a disclaimer, there is no black and white or wrong and right when it comes to mead making. There are too many factors to consider pertaining to things such as one’s reason for making mead, one’s personal taste, and how much time and effort one may want to commit to mead-making. In the following guide, I’ll attempt to cover as many bases as possible and am happy to answer questions (time permitting).
But first, a word about the title of this guide: Wild Yeast is Your Friend. While I am focusing on issues that may come up in making mead via traditional, natural, and organic practices, many of the topics will also pertain to mead making using commercial yeasts, sanitizers, and additives. I am not completely against the latter items per se, but simply want to make mead the way I live my life, in as holistic a manner as possible. In other words, this isn’t an “us versus them” discussion. For the most part I find mead makers to be a pretty friendly bunch. We (mostly) get along quite nicely. I do from time to time come across comments in online forums about wild yeast in which terms like “bad idea,” “dangerous,” “poison,” or even “the dark arts” are used. Yes, seriously. I also sometimes have people approach me at workshops or online worried about the potential dangers of using wild yeast.

Image courtesy of Pixabay.
Folks, people have been making alcoholic and non-alcoholic ferments from wild yeast since the beginning of time. Every commercial yeast strain started out as a captured wild yeast, and was eventually tamed in the laboratory which, to be fair, has provided us with some lovely, predictable yeast strains. Even today, wild yeast is captured and cultivated in labs for the production of mead, beer and spirits. Yes, things can go wrong, but that’s no reason not to learn how to coax in (capture is such an ugly word), save, and lovingly feed our own wild yeast. For my 2015 Mother Earth News Fair presentation on mead in Topeka, Kansas, I decided to title one of my PowerPoint slides “Wild Yeast is Your Friend” to launch my discussion on wild yeast. It must have struck a chord, since I had an attendee of the fair ask me to write just that in his copy of my book when I signed it. At that point, I knew that I would eventually have to write something with that title. So, without further ado, here are some tips on how to get along with your new friends.
A primer on starting and maintaining a wild fermentation
Wild fermentation really is a simple process. The key is to not overthink it. That being said, I’ve been doing it for a while and sometimes forget that people starting out may have concerns or experience problems that I don’t think to address. If you don’t have my book Make Mead Like a Viking, a good introduction to wild fermentation can be found in some of my articles on the subject, which you can find at my website portfolio, among other places. I’m certainly not the only one who has written on the subject, though. Sandor Katz, who I learned from, has written some books that are required reading for wild fermentation enthusiasts, Wild Fermentation (which was revised, expanded and reprinted in August 2016) and the greatly expanded follow-up The Art of Fermentation. You can find a summary of the simplicity of his process for making wild-fermented country wine at this link. Some key points if you’re having trouble getting a strong wild ferment going are:
Stir several times a day. As noted in the above (milkwood.net) link, “Every time you stir you are doing multiple things; drowning any moulds [molds for us American English speakers] that might be thinking about starting to grow on the fruit at the surface, adding air to the brew, and agitating the overall ferment. In a good way.” When stirring, stir for a couple of minutes at a time. Get a vigorous whirlpool going and then reverse direction. Keep in mind that this will likely produce bubbles. This does not mean you have achieved fermentation. When you stop stirring and hear fizzing, usually accompanied by a bit (sometimes a lot) of foam, you’re there!
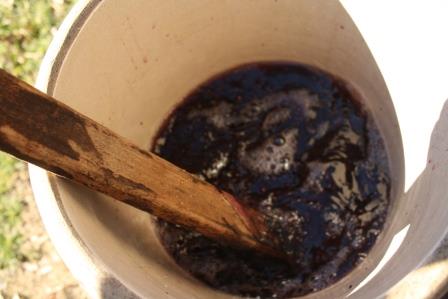
Stirring a recently started elderberry mead (or melomel, i.e., fruit mead).
Add ingredients that contain wild yeast. For mead, you should use raw, unfiltered honey, which houses wild yeast colonies of its own. However, it needs additional yeast and nutrients to ensure a strong ferment. If you’re not making a fruit mead from wild or organic (i.e., unsprayed) fruit, always add a few organic raisins or other dried or fresh fruits. I add 10-12 raisins for a 1-gallon batch and 20-25 (or just a small handful) to a 5-gallon batch. You can add all manner of organic fruit, edible flower petals and garden-grown or wild-foraged botanicals in small amounts to achieve the same affect. There are certainly some detractors to the dried fruit as nutrients concept, but I know plenty of mead makers who do it. It works, so why not? As an example, my friend Amber Shehan has written a book based on her popular blog Pixie’s Pocket. In the section on yeast nutrient, she says “Yeast consumes sugar to produce delicious alcohol, but sometimes sugar isn’t enough to get the job done. Our fungi friends need more food, in the form of yeast nutrient. You can buy bottles of yeast nutrient from a homebrew shop, but I prefer to use raisins and other fruit to provide the needed boost to my booze. Most of the recipes in her book use raisins, but I omit them when there is enough fruit to make their inclusion redundant (pg. 17).“ She’s been doing this for many years, I’ve had some of her tasty mead, and she’s a wee pixie, so listen to her!
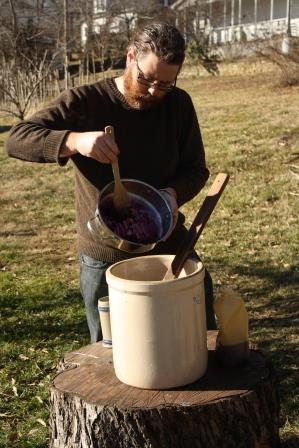
In addition to de-stemmed elderberries, I added a small handful of organic raisins to this mead for wild yeast, nutrients and tannin.
Some additional tips I would add are:
If you already have a fairly fresh batch (one that’s been going a few weeks to a month) of fermenting mead, wine, cider, etc., add about half a cup to the new batch. It’s fine to do this if you’ve used a commercial yeast as well. The active ferment will ensure you get a solid ferment going for the new batch. This was traditionally called barm or backslop (nearly every culture has a term for it).
Start your new mead in a jar that is smaller than what your final batch will be. Anything from a pint (or less) to a quart (or more) will get a larger batch going. Once you’ve introduced those active yeast and continue stirring in an open vessel, the fun will to start in no time.
Keep it warm and make it feel loved. A new batch of wild-fermented mead is like a new baby, puppy, kitten, or dinosaur. It needs your care, which means lots of warmth (60-70 degrees Fahrenheit), a dark corner to make it feel safe (keep it away from sunlight), and regular attention (stirring, singing, cuddling; don’t worry: no one is looking). If the only place you have to keep it isn’t quite warm or dark enough, simply wrap it in a blanket or towel. Oh, and never, ever feed it after midnight (if you don’t get the reference, I’m too old).
Develop a rhythm. You don’t have to make mead all the time but if you do mostly one-gallon batches and make a new batch every month or so you’ll quickly develop a feel for the process and before you know it, attending to your meads, wines, and other ferments will be a part of your daily routine.
Consider the time of year. While I’ve made perfectly good wild ferments in the fall and winter, I’ve found that my spring and summer meads get going much quicker. Even if you keep it by a heater vent or near a stove or have a consistently warm house, it’s almost as if a wild ferment can sense the outside weather. Part of this may be that there are less wild yeast floating through the air since the rest of the wild world is resting. Don’t let this stop you from making mead all year round but give your mead a little extra time and care if making it in the cold months.
Never boil or pasteurize honey or any fruit you plan on adding. Warming on low heat will help bring the must (unfermented mead / wine) to the ideal temperature for fermentation, but heating too much will kill off wild yeast and cause some of the aroma compounds to dissipate, making for a blander outcome. Take note that some recipes require you to cook the must to achieve the proper flavor. An example is bochet (made with “burnt” or caramelized honey). For these, use barm / backslop or a commercial yeast, or caramelize some of the honey and proceed as normal with the rest.
If it turns out more tart, sour or funky than you expected, just understand that this is part of the territory. When drinking, blend it with some fresh honey and water, some other mead or wine, or make it into a cocktail such as a whiskey sour. In my case, my wife and some of my friends enjoy these flavors more than I do, so I just give it to them (or save it to share at a workshop).
Troubleshooting and avoiding problems
Things can go wrong in making mead, but that doesn’t mean they will. Don’t go out of your way to try to anticipate every problem. This is how modern homebrewing’s obsession with extreme sanitation and near-laboratory conditions came about. Approach the process with confidence and a reverence for the journey you are beginning, take notes, learn from your “mistakes” and those of others, and avoid setting stringent expectations. That being said, I won’t claim every mead I’ve made has been perfect, but I do often find that ones I don’t care much for, others enjoy. Following are some of the issues you may encounter. Note that this guide is designed for people who have already started making mead and are at least somewhat familiar with the processes and equipment. Hence, I don’t always go into detail in describing things those readers will already know.
Mold or funky film on the surface
Don’t get freaked out by mold. It’s not always a bad thing and doesn’t necessarily mean your mead is ruined. The only times you’ll want to be concerned are if there are moldy or gelatinous substances floating beneath the surface, or if the mold is black and slimy. In these cases you really should just count your losses and toss the batch. That being said, I’ve never had either of these happen. The best way to avoid any kind of mold is to clean anything touching the mead thoroughly and to stir regularly during the open-fermentation phase. I clean with hot, soapy (not much soap and I try to use a natural, no-scent soap) water and sometimes with OneStep, a natural cleaner that cleans through oxidation. You can use sanitizers as an extra step, but even this isn’t a sure-fire solution. Timing and proper care for an open ferment are key. Don’t leave mead in an open fermenter more than two weeks after fermentation commences unless you’re intending on drinking it young and don’t mind a sweet mead with a potentially sour edge. Be sure to continue stirring daily, even after you’ve achieved fermentation. If mold does appear on the surface, you can safely scrape it off with a clean spoon, discard, and continue as usual. If racking to a carboy for long-term aging, be sure the airlock fits snugly and that you have an airtight seal. Note that you may sometimes see a white, cloudy film on the surface, even after racking to a closed container with an airlock. This isn’t mold, but rather a yeast bloom. It’s perfectly safe and can be stirred back into the mead. As I note in Make Mead Like a Viking (pg. 80):
Sometimes you may even see a thin white film, or pellicle, form on the surface. This is a good sign, and should be left alone. You have just introduced Brettanomcyes, referred to by beer brewers as “the Brett” and by vintners as “Flor” (flower). This strain of yeast likes to party on the surface, linking hands and forming a barrier to prevent oxygen from entering the must. An oxidative yeast that prevents acetobacter from turning your mead into vinegar, Brett is commonly found on the skins of fruit and (theoretically) spread by fruit flies. It’s safe to stir it in, but wait until you’re ready to rack or drink the mead. (I should note that I received a not-very-tactful comment online once about this being erroneous. I did my research, which I note in the book. You should too. I recommend my primary source, Wild Brews: Beer Beyond the Influence of Brewers Yeast, by Jeff Sparrow.)
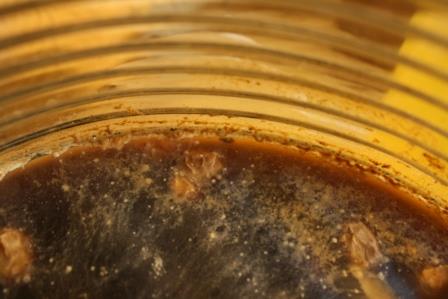
Yeast bloom forming on the surface of a bragot (honey beer).
Avoiding (or intentionally creating) vinegar and troubleshooting tart, bland, astringent, or just plain funky flavors or odors
There is a common misconception that if a mead tastes too acidic it’s turned to vinegar and can’t be saved. First off, mead vinegars are lovely to cook with and are well worth making intentionally, so it’s not that much of a loss. Second, provided you have avoided allowing it to have contact with open air for more than a couple of weeks, what you’re likely tasting is tartness due to high acid levels. This likely occurred because of a high-acid honey, an improper acid balance caused by ingredients, an environmental factor, or just wild yeast doing its thing. This is why I generally wait to add acid to my mead after fermentation has been going strong for at least a couple of weeks. The natural way of fixing an acid imbalance is to blend in more honey for sweetness to balance out the tart, preferably a low-acid honey. If you don’t want to use up more honey, make a simple syrup, preferably from organic cane sugar and warmed spring water. Mix and taste until you’re satisfied. If you want to get more technical, pick up a pH meter (not acid strips; you’ll be wasting your money) and some calcium carbonate. As Ken Schramm notes in The Compleat Meadmaker (pg. 65), “The method of pH adjustment I prefer is to add calcium carbonate, CaCO₃, ½ teaspoon at a time, stir, test, and repeat as necessary to bring the pH up to about 3.8.”
If there is too much astringency (mouth-puckering / dry) in the mouthfeel, you have an excess of tannin. This can also be fixed by mixing in a simple syrup, and/or adding in additional low-tannin flavoring ingredients. Worse comes to worst, blend the final product with another mead or wine. If the mead tastes a bit bland, you’re in luck. Simply add a few drops of acid in some simple syrup and very small amounts of tannin, stir it gently into the must, check every couple of days and bottle when the balance is right. Don’t expect it to taste incredible right off the bat, as it will improve with age. This is one of those aspects of mead making that is as much art (and personal preference) as it is science. Even those who are very clinical about their mead making can only do so much when it comes to testing tannin levels. Don’t overthink it. Generally, a little bit of tannin goes a long way. If you’ve added any amount of fruit, raisins, or other botanicals, you likely have enough tannin. If you added too much, backsweeten (add more honey or honey/water until you like the taste).
Sometimes while a mead is still young, you will notice what can be best described as “funky” flavors or smells (a sulfurous odor for example). In my experience, I generally just use the tried and true time and patience method for averting this problem. I can’t honestly say I’ve noticed any particularly strong odors while my mead is fermenting but my wife tells me I have a poor sense of smell. Or maybe it’s just that I’ve become accustomed to all the lovely smells that go along with fermentation and she hasn’t… Now that I’ve just dug myself into a hole I may as well keep digging. The best advice I can give is that mead is a slow fermenter by nature and can produce all kinds of funky flavors and smells as it progresses. One tip many mead makers suggest to speed up the process and avoid off flavors is to add nutrients. I personally add these in the form of raisins or other botanicals but you can purchase these in powdered form from a homebrewing store, which is perfectly acceptable. I have used both with success so go with what you prefer. If you want to get really technical and hands-on, try the staggered-nutrient addition (SNA) method many more technical mead makers swear by. I’ve personally only tried the lazy version of this method (“add when I feel like it”) but have mostly just gone back to adding nutrients during initial fermentation. It works fine for me and I can use my time to focus on other things, like lazily drinking mead or beer, so I’m good with that.
Although written more for beer, these sites list some common off-flavors and how to avoid them. Much of the information is just as applicable to mead as it is to beer:
http://howtobrew.com/book/section-4/is-my-beer-ruined/common-off-flavors
https://www.morebeer.com/content/homebrew-off-flavors
Clarifying mead
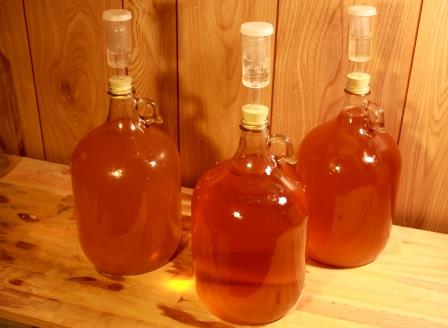
Two meads and a wine in various stages of fermentation. After a few months, most meads will become quite clear, and can be clarified further with regular rackings.
I’ll admit that this isn’t an aspect of mead making that I find really belongs in a discussion on “trouble,” but a lot of people prefer their meads to be clear, so I’ll provide a few tips. While I enjoy a nice, clear mead, I don’t find a bit of cloudiness to be off-putting. Most of my meads turn out fairly clear. If they don’t, I don’t stress it. A cloudy mead, or “haze,” is a result of yeast, protein, or polyphenols that are suspended in the mead upon the completion of fermentation. Sometimes this can result in an excess of tannin, in which case I will proceed with clarification. Some natural solutions to this are to backsweeten just a bit, or to cold crash. Cold crashing can be tricky if you’re making a five-gallon batch and don’t have a large, mostly empty refrigerator. It’s less of a problem for one-gallon batches or have access to a cold back porch or garage in the winter. Simply set the carboy or jug where it can stay at a fairly steady temperature of just above freezing (a bit colder is fine, but avoid single digits or temperatures above 40 degrees Fahrenheit) for a few days to a week. This essentially slows down fermentation and knocks out any yeast that are still trying to hold on. It doesn’t kill yeast, but I have heard of people using this technique to stop fermentation early (which I will discuss later). Give it some time in a warm room before determining if it’s ready to bottle.
If you want to get technical and use natural and not-so-natural additives, there are some options. Egg whites contain gelatin and albumen and have been used as a clarifying agent for centuries. They can also be used to draw out excess tannin. Rather than going into detail here, this link does a fine job of demonstrating how to clarify white wine with egg whites. This technique will work just as well for mead. Other options are isinglass (from a fish’s air bladder-yum) and Sparkolloid®. These are all positively charged fining agents. According to Ken Schramm in The Compleat Meadmaker (pg. 48), particularly stubborn hazes can be taken care of by following up with a negatively charged agent such as bentonite or kieselsol (silicon dioxide). Essentially, what is happening here is that positive electrostatic agents bond with the negatively charged molecules that are causing hazing. When following a positive with a negative, you’re catching anything the positive charge didn’t catch. Now, I’m not a scientist and I personally prefer to brew using the olde ways, so don’t take my word for this. I’ve researched this from several sources but I recommend researching further if you really want to give it a try.
Knowing when fermentation is complete and when it’s time to bottle
This is a tricky one as there are so many factors involved but it’s a question I get a lot. What I’ll do here is provide a rundown of some general tips and follow with tips for special circumstances or specific types of mead. Keep in mind that a one-gallon batch will almost always ferment faster than a five-gallon batch, but there are a few techniques for speeding up both.
The core areas for ensuring a complete fermentation without additional effort or additives:
1. Time (3-6 months for one-gallon; 12-15 months for a five-gallon)
2. Continuous racking (every 1-3 months)
3. Patience (see above two)
To put it simply, mead has a lot of sugars. These sugars need to fully ferment, releasing carbon dioxide while doing so, before they can be bottled. Of course, there are exceptions if you want a carbonated mead. The more honey you use, the longer it should age in the carboy and subsequently in the bottle. This is not only for ensuring a complete fermentation but also for allowing the flavor and mouthfeel of the mead to smooth out. Time isn’t always a deciding factor in knowing when fermentation is complete. There are various methods for checking whether or not fermentation is still happening, but my favorite is the tried and true pinch of sugar. Just take a pinch or half teaspoon of sugar and sprinkle it in the mead, either in the carboy or by drawing some out with a wine thief or turkey baster. If it drops to the bottom quietly, fermentation should be complete (or at least close). If there is any reaction at all, fermentation is still going on. A reaction can range from carbonation bubbles rising as the sugar drops to vigorous (and messy) foaming. I still recommend giving it at least a month if the mead seems still at this point, as I have occasionally found carbonation in my meads after doing this test and bottling right away.
If it’s not quite there and you want to speed things up, rack into another carboy or into a plastic fermentation bucket in anticipation for bottling. Rack gently so as to not get any remaining yeast too excited and allow it to settle. From here, you can proceed with degassing. This is simply taking a long spoon or other stirring implement and stirring gently without disturbing the surface too much. Use a drill on slow speed with a clean stirring attachment if you want to do this in a carboy. You will likely see a bit of fizzing at the top as you do this. Do it every couple of days until things are nice and still. Do another sugar test to be safe and proceed with bottling (after any acid or tannin adjustments) when everything is nice and calm. If you want to carbonate your mead, you can wing it and bottle before fermentation is complete, but a better way to get the amount of carbonation you want while avoiding bottle bombs or mead geysers is to wait until fermentation is complete and then stir in some honey or sugar. A more reliable and scientific method is to use a hydrometer. I’ve taken to doing this more lately because I’ve tested meads that by all accounts seemed still and found they were carbonated after opening a bottle. A hydrometer is something you’ll need to purchase at a homebrew store if you don’t have one. You may have noticed in my writings that I don’t reference them as often as other brewers do. This is because I want to teach people how to brew using intuition, experimentation and primitive methods as their ancestors would have done. However, I do have a few in my possession and do use them from time to time. One of their intended uses is to test the original gravity (liquids with sugar mixed in are “heavier” until they’ve converted the sugar to alcohol) before fermentation and then making measurements later in the process to calculate the final gravity. They can also be used to test gravity every couple of days (or weeks) when you feel fermentation is about complete. If it remains at the same reading for a week or two then you should be good to go.
Other methods for stopping fermentation include cold crashing (referenced in the clarification section) or adding chemicals such as potassium sorbate or potassium metabisulfite. I have never done this so I can’t speak as an expert on it. However, these sites have plenty of great info if you want to give it a try:
https://monkeyboymead.com/meadmaking/ending-fermentation-aging/
http://www.eckraus.com/wine-making-stop-fermentation.
In the end, your best gauges for a full fermentation are time and patience. It can be tough for folks like me who started out brewing beer and are accustomed to having a bottled and drinkable product within about a month of brewing, but the wait will be worth it. For most of my one-gallon meads I’ve found that six months is generally a good time to bottle, although a few more months doesn’t hurt. I usually bottle at around four-to-six months. Remember, the more time you give the entire product to age in a single vessel, the better the final product will be. For five-gallon batches this can mean a year or more of waiting before you even bottle and several months from there. The amount of honey (or any other sugars) you use will be a factor. I did a five-gallon semi-sweet once that ended up using about 15 pounds of honey (okay, it bordered more on sweet). I gave it nearly fifteen months and three or four rackings, racked it to a bottling bucket and degassed several times and eventually bottled it. It was an amazing mead but I still had popped corks and carbonation. Sometimes fermentation is just a fickle process. You more technical people may get things done quicker. I know it’s possible, but I usually use my waiting time to make some beer.
I’ve referenced backsweetening a few times but feel I should add another word about it here. The best way to ensure a mead has the level of sweetness you desire is to add the proper amount of honey for the recipe (whether it be dry, sweet, semi-sweet, etc.). However, when making mead naturally, it can sometimes ferment past the level of sweetness you want. The best way to resolve this is to keep adding honey (sugar is fine too; I use cane sugar) until it reaches the level of sweetness you want and it has finished fermenting. This requires more time and patience and you may never quite get it where you want it. You could always add sulfites and then backsweeten but I generally just work to get it as close as I can and then backsweeten with simple syrup or a sweeter mead before drinking. This is the way it has been done for millennia, so unless you plan on going commercial or like to get super technical with your brewing, there’s no reason you shouldn’t do it.
Airlocks, totem sticks and going “ancient” with your equipment

Illustration by Michael Startzman.
My goal from the offset in making mead was to make it like the ancients or, like a Viking if you will. I wanted to go further than the many recipes I’d read that talked about how the Vikings liked mead but then proceeded to talk about ultra-modern equipment, techniques and chemicals. I’ll admit, I still haven’t gone as far as I’d like. I still have my share of “modern” equipment (carboys, hydrometers, plastic airlocks, plastic brewing buckets) but I work to use those less and less. Really, it would probably be more accurate to describe my goal as to brew as self-sufficiently as possible. Still, I continue to read old texts on brewing and infer what I can on the types of equipment used when the brewing process is only referenced briefly. I’ve talked to a lot of brewers with the same mindset who have come up with some ingenious ways of brewing with little-to-no homebrew-specific equipment. My advice to you is to just use what you have, continue looking for ways to innovate, and don’t stress it. I have a plethora of plastic airlocks due to the many years I’ve been brewing and from the classes I teach for which I have them on hand to sell as part of a brewing kit, so I will continue to use them. If you don’t want to use an airlock, use a balloon, a condom, or anything else along those lines. Someone once told me that he buys unused plastic gas cans from a discount store for brewing and uses an inflatable rubber ball for the airlock by attaching the opening of the deflated ball around the lid of the gas can with rubber bands. Not very “ancient” but certainly ingenious.
If you’ve read my book Make Mead Like a Viking or any of my articles on ancient mead making you may have noticed that I reference “totem sticks” or “magic sticks.” Essentially, I learned of these from Sandor Katz’s books Wild Fermentation and The Art of Fermentation and Stephen Harrod Buhner’s book Sacred and Herbal Healing Beers (which Katz also references). Katz and Buhner both reference ancient and indigenous cultures who passed along heirloom yeast strains by using the same stirring stick or fermentation vessel without sterilizing it (rinsing it with warm water is fine). This is also a practice likely utilized by the Vikings, which I learned of from the beer writer Michael Jackson in this article. I have used a wooden stir stick for stirring mead in open fermentation vessels often, which I wash only by running warm-to-hot water over it but I can’t say that I’ve experimented with actually saving yeast strains through this method in any methodical or scientific manner. I have had folks contact me after reading the book intrigued by this and wanting to know what historical sources I learned it from. All I can say is that I started the same as you: I came across a reference in a book, was intrigued by it and gave it a try. I will continue my research into this and hope to cover it in more detail in future writings but for now feel free to not consider me an authoritative source on the subject…
Some final thoughts on cleaning, sanitation and those crazy wild yeast
So, I started this whole thing out by stating that wild yeast is your friend. I have learned since writing Make Mead Like a Viking that there are plenty of people interested in the concept of wild yeast and avoiding chemical sanitizers and additives but there are still people out there who are leery or just plain scornful of wild brewing. I still get people warning me that using wild yeast can potentially be “disastrous.” All I can say is that, if you have reasons for pursuing wild brewing, this is your personal choice and there is no reason why you shouldn’t continue to pursue it and discuss with others what you’ve learned. Some prefer a highly regimented, scientific approach to brewing and that’s their prerogative. I make most of my meads with wild yeast and have completely stopped using sanitizer in my mead making and beer brewing. I also am not exacting in my recipes and rarely repeat the same recipe with the exact same ingredients and measurements. Sure, not everything turns out like a nice, consistent and reliable modern brew but I’m in this for self-sufficiency, affordability and experimentation. Besides, only me and the people I share it with are drinking it so those who have a problem with it need not worry that it will affect them, although I do encourage them to shift their worldview just a bit. You never know where it could lead you.

Illustration by Max Alnutt for the Viking Nerds Skal Deck expansion to the tabletop game Don’t Fall in the Mead Hall.
A Very Meadly Travelogue
A travelogue of my 2016 Make Mead Like a Viking book tour.
It's been a while since I've posted a blog or sent a newsletter to my mailing list. I have an excuse though...I've been busy!
Yeah I know, lousy excuse. For someone accustomed to do doing things when I durn well please, I still have to meet deadlines, show up to events on time, etc., etc. Thus, things like newsletters and blog posts tend to get pushed back to "I'll definitely get to it in the next day or two." Or, as it seems these days, in the next month or two.
All apologies aside, it's been a wild ride over the past several months. Make Mead Like a Viking continues to have solid sales, at least according to Amazon, and the positive reviews (as well as a few critical ones) continue to pour in, both on Amazon and through my various social media presences (see links at the bottom of each page of my website). If you've read it and have something to say, please do share your thoughts on Amazon, Goodreads, etc.
Although I will focus primarily on my trip to the Pacific Northwest in this blog entry, I would like to give a shout-out to Asheville, North Carolina, the homebrew and craft beer mecca of the Southeast. In April, I traveled there with my family from our home in Kentucky for the Mother Earth News Fair (MENF). I've presented at a few of these fairs now but my first was in Asheville. I made sure to give myself a few days extra to check out some of the many local (and I do mean local) food and craft brew venues. There are far too many to list here, as I always try something new whenever I visit, but the Wild Yeti in me particularly enjoyed Wicked Weed Brewery (or more specifically its Funkatorium). For an earlier rundown of my travels to Asheville see my 2012 Earthineer article.

Funky beers aging in barrels at the Funkatorium.
I was hoping to find more time to visit some meaderies but sadly, meaderies are still far and few between in the southeast. Some are so small that they don't even allow visitors. One that did, Fox Hill Meadery, was in the mountains surrounding Asheville. The drive was beautiful, but as the owner warned us, GPS systems exit reality when they get close to his meadery. With only a few turnarounds we managed to find the aptly named meadery. Climbing up the steep driveway, we turned into what appeared to be someone's home. Turns out it was, although the mazer Jason Russ had recently had a building constructed specifically for his mead. Jason warmly welcomed us into his tasting room, where myself, my wife Jenna and my brother Zach (AKA the chainsaw juggler) sampled each of Fox Hill's seven mead varieties. Although we all enjoyed something about each mead, I will say that the range of flavor and styles available paled in comparison to what I discovered in the Pacific Northwest. This is not meant as a criticism of Jason and his meadery. This region of the country is simply not quite at the level that the west and east coasts are in regards to how seriously mead is taken as a contender to the craft beer movement. To be fair, it sounds like Fox Hill is well on its way to bringing greater variety in mead to North Carolina. Jason showed me some kegs which contained some session meads he was experimenting with. Essentially, a session mead is a mead with an alcohol level akin to beer and that is carbonated in a similar manner to beer. It uses less honey than the more wine-type meads and has a much shorter aging time. I'm working on my own session mead recipes currently, so stay tuned.

My littlest yetiling Maisie's favorite part of the visit was the "doggy."
Fox Hill had a nice selection of melomels (fruit mead), metheglins (herbal / spiced mead) and traditional (simply honey, water and yeast), as well as a Special Reserve Mead. An off-dry (between dry and semi-sweet), this mead is made with a unique blend of buckwheat honey and some lighter varietals. It comes in at a solid 16% ABV (alcohol by volume). It is also aged in oak for a "long period of time" (I'm not sure exactly how long). Due to the strong flavor imparted by the oak and buckwheat, Jason adds ginger, as he feels it can handle it. I believe it also has apricot in it, but I don't see that noted on the meadery's website. For more on Fox Hill, read this AleHorn interview. All in all, it was an enjoyable visit. We brought back with us a couple of bottles of the Special Reserve and peach melomel, which we enjoyed (responsibly of course) along with one of my own metheglins. Other North Carolina meaderies include Bee & Bramble, Starrlight Mead and Black Mountain Ciderworks (which has both mead and cider).

Meading it up with Fox Hill's Head Mazer Jason Russ.
Inspired by Fox Hill's Special Reserve, I picked up a local honey made from summer wildflowers. It was dark and rich but not nearly as much so as buckwheat. For my MENF presentation, I started a one-gallon batch of mead with dried apricot and ginger. Thus far, it has performed admirably in taste tests, even after passing the "sweet spot" most meads reach (meaning they taste lovely while "young" and sweet but reach a point where most of the sweetness has fermented away and they need time to age out harsh flavors). If you want to give it a try yourself, here's how I recommend you go about it:
Ginger-Apricot Mead Recipe
- Prepare a yeast starter through wild fermentation. If you don't have my book, my method is outlined here and here (scroll down to "weed mead").
- For a semi-sweet mead, blend approximately one quart (2.3 pounds) of honey and one gallon of slightly warmed spring water.
- Add three to four dried apricots or as many fresh, whole apricots as you'd like.
- Thinly slice a chunk of fresh ginger and drop in 3-4 slices (about 1 in. in length each).
- Add 5-6 organic raisins.
- Ferment in an open-mouthed container covered with a dish towel or cheesecloth for 1-2 weeks, stirring 2-3 times daily.
- Rack (transfer) to a narrow-necked jug with an airlock or balloon over the opening.
- Rack off lees (yeasty sediment on the bottom) after about a month and 1-2 times every couple of months thereafter. It should be ready for bottling or even drinking within 4-6 months. I highly recommend bottling and aging at least a few bottles.
- At any point in the process, if you taste and the apricot or ginger doesn't stand out enough for you, add more and continue to taste test until it has reached a level you like. Keep in mind that some flavor subtleties won't come out until the mead has aged in a bottle for six months or more.
- Don't forget to toast to your friends with a hearty "skal!"
As usual, I enjoyed meeting all of the sustainable living and modern homesteading enthusiasts, as well as converting some new wild mead makers at MENF. The passion at these events always amazes me. It really does feel like a family; a family that is working to change the world for the better. Up next, my Pacific Northwest tour of all things Vikings and mead!
The Great Pacific Northwest, where the mention of mead and Vikings rarely gets a "huh?"
I said this many times during my travels, but this area really is my second home. From the moment I glimpsed Mt. Rainier rising from the clouds as our plane descended into the Seattle-Tacoma (SEATAC) airport I felt at home. For a while, this was my home. Although I'm a Kentucky native and currently live in my home state, I spent what seemed at the time like a good portion of my life (7-8 years) living in various parts of Seattle and in Bellingham (near the Canadian border) and traveled a great deal throughout Washington, Oregon, western Canada, and the Southwest US.
This time I was on a mission: to spread the good word of Vikings and wild-crafted mead! My wife and I chose to arrive before Memorial Day weekend to catch a bit of personal travel and do some camping and beach combing before the tour-proper started. We also chose to leave our five-year old and one-year old at home on my mom's farm (hallelujah!) so that we could, well, recover some of our sanity. I will certainly be bringing them with me the next time but this particular trip would have been trying on all of us. Not to mention that Jenna and I have barely gone a night without kids for quite some time now.
After visiting some of my old haunts in Seattle and trying out some of the new breweries that had popped up since I lived there last, I had my first workshop before our official vacation started, on Friday evening of Memorial Day weekend... Despite the insane traffic we had to navigate to get to the venue on time, I and the workshop attendees had a good old time. Ironically, three attendees were Kentucky natives. I learned that there is a strong interest in all things Viking and Norse in Tacoma. There's even a Scandinavian Cultural Center. A hearty thank you to the staff at Crescent Moon Gifts for hosting the event. If you're in the area, check out their Spring Fairy Festival and Fall Fantasy Faire.

I even managed to find some Viking-themed brew to fill my horn with while camping.
Following a weekend spent attending the Northwest Folklife festival and camping at beautiful Deception Pass State Park, it was time to head to the Fremont area of Seattle for a reading and micro workshop at The Book Larder. I love the concept of a community cookbook store and hope more communities give this concept a try. The turnout and reception were solid and the staff even picked up some mead for a tasting. They chose Chaucer's which is one of the earliest meads I tried and still one of my favorite dessert meads.

Next up was Village Books in Bellingham, one of my favorite bookstores to visit when I lived there. Some of my old writer friends from the area...and I mean old (or at least they claim to be, given that they refer to their little group as the Grumpy Old Writers) arranged a potluck before the reading and came along to cheer me on. The turnout was a little smaller here but Bellingham is the "city of subdued excitement" after all. Perhaps their excitement was a little more subdued than usual. Regardless I got to pay a visit to my favorite English-style pub, Archer Ale House, during my visit, so it was well worth it.
After Bellingham we figured "why not head to Canada?" Given that the border is just over 20 miles from Bellingham I figured I may as well pay a visit to one of my favorite cities in the world (and I've been to a few), Vancouver BC. The crossing was fairly painless, although it is certainly much less lax than when I used to visit during pre 9/11 days. We were going to camp that evening but a downpour convinced us to stay at a hotel in Langley BC and catch up on some laundry.
Next morning, we drove into beautiful Vancouver and went straight to the Granville Island Public Market, still one of my favorite markets in the world, with a stellar selection of fresh, local and unique food offerings. Of course, the very first stop at the market was Granville Island Brewing, where I tried a lovely flight (sampling) of freshly made craft beers.
I believe I sampled the Maple Shack Cream Ale, the English Pale Ale, the False Creek Raspberry Ale and... the Surprise Ale I suppose!
After picking up a quart of local, raw thistle honey we headed into town for my reading that evening, at Barbara-Jo's Books To Cooks, another cookbook book store. Although Barbara-Jo and staff were hoping I could bring along some of my own mead for a tasting, the facts that I had flown out for my trip, crossed the border, and still only brew on a very small personal scale, made that rather difficult. Still, I picked up some local meads, as did Barbara-Jo's, so we got to enjoy a mead sampling along with a reading and mini-workshop! The group that attended seemed to enjoy themselves quite a bit, particularly since I emphasized that we toast with a skal! after each sample.
A book store with a kitchen in it. How awesome is that?
The next day was going to be a tough one, as our next stop was in Portland, Oregon. We elected to drive that night back to Seattle to make the next day's drive less painful. As we had the rest of our time in Seattle, we crashed on our dear old friend (and fellow Berea College graduate) Moriah Cayenne Dailer's couch in her cozy Fremont apartment. Here's a hearty skal! to her for making us feel at home while away from home.
For the last leg of our trip, we headed to Oregon for a workshop at the Portland Homebrew Exchange (HBX). Before the workshop, I had to brave the rush hour traffic to make time for visiting a place I had only just heard about, The Mead Market.
What an incredible idea. Why doesn't every town have a mead market? Originally (and still) a beekeeping-supply store, they had so many customers asking about mead that they decided to open a retail store with a workshop space and regular tastings from local meaderies. They had literally just moved into the retail space when I visited and were finalizing their workshop space. The staff members and I felt a meadly gravitation toward one another immediately. I will almost certainly bee (ha-ha) back to host a workshop and book signing in the near future.
After the workshop (finally, a workshop in a homebrew store where I had plenty of items on hand to demonstrate!), we headed to Albany, Oregon for the Big Event, the reason we were out there in the first place, the Oregon Mother Earth News Fair. For this event, I did both my Make Mead Like a Viking workshop and my Ferment the Harvest workshop. In addition to mead, I ferment vegetables and lots of other stuff, and teach about other types of fermentation when I have the opportunity. Both were well attended by the typical passionate MENF crowd full of passion (and questions).
The crowd that gathered for my Make Mead Like a Viking presentation. Aren't they lovely?
Check out all the other great workshops. And this is just for one stage!
Conveniently, I was set up right next to Bee Thinking, the beekeeping-supply store that also runs the Mead Market. I didn't realize this until the next day when I saw they were sharing a photo of my presentation on social media. I made sure to stop by and chat with them and take the opportunity for a photo-op. If you're wondering about the walking stick...well, I had some old foot injuries come back to haunt me during the trip and spent most of it hobbling around. I'm still recovering but I'm a Viking. I'm not going to let some old battle injury slow me down!
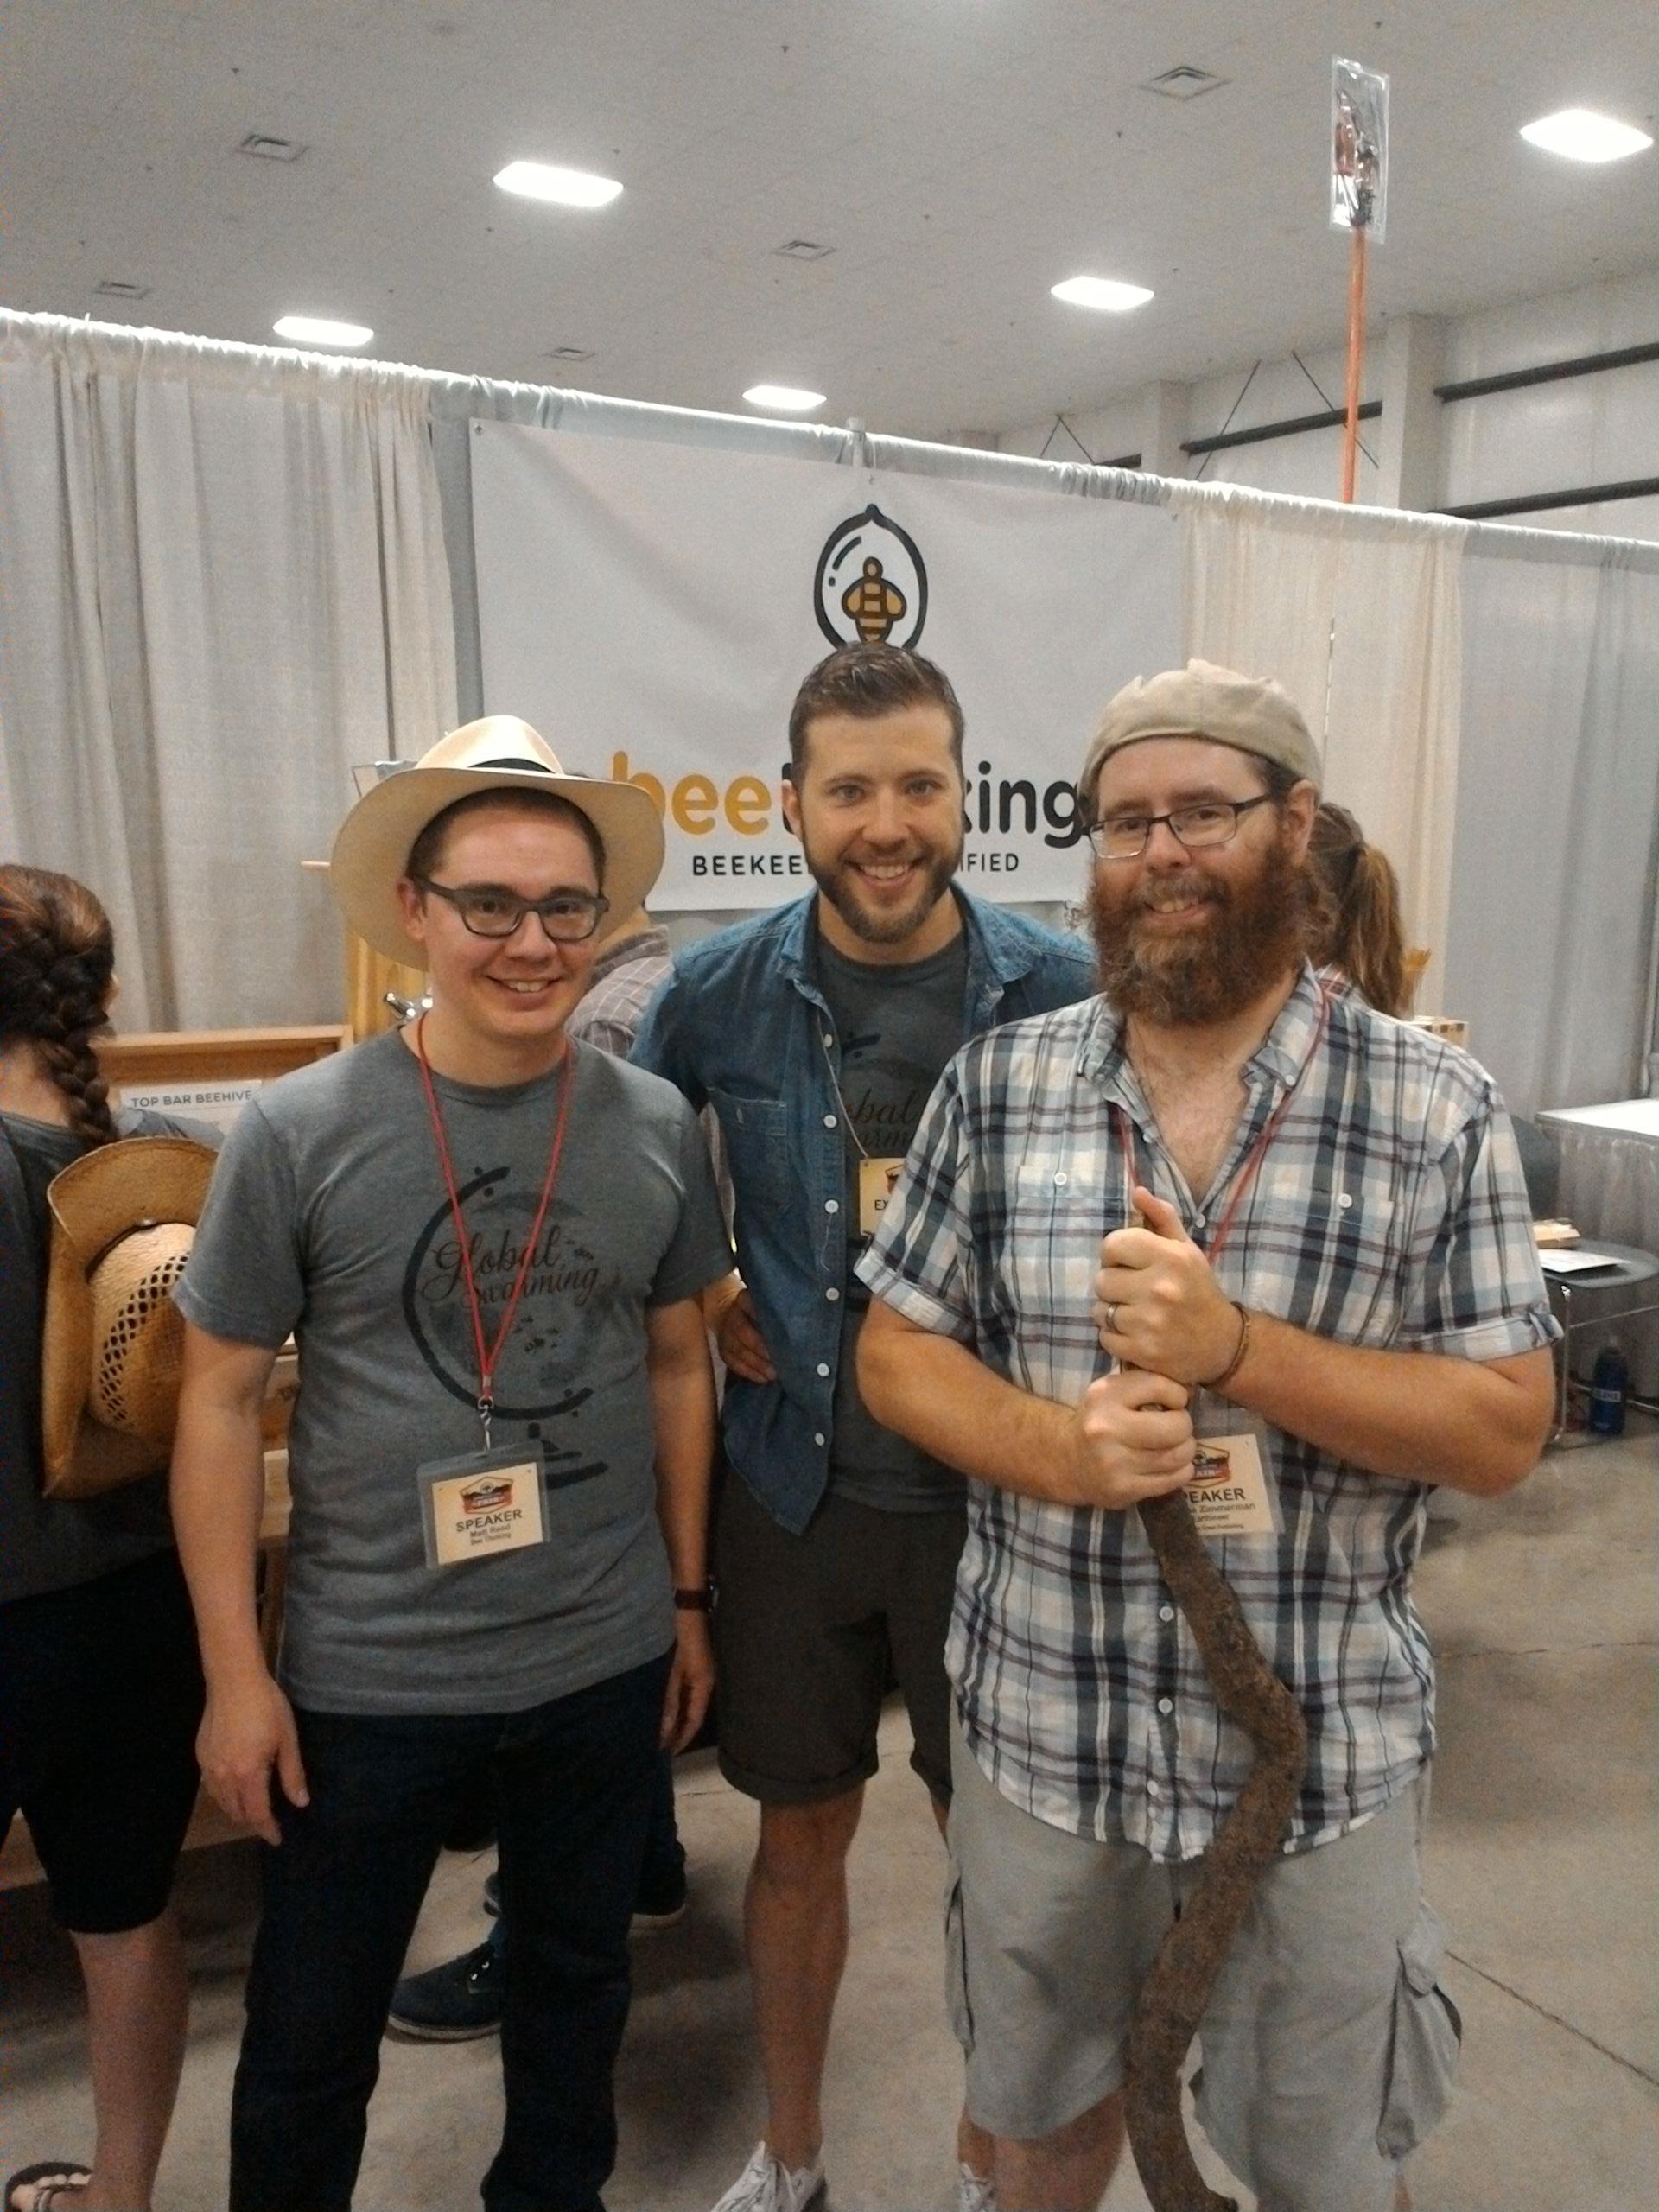
Mutual mead love...
Seeing as I did both of my workshops on Saturday, I decided to make the rounds, visit friends (authors, editors, publishing folks, etc.) from previous fairs--including the Chelsea Green Publishing and New Society Publishing booths and the Backwoods Home / Self Reliance magazine booth--and then play hooky.

Jessie Denning (right), Managing Editor of Backwoods Home magazine and Annie Tuttle (left), Managing Editor of Self Reliance magazine, at the Backwoods Home / Self Reliance booth. I had meant to get a photo taken with them but forgot. I could have Photoshopped myself in later but, well, that would be creepy. Photo by Dave Duffy.
Seeing as it was nearly 100 degrees on our side of the Cascades, Jenna and I located a beach (Nye Beach in Newport) about an hour across the mountains and headed there for an afternoon walk on the cool, misty beach. Did I mention I couldn't seem to avoid running into Vikings on this trip? When I felt an urge for coffee, a coffee shop magically appeared before me called Carl's Coffee. I was intrigued by the Mjolnir (Thor's Hammer) in their logo and stopped in for a macchiato (the real kind, not the Starbucks kind). In querying the staff I discovered that Carl had Viking ancestry and I would "know it if I saw him." Sadly I didn't get a chance to meet Carl but I did pick up a t-shirt.
This is my "I'm a tough Viking...in short pants" look.
You would think this would be the end of my trip, wouldn't you? While we were scheduled to fly out early Tuesday morning (we're currently at Sunday), I had one more event Monday evening. On our way back to Seattle, we stopped at Olympia for a reading at the lovely little indie bookshop Orca Books. This reading was also highlighted with a sampling of mead purchased by the staff. Although I was about worn out and hoarse in the voice at this point, I made it through and met some more folks passionate about Vikings and mead. It would be heresy of me not to mention the stop I made before the reading. The folks at the Mead Market had informed me of a little neighborhood hangout called the Skep and Skein. Yes, this is a bar and mini-meadery that serves its own mead, mead from other meaderies, and a nice selection of craft beer...and hosts groups of knitters, spinners and crocheters for weekly mead-ups. Knit, purl, drink, repeat! ...I have no idea if that is their logo but it should be. They were unfortunately out of their house mead but I enjoyed some Redstone mead from Colorado and a couple samples of craft beer.

Jenna and I caught up on some reading while sipping mead, beer and cider at the Skep and Skein.
Next up: drive to North Seattle (I was my typical cheaparse and rented a Prius hybrid far from the airport), drop the car off after hours, take a cab to nearest Link light rail stop, and hobble to the room I rented (again, not quite as close to the airport as it should have been). We pretty much had time for a shower and couple-hour nap before getting up to catch our flight. It was an exhausting day but well worth it!
Before I close out I'd like to share some photos from the Nordic Heritage Museum in the Ballard District of Seattle. I've visited there many times but this time made it a point to chat with their events director and gift shop manager. Their gift shop now carries Make Mead Like a Viking and Don't Fall in the Mead Hall. I will mostly likely be back to present a workshop there, likely in May or June 2017. Also, I have high hopes that I'll have a booth at their Viking Days event in August. I highly recommend this museum if you're interested in Scandinavian culture, arts and history from any era.




Just one section of the awesome Nordic Heritage Museum gift shop. They have plenty of books on Viking lore and history, Scandinavian food and drink, and other Nordic subjects, along with all kinds of other drool-worthy items.
Well folks, thanks for reading. I know this was long but I felt like we had a lot to catch up on. Stay tuned for future (and hopefully shorter and more regular) updates chock full of recipes, Viking lore and other fun. In the meantime, be sure to follow my Facebook and Twitter pages:
https://www.facebook.com/JeremeZimmYeti/
https://www.facebook.com/vikingnerds/
https://twitter.com/EarthineerYeti
And, check out my website's Portfolio page for semi-regular updates on articles I've had published that appear on the web. Also, my Media page has links to media appearances and podcast / radio interviews, including a recent discussion I had with Jack Spirko on his Survival Podcast.
As always, Skal!


Celebrate Yule Like a Viking
While I don't celebrate Yule, per se, I'm very interested in how early European cultures celebrated this time of the year. For peoples in Northern European climates, with the long dark and cold winters, this time of year was a time of celebration.
Make Mead Like a Viking has been out for nearly two months now and things are going well. While I would prefer you buy it through an independent bookseller or through Chelsea Green Publishing, if you like it, please review it on Amazon and elsewhere. If not, review it anyway, but try to be nice. If you want to buy a signed copy for yourself or as a gift, click here.
While my newsletters and blog entries aren't put out on any set schedule, I find it fortuitous that I'm finally finding the time to put this one out at the beginning of winter solstice, AKA, Yule. While I don't celebrate Yule, per se, I'm very interested in how early European cultures celebrated this time of the year. For peoples in Northern European climates, with the long dark and cold winters, this time of year was a time of celebration. In part because they had little better to do while huddling over fires in their homes or in communal mead halls, but also because they knew that the sun was heading back their way. Light would once again overtake Dark. Many cold months were ahead, but the days would slowly start getting longer.

This was in no way a celebration limited to a single culture though. Many other cultures celebrated this time of year, as it symbolized the beginning of a new year, with all of the rituals and hopes for better tidings that went with that. For a brief summary on what Yule meant to early pagan cultures, see this video. Visit The Asatru Community's page for a more in-depth exploration. These celebrations are by no means dead, as many people still celebrate Yule today. Christmas is essentially a Christianized version of Yule, although not all Christians celebrate it due to its pagan origins. In the Dark Ages, the Roman church wanted to convert more "heathens" (literally, "from the heath," i.e., country folk who preferred the Old Ways) to Christianity. To do so, they changed the Biblical birth of Jesus to the dead of winter rather than the spring. Over time, Yule traditions were integrated into Christmas and Yule fell by the wayside.
For those who prefer the pagan aspects over the Christian, Yule can still be celebrated today, right alongside Christmas (or any other culture's winter holiday for that matter). After all, the goal is to bring people together and wish joy and good tidings on all. On midnight, December 21st, Yule officially begins, and Yule eve is celebrated as the "Mother Night." Preparations must be made to cheer on and strengthen Thor as he prepares to once again battle the frost giants of Jotunheim to keep them from turning Midgard (the land of humans) into a land of frost and bitter cold. With our help, Thor will once gain prevent Fimbulwinter, the precursor to Ragnarok (which is not so much the end of the world as it is the beginning of a new one).

For 12 days, celebrations will be held with friends and family, with much cheer, drink, food, burning of bonfires, and quiet reflection. December 25th falls right in the middle, and New Year's will be its culmination.
During Yule, Jólnir (Odin) will lead the Wild Hunt through the sky, along with the spirits of humans, horses and dogs. This grand procession takes place during all twelve days of Yule, with the intent of reminding our deceased ancestors (the draugar) that they need to stay on their side of the veil, as it as at it thinnest during this period.

So, how can you celebrate Yule in modern times and still feel like a Viking while you're at it?
1. One thing you may already do that is a part of the Yule tradition is to bring an evergreen tree into your house and decorate it. This is a pagan tradition at its core, but some choose to do it with their Christian beliefs in mind, or simply as a secular tradition. Many cultures integrate the mythos of trees that symbolize life into their beliefs, from the Tree of Life of Judaism and Christianity to the great World Tree of Norse and Germanic mythology, Yggdrasil. This one is up to you.

2. A yule log is another option. In honor of Thor, take the largest oak log you can find (or can handle) and kindle it, either in an indoor fireplace or an outdoor fire. Be sure to save some of its charred remains to use for lighting next year's log.
3. Sacrifice a goat Okay, maybe don't sacrifice it, but goats are associated with Odin and were often slaughtered at this time of the year. After Odin was given his share, any other goats that weren't being saved through the winter were slaughtered. Their meat was either preserved or eaten right away--boiled, pit-roasted, or spit-roasted. Visit here and here for tips on humanely slaughtering and butchering your own goat.

4. Sacrifice a boar. Or just roast up some pork. Either way, continue the tradition of the Oath Boar, during which oaths were solemnly made to Frey over a large boar. Unlike New Year's resolutions, these oaths are meant to be kept.

5. Make some mead. Sorry it took me so long to get to this one but you know this is where I was headed. Of course, you can use some recipes from my book, but here is a handy link on how to make a spiced holiday mead, along with some tips for cooking goat. In addition to the spices mentioned in this recipe, you can incorporate many other spices, from vanilla, to cardamom, to a bit of spruce from the Yule Tree. Make a small mead in time for New Year's or start a tradition of making mead over the holidays that you will age and drink during future holidays.
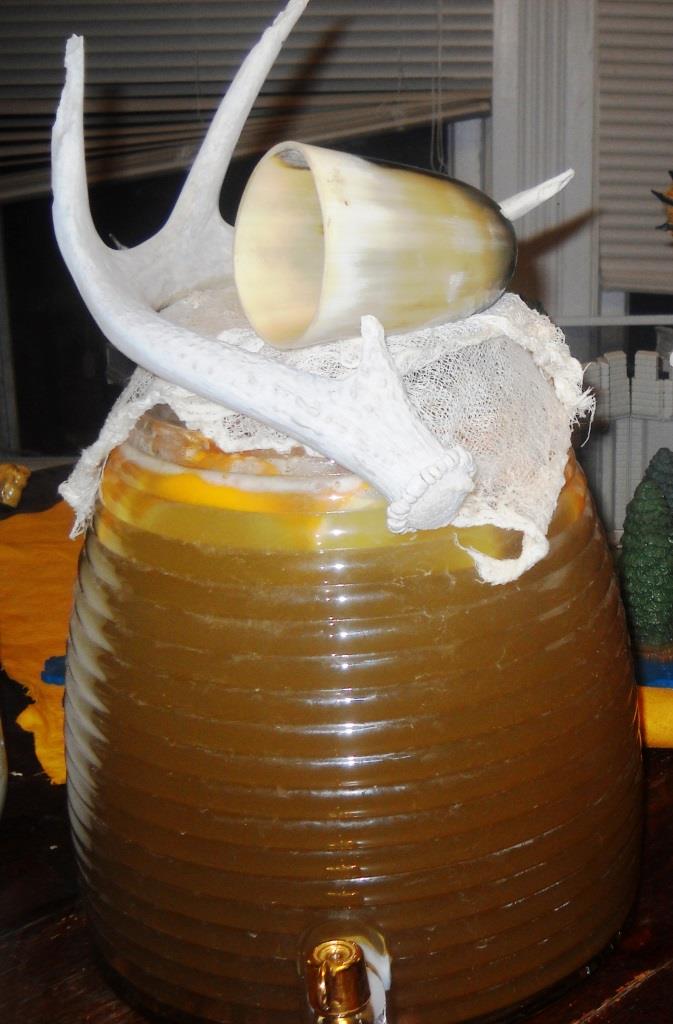
6. Play some Viking games. The tabletop strategy game Hnefatafl is an obvious choice, but why not pick up a copy of Don't Fall in the Mead Hall for future gatherings? Or, make up your own drinking games. Remember, when the Vikings celebrated Yule in the mead hall, it was all about boasting, oath-making, poetry, dance, and song. Can you hold your own or are you a weak-livered milk drinker?
As always...
Skål!
-Yeti
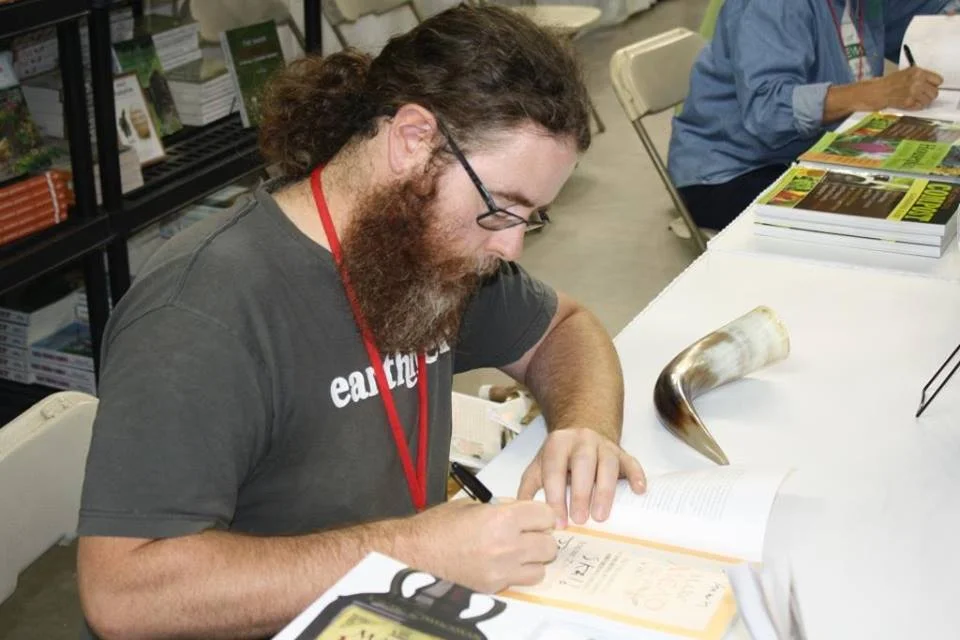
Make Mead Like a Viking is Finally Here!
It's finally here! I don't know about you but I'm glad to be able to stop saying it's almost here and have a physical product to show off. Big kudos to my publisher, Chelsea Green Publishing, for all the work they did in putting together a beautiful product. The words within will speak for themselves but I'm thrilled with how amazing the final product looks. Click here for information on how to order your very own copy. Although I fully support independent booksellers and publishers, Amazon rankings are a big deal, so wherever you buy it, please review it on Amazon and elsewhere.
My event schedule is booking up quickly. Stay tuned for 2016 workshop and book tour information. I presented at the Mother Earth News Fair in Kansas recently. I received a lot of wonderful feedback, and signed some books (see photos below). Coming up (very) soon, I'll be doing some local signings. On Wednesday, November 4 from 6 pm to 7:30 pm, I'll be celebrating the book's official publication date with a signing and a reading at Robie Books in my hometown of Berea, Kentucky. You can find information at the Facebook event page. I'll also be signing at the Berea College Store along with other alumni authors during the Berea College Homecoming on Friday, November 13 from 12 pm to 5 pm and Saturday, November 14 from 10 am to 1 pm. Finally, I'll be teaching a workshop on how to make a simple "small mead" flavored with holiday spices that attendees will brew on site and will be able to bring home and drink in time for the holidays. See here for details.
Hope to see you at an upcoming event. Keep on meadening!
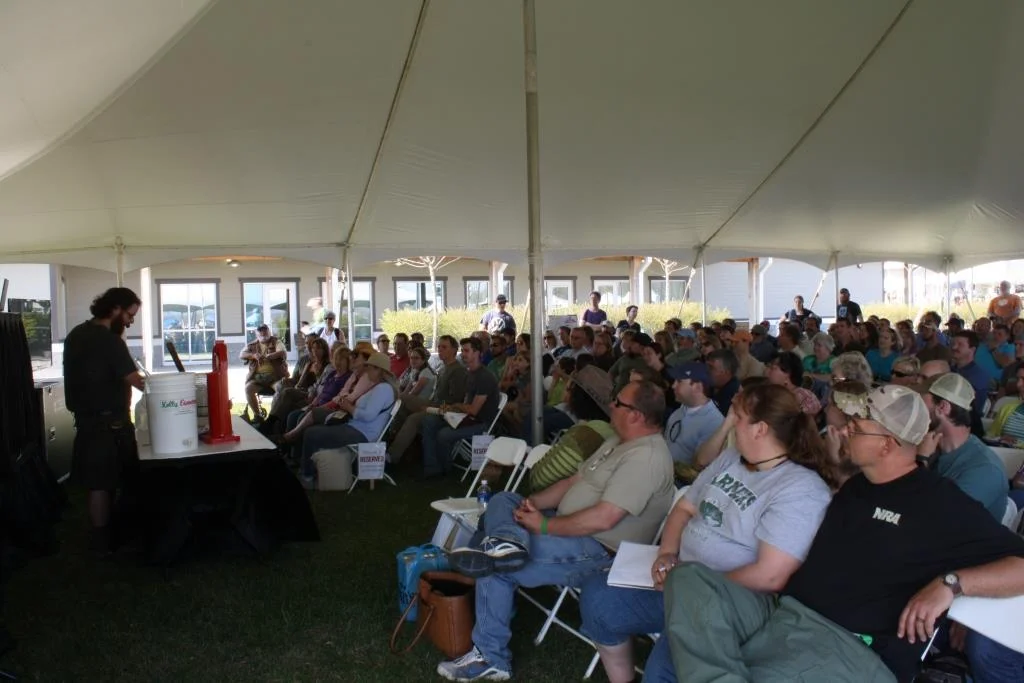
Mother Earth News Fair Book Release Event
I've been busy finishing up the final edits to the proof of Make Mead Like a Viking, and am wrapping up articles for Earthineer, New Pioneer magazine, Backwoods Home magazine, and who knows what else. I have a brief breather now that most of my work is off to be looked over by editors, proofreaders and other folks I'm lucky enough to work with, so I thought I'd touch base with you good people before the next round of craziness starts.
The upcoming year is looking to be a life-changing one for me as my book and other new writings begin to make the rounds. I'm excited, and certainly a bit nervous, but the feedback I've been hearing so far has been positive. That should make everything okay, right? One thing that has me particularly stoked is that the first review that came in from the advance copy (for inclusion as a "blurb" on the book inside and/or back cover) is from the "Indiana Jones of Ancient Ales, Wines, and Extreme Beverages" himself, Patrick McGovern, the author of Ancient Wine and Uncorking the Past:
“Jereme Zimmerman has captured the wild spirit of mead quite literally―as the quintessential naturally fermented beverage of humankind from the beginning, which reached its apotheosis with the Vikings. Without compromising its mysterious allure, he brings it down to earth for all to make and enjoy.”
Mr. McGovern has been a strong influence on my writing and his research has been vital in helping me to learn just how the Vikings might have actually made mead. I've enjoyed some great historical beers from Dogfish Head brewery that were crafted by Sam Calagione in collaboration with Mr. McGovern as well. Now to see what some of the other Big Names currently reviewing the book have to say...
Rather than passing along any more of my recipes for this newsletter, I wanted to give a shout-out to Amber of Pixie's Pocket. I've been taking note of her mead and wine recipes for some of my own fermentation experiments and give them the full Yeti Seal of Approval. Her Vanilla Bean Chamomile Mead and Mint Wine recipes in particular are on my to-do list.
That's it for now. Be sure to scroll down for updates on my upcoming workshops, including my official book-release workshop at the Kansas Mother Earth News Fair...
Upcoming workshops and speaking engagements
This reclusive hobbit-yeti will be leaving his hobbit hole soon for a grand adventure. I'll be promoting my book and spreading the word about the wild-mead movement over the next year and beyond. Here's what I have for now but who knows where I'll be next...
Downtown Richmond (Kentucky) Farmers Market, August 22, 10-12 am
Sorry about the short notice on this one. Yes, it is this coming Saturday. I'll be doing my standard Make Mead Like a Viking presentation, possibly with a few twists. Be sure to stop by the Daggletail Farm booth for some mead soap and other unique soaps while you're there!
Berea (Kentucky) Farmers Market, September 19
Times and details are still being hammered out but suffice it to say that I'll be there in some capacity from 10-12 am (and beyond) demonstrating vegetable lacto-fermentation, with an emphasis on kraut and kimchi. Yes, I do ferment things other than mead!
Mother Earth News Fair, Topeka, Kansas, October 24-25
This is the big one! Tell your friends! Spread the word! I'll likely be at future Mother Earth News Fairs closer to wherever you happen to live but my publisher will quite literally be dropping off copies of the book hot off the press for this event, so it's bound to be a good one. I'll do what I can to make it memorable. Attendees will also have the option of visiting the bookstore and the Chelsea Green booth to meet me (whoo hoo!) and have their own personal copies of the book signed.
Skál to y'all!
June 2015 Book Update
Available for pre-order now!

How to use natural ingredients and historical techniques to ferment mead and just about everything else
For this newsletter, I will focus less on mead and more on other historical beverages, both fermented and not. Many of the techniques explored in my book can be used to make a wide range of alcoholic and non-alcoholic historical beverages. Recently I presented on some of these techniques at the Berea, Kentucky Farmers Market and promised attendees who signed up for my newsletter some recipes. Since the recipes are simple, and share techniques and ingredients, I'll touch on the basics here and offer additional avenues for experimentation. I've blogged on some of these at Earthineer.com (as RedHeadedYeti), and plan on writing future blogs on the rest. You're going to get a sneak peek of a few of them. Aren't you lucky?
Switchel, AKA shrub, AKA haymaker's punch
Prior to the commercialization of soda and the insidious absorption of high fructose corn syrup into Western culture and beyond, the non-alcoholic drink of choice for hot summer days wasn’t Coca Cola or Pepsi but rather something much healthier. Some call it switchel. Some call it shrub. It is also known as haymaker’s punch, as it was traditionally made by the gallons to keep workers hydrated and happy while busy harvesting hay and doing other farm tasks in the hot summer sun.
From the several recipes I’ve read for each, I’ve found that they are essentially variations of the same theme. At its heart, it is simply equal amounts of vinegar (usually cider) and a sweetener such as honey, sugar-water, molasses, or sorghum. Like any good homemade beverage, this blueprint can be adjusted infinitely to match your taste preferences and available ingredients. Generally, ginger or other roots (such as sarsaparilla or sassafras) and fruit were infused in the mix for extra flavoring, with berries and ginger being the most common.
I’ve made several using only ginger, berries, honey, and cider vinegar. Although other flavors are certainly enjoyable, these flavor combos make for some of the best switchels. To make a one-gallon batch, start with the following ingredients:
1/2 cup honey
1/2 cup apple cider vinegar
1 tablespoon sliced fresh ginger root
1 gallon of good, clean water
2-4 cups fresh or frozen berries
Mix the honey and vinegar in a large pitcher or wide-mouthed jar. Add enough water to make about a gallon, warming some of it to help work out any remaining honey from your measuring cup. Add berries and ginger and cover with a towel to keep fruit flies out. Leave the mixture out at room temperature overnight. Within 24 hours the stronger flavors of the ginger and vinegar will have mellowed, balancing with the honey and berries. At this point, you can simply drink it at room temperature (the traditional method), chill it in the refrigerator, or add ice. If you want it to taste more like a soda, you can either mix in some sparkling water or (my preferred method), pour it into flip-top bottles or a jug with a lid, add ½ teaspoon of sugar per half gallon, seal, and let sit at room temperature for 12-24 hours. When you open a bottle (or jug) and hear a fizzing sound, you have carbonation! If you take a sip and want it to be more carbonated, leave it sit out for a while longer and refrigerate when you like it. Take care not to leave it out at room temperature for too long or you risk exploding bottles.
Now that you’ve got a feel for the basic recipe, the sky is the limit. Sometimes I’ll make mine with only strawberries, or use strawberries and bananas. I also like to add molasses either along with, or instead of, the honey. The beauty of this is that you can have a pretty good idea of the final flavor by taste testing as you mix ingredients. This is not a fermented beverage and requires no aging, although giving time to allow the fruit to fully infuse into the liquid will draw out more of the fruity flavors. Some recipes say to add half a cup of oatmeal for body. I’ve tried this but can’t say this it did much for me. I’ll add oatmeal when I’m brewing beer to add body, but I don’t feel this drink needs it.
This needn’t be only a summer drink. You can warm it up as a hot toddy in the winter. Just add a bit of bourbon or even mulled wine and some extra spices (such as cinnamon and cloves) and it’ll warm you up quick! You can also concentrate it into a syrup to which you can simply add water when you’re ready to drink. The process is a bit more involved. I’ve never seen the need to do it since I pretty much always have these ingredients on hand. You can visit this site for details on how to do this.
While some of the historical beverage recreations I cook up don’t appeal to everyone, this is one that pretty much always pleases both kids and adults. After a hard day’s work in the field (or garden), reward yourself with an ice-cold glass of sweet, tangy switchel!
Water kefir and fruit soda
Kefir is a fermented beverage made from SCOBY (symbiotic community of bacteria and yeast) “grains.” I’ll be discussing water kefir here. Milk kefir is related only in name and due to its similar looking SCOBY. Both have a granular appearance, resembling cheese curds or small brains, but the types of bacteria and yeast residing on each are different. Each can be used to make highly nutritious, probiotic drinks full of beneficial bacteria. Although either can be used as starters for other ferments, milk kefir grains will only reproduce in milk and water kefir grains will only reproduce in sugar water. For information on making milk kefir, you can go here for a simple tutorial.
I like to use my kefir grains to make healthy sodas. Although by itself water kefir can be drank as a tangy beverage akin to kombucha, I use mine to ferment fruit juice and whole fruit for a delicious fruit soda. If you know people who enjoy fermenting and eating healthy, you may very well be able to find some grains from someone in your community. Otherwise, there are a few trustworthy websites that offer grains for a minimal price (such as www.kefirlady.com and www.gemcultures.com). Many people are willing to pass their grains along for little more than the cost of postage. Personally, I received a very small amount of grains from a friend. They have now multiplied to the point that I have enough to pass around to people I know via a “pay it forward” ethos. Mine were given to me and I don’t see why I shouldn’t pass the favor along. While grains can be mailed, I am notorious for avoiding the post office, or even taking the time to put a stamp on an envelope and put it in my mailbox. If you’re in my community (Berea, KY), let me know and I’ll meet up and share some with you. If you want to skip the kefir grains and make a healthy fruit soda using ingredients that are more readily available, try making a simple lacto-fermented fruit soda using a ginger bug starter.
Now that you have acquired some grains, it’s time to start feeding them. All you need to do is prepare a sugar-water mixture, to which you will add the grains. Any de-chlorinated water and any type of sugar will do. I generally use either boiled and cooled tap water or spring water and an unprocessed sugar such as cane sugar. Other than avoiding chlorinated water (chlorine can inhibit yeast growth), you needn’t limit yourself. Keep in mind that fermentation is a natural detoxifying process, which is why fermented foods and beverages were standard fare in the days before refrigeration. Most water was fermented and flavored in some capacity to prevent illness from drinking contaminated water.
The best gauge for determining the proper ratio is taste. Take a quart jar, add about two cups of water and mix in a tablespoon or two of sugar. It helps to warm the water just a bit to help the sugar dissolve. If you have just acquired grains, this is enough to feed a tablespoon or two. If you have more grains, try upping the ratio and using a gallon or half-gallon jar. Although not absolutely necessary, a slice or two of ginger and a bit of fresh fruit will give the kefir additional feeding materials. Oxygen isn’t required to ferment kefir, but I will sometimes place cheesecloth over mine as I would any other open-fermented beverage. Most times, I simply place a loose lid on the jar and let it sit in a cool, dark corner for a couple days. It’s best to not tighten the lid too much, as the pressure from fermentation and carbonation could cause the jar to burst if left too long unattended. The warmer the space, the quicker the fermentation. Hence, you will need to feed it small amounts of sugar water every 2-3 days in warmer areas and 3-4 days in cooler areas. Over time, the grains will die if not fed, dissolving into the liquid.
Making beverages from kefir is simple. I would be doing you a disservice if I tried to narrow it down to specific ingredients and ratios. You can customize your beverages to fit your palate, so experiment away! I usually take about a cup of kefir, strain it into a half-gallon jug, add more fresh water, a bit of juice, and some fresh or frozen fruit (berries, peaches and mango are my favorites). Then, I close the lid tightly on the jug, let it sit for 12 hours or so and carefully “burp” it to see how carbonated it has become. I’ve taken to doing this outside, as results can range from a slight bit of fizzing, to a geyser of fruit soda. If it tastes too “fermenty” or carbonated, adjust the amount of water and juice you add or simply allow more air to enter by loosening the lid or removing it and covering the opening with cheesecloth or a towel to keep out fruit flies. It’s best to drink this soon after you make it, but still holds up well after a couple of weeks. Keep in mind that, given enough time, it may develop trace amounts of alcohol. My four-year-old daughter enjoys drinking it young and freshly made, while a young relative of hers who shall not be named handed the glass back to me and politely told me “this is disgusting.” Kids, like adults have varying taste buds, and have been accustomed to heavily processed foods. Just because you don't like it on the first try doesn't mean you won't grow to love it.
But wait, there's more!
Since I promised the attendees of my last workshop several recipes rather than wasting paper by printing them out, I'll provide some links and attachments to some additional recipes below. Some readers may already have these, so feel free to pass them over. If you have problems downloading the file for my Primitive Mead Makingbooklet, simply send me a message (jeremez@gmail.com) and I'll forward it on to you.
- Sima: Finnish Sparkling Lemon 'Mead'
- Sweet Potato Fly
- Yard Beer and Weed Mead
- Wild Fermented Mead
- Pour Me One of Those Pin Board
- Alternative Brewing and Fermentation Pin Board
- Primitive Mead Making
- Fire Cider
Finally, if you're interested in a fairly simple method for making bragot (a mead/beer hybrid), check out the current issue of New Pioneer magazine for my article. Otherwise, wait for my book to come out, as I discuss a couple of bragot and honey beer recipes in it.
Well, there you have it. If you find yourself devoting large areas of your house (or even your entire house) to bubbling ferments and crazy concoctions, I take full credit.
Skál!
The first of what will hopefully be many videos on mead making and fermentation. Filmed and edited by the mighty Dave Brown.
Book Update and Spring / Summer 2015 Workshop Schedule
The book is coming along. My editor and I are working hard on edits, and the design team is working on a cover concept while I finish gathering photos (many of them mine) for what it appears will now be a full-color book with photos throughout. There may even be some illustrations here and there. Unless Ragnarok happens this summer, we're planning on printing in October 2015.
The book is coming along. My editor and I are editing away like Viking berserkers, and the design team is working on a cover concept while I finish gathering photos (many of them mine) for what it appears will now be a full-color book with photos throughout. There may even be some illustrations here and there. Unless Ragnarok happens this summer, we're planning on printing in October 2015.
In the meantime, I'm working on articles on fermentation, homesteading, and sustainable living for publications such as New Pioneer magazine and Backwoods Home magazine. And of course I'm doing my best to fit in blogs for Earthineer.com. I have to dig out the RedHeadedYeti pelt to write those, though. That thing seriously needs washing, but it bares its teeth and growls anytime I get near it with soap. Stay tuned for updates as these pieces are printed and posted online. You can follow my social media handles for the latest information. For now, here are the dates I have confirmed so far:
Berea, Kentucky Farmer's Market Second Saturday Event: I'll be doing a hands-on presentation on the simplicity of fermenting natural, wild-crafted mead, beer, and wine. I will discuss non-alcohol / low-alcohol fermented beverages as well. The event will take place from approximately 9 am to 1 pm. I haven't confirmed times yet, but I suspect I'll be talking fermentation throughout the day.
The Whippoorwill Festival - Skills for Earth-Friendly Living: The first venue where I did my Make Mead Like a Viking workshop. This is a great 4-day skill-sharing festival in my hometown. I'll be doing my mead-making workshop here again this year. I don't have the day and time confirmed for my workshop yet, but the festival is from July 9 - 12.
Berea, Kentucky Festival of Learnshops: I'm excited to be presenting at this awesome festival that lasts most of the month of July along with several other artisans and DIY enthusiasts that my town seems to be teeming with. Hopefully this will be the first of many to come. I'll be doing several workshops at the Village Trough for various dates from July 18 - 25.
Mother Earth News Fair: I don't currently have any official workshops lined up for any of these events yet, but stay tuned. I enjoyed doing my "Make Mead Like a Viking" workshop at the Asheville Fair in 2014, but chose not to do it this year so I could focus on finishing up the book and taking care of my new daughter Maisie Jane. My 4-year old daughter Sadie is asking to get up on stage with me again as she did last year. I think I may have a drama queen in the works. Regardless, visit Earthineer.com's booth and attend their DIY solar panel and aquaponics workshops, which they'll be presenting at several of the fairs. You may even catch a Viking Yeti siting at the Wisconsin, Kansas, or Pennsylvania event...
Book Update Newsletter
Make Mead Like a Viking!
Writings and workshops on wild-crafted mead-making
Many of you are receiving this newsletter because you signed up at a workshops. I’ve also added a few folks from my personal contact list who I thought might be interested. If you would rather not receive these emails, simply scroll down to the bottom and unsubscribe. I know how much I dislike receiving emails that I don't have the time for, so I won’t be offended. I promise my updates will be minimal and well worth your while.
For those of you who don’t know, I’m working on my book Make Mead Like a Viking with Chelsea Green Publishing that expands on the information presented in my mead-making blogs with Earthineer.com (as RedHeadedYeti), my homebrewing articles with New Pioneer magazine, and my Make Mead Like a Viking workshops. I’ll be using this mailing list to provide occasional updates and to announce when the book has a release date. I’ll also present information from my readings into ancient history and mythology pertaining to the brewing of mead, ale, and other alcoholic beverages by the Norse and other Scandinavian, Germanic, Anglo Saxon, and Celtic cultures. As time progresses, I’ll likely expand into other areas of the world, as practically every country has an ancient connection with mead. I may even send along a recipe or two.
As a matter of fact, here's one right now for a spiced "small mead". Small mead is a low-alcohol mead (3-5%), takes minimal time and effort to make, and can be drank chilled or as a warmed glogg / mulled mead.
Yeti’s Lazy Viking Mead
Equipment & ingredients: All you need for a one-gallon batch is a gallon jug (glass or food-grade plastic), an airlock (or substitute other options I've listed below), yeast (ale, bread or wild), water, honey, raisins, and whatever flavoring ingredients you desire.
Step 1: Clean your fermentation jug and airlock thoroughly in hot, soapy water and let fully dry. Another option is to make it in a jug 3/4 full of spring water, or removing all but the bottom 1/8 to 1/4 of a gallon jug of raw honey.
Step 2: Mix 1-1.5 pounds of raw honey. To be honest, any honey will do; even the standard store-bought stuff. All the yeast really want are some sugars and enzymes to devour. For optimal flavor and health benefit, go raw and local. The best way to ensure the honey dissolves thoroughly in the water is to place a cap on the jug and shake it like you mean it. You can also use a chopstick or other thin cooking implement to stir it vigorously.
Step 3: Add 1 tsp. of yeast. You can use bread yeast or any yeast designed for an ale. Seriously. This isn't a sophisticated mead designed for long-term aging. It will still be plenty flavorful. If you're already into wrangling wild yeasts and have a starter such as a ginger bug available, feel free to use that. Put the lid back on and shake it again, or stir it with a cooking spoon. Alternatively (my preferred method), initiate a wild fermentation as I've outlined in my Make Mead Like a Viking! - Wild Fermented Mead 101 blog.
Step 4: Here's where it gets fun. I recommend at least adding 10 organic raisins for wild yeast, tannin and nutrients, and a slice or two of orange for acid and a bit of a citrusy flavor. To make a spiced mead (metheglin), work your way down this list, stopping where you please:
1-2 cinnamon sticks
4-6 whole allspice
2-4 whole nutmeg
1 vanilla bean (or 2 tsp. vanilla extract)
1 oz. fresh-grated or candied ginger
Step 5: Once you've added yeast and ingredients, or have initiated a wild fermentation, place a cork and airlock in the opening of your narrow-necked fermentation vessel. Alternatively, a balloon with a small hole poked in it, plastic wrap, or a loose-fitting lid will do. Just be sure to "burp" the lid by unscrewing it a bit every day or so. Do NOT tigten it and forget about it. The best case scenario if you do this is a mead volcano when you open it; the worst case is an exploding mead grenade.
Etc. & Beyond: Feel free to experiment with as many flavorings as you want. I recommend tasting it a week or so after fermentation commences. It won't quite be ready, but you'll get an idea as to whether or not you need to add ingredients for more flavoring. Metheglins (spiced meads) were traditionally brewed for medicinal purposes, or to save a mead gone bad, and could have as many as 50 different flavoring ingredients! Nine times out of ten it will be perfectly fine; if so, leave it alone.
Bottling & Drinking: You have a couple of options at this point. You can wait at least a month after fermentation commences before drinking. Handle carefully to keep the sediment (lees) that has settled to the bottom from mixing in (although lees has plenty of nutrients to impart), and pour or siphon into a drinking vessel. It will be mildly alcoholic, a bit bubbly and plenty flavorful. Or, you can siphon/pour it into some champagne bottles (which you’ll need to cork), flip top/Grolsch bottles, bourbon bottles, or even two-liter plastic soda jugs; and put it in the refrigerator for 3-5 days. Handle sparingly and carefully, as pressure will be building. You should now have a sparkling, effervescent beverage.
More awesomeness
For more recipes and discussions on ancient and wild fermentation, please visit this board, which is a compilation of my various fermentation blogs and articles. Be sure to scroll through the comments on my blogs, as I've provided updates on technique and recipes, and answered questions from fellow Viking mead makers.
While you're there, hang out a while. If you’re not already aware, Earthineer is a homesteading network that connects people locally and nationwide (with a growing international presence) to trade, barter and chat about homesteading, farming, gardening, sustainable living, and all subjects in between. Check us out. We have fun there, and you might even learn something new.
Finally, here are some PDFs of my workshop handouts. The first, my Primitive Mead Making booklet, provides a bit of history and includes two basic recipes to get you started. The second is a shorter handout I made after the Primitive Mead Making booklet that has some updates on additional techniques and hopefully clarifies a few things.
If you are a mead-maker, brewer, or fermentation enthusiast and have any thoughts regarding the techniques I present in these documents, feel free to let me know. I may not have time to respond right away to all inquiries, but I welcome all feedback. Keep in mind that I’m not teaching people how to make mead using modern techniques, but rather my goal is to provide instruction on how to wild-craft mead using local, organic ingredients and (if you so choose) wild yeast. You can make excellent mead using modern methods and ingredients, but my main intention is to set people on the path to brewing locally, naturally, and self-sufficiently so we can come together and take our food system back.
Skál!
P.S. If you would like to visit my little town of Berea, Kentucky this July, I'll be doing several workshops for the Berea Festival of Learnshops. Sign up for mine and check out some of the other offerings while you're there.
Skál!